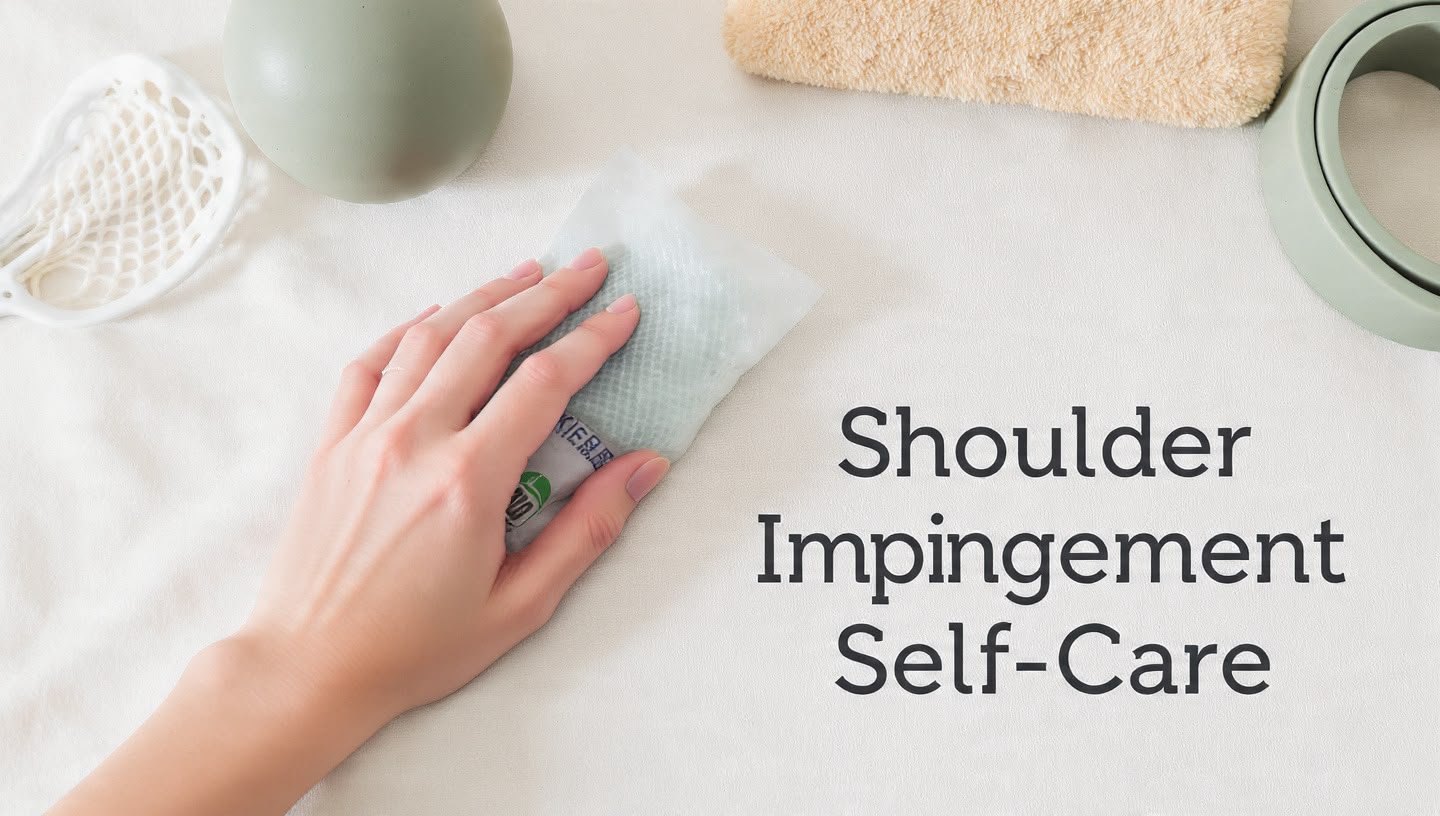
Shoulder Impingement Self-Care: An Expert 2026 Relief Plan
Effective shoulder impingement self-care is an active, phased process of modulating inflammation, restoring pain-free movement, and methodically strengthening the rotator cuff and scapular muscles. It is not simply resting and waiting. The specific strategies you choose must match your current healing stage, from the acute, irritable shoulder to the recovering, load-tolerant shoulder. A 2021 systematic review in the British Journal of Sports Medicine confirmed that a structured, progressive exercise program is the cornerstone of nonsurgical management, often matching or exceeding surgical outcomes for subacromial pain syndrome. This article provides a complete 2026 self-care framework. You will learn to sleep without aggravating your shoulder, set up your workspace to prevent re-injury, use ice or heat precisely, avoid the two exercises that most frequently stall healing, and understand the recovery timeline so you can trust the process when progress feels slow.
What Is Shoulder Impingement Self-Care?
Shoulder impingement self-care refers to the daily, evidence-based practices you independently perform to reduce compression of the rotator cuff tendons and subacromial bursa within the narrow subacromial space. The pain typically flares when you lift your arm overhead or reach behind your back, as the supraspinatus tendon gets pinched between the humeral head and the acromion, a bony shelf on your shoulder blade. Self-care addresses the root biomechanical causes, not just the pain sensation. According to the American Academy of Orthopaedic Surgeons, impingement is often driven by a muscle imbalance: tight pectoralis minor and upper trapezius muscles pull the shoulder forward, while weak serratus anterior and lower trapezius muscles fail to tilt the scapula correctly during arm elevation. The result is a physical pinch every time you raise your arm, which, over months, degrades tendon quality. Your self-care plan, therefore, has two clear targets: calm the inflamed tissues early, then deliberately correct the movement dysfunction that caused the impingement.
Key Takeaway: Shoulder impingement self-care is active rehabilitation, not passive waiting, and must be tailored to whether you are in the acute, subacute, or strengthening phase of healing.
How to Get Shoulder Impingement Relief at Home
Relief at home begins with immediately removing the postures and activities that narrow the subacromial space, paired with pain science-informed strategies that calm the nervous system’s protective response. The quickest relief often comes from changing how you use your arm, not from any single exercise or cream. Here is the first-order action plan to begin relief today:
| Action | How to Do It | Why It Helps |
|---|---|---|
| Armpit Roll Support | Place a rolled hand towel in the armpit of the painful shoulder while sitting. | Gently spaces the humeral head away from the acromion, relieving tissue compression. Use for 10-minute intervals. |
| Activity Modification | Keep your elbow below shoulder height for all daily tasks. Use a stool to reach high shelves. | Prevents the painful arc of movement (typically 60-120 degrees of abduction) where impingement is most severe. |
| Paced Breathing | Try box breathing: inhale for 4 seconds, hold for 4, exhale for 4, hold for 4. | Reduces systemic stress hormones that amplify pain perception. Pain neuroscience research from 2023 highlights this as a genuine analgesic tool, not a placebo. |
| Topical Menthol Gel | Apply a 4% menthol gel to the anterior and lateral shoulder. | Menthol activates cold-sensitive TRPM8 receptors, providing a tangible, non-medicinal cooling pain relief signal to the brain. |
The goal in the first 48 hours is to break the pain cycle. Pain makes you tense your upper trapezius, which hikes the shoulder up, which worsens the impingement, which causes more pain. The armpit roll and the elbow-below-shoulder rule physically interrupt this mechanical loop, giving the tissues their first real break.
Your Shoulder Impingement Recovery Timeline
A realistic shoulder impingement recovery timeline involves noticeable pain reduction within 2 to 4 weeks, functional improvement by 6 to 12 weeks, and full tissue adaptation and exercise tolerance by 3 to 6 months. Any promise of a “week-long fix” ignores tendon physiology. A 2020 study in the Journal of Shoulder and Elbow Surgery tracked nonsurgical patients and found that while pain and sleep disturbance improved quickly, tendon collagen remodeling and strength gains required months of consistent progressive loading. Tendons heal slower than muscles because they have less blood supply. Think of tendon healing like patching a worn tire liner, not inflating a flat. The adhesive requires repeated, controlled pressure to bond correctly, and rushing the process causes the patch to fail. The timeline below maps the broad phases:
- Phase 1: Acute Inflammatory (Days 1 to 7)
- Goal: Reduce pain, protect tissues, and maintain gentle motion without aggravating the pinch.
- Self-Care Focus: Relative rest, intermittent ice, armpit roll, pendulums, pain-free passive range of motion.
- What to Expect: Dull ache at rest, sharp pain with reaching. Sleep is often disrupted.
- Phase 2: Subacute Recovery (Weeks 2 to 6)
- Goal: Restore full pain-free active range of motion and begin low-load strengthening.
- Self-Care Focus: Heat before mobility, wall slides, isometric external rotation, scapular setting drills.
- What to Expect: Daily life pain decreases, but exercise reintroduction will cause mild, temporary ache.
- Phase 3: Strengthening and Adaptation (Weeks 7 to 24+)
- Goal: Progressively load the rotator cuff and scapular muscles to handle all required life and recreational tasks.
- Self-Care Focus: Resistance band external rotation, prone Y and T raises, eccentric supraspinatus loading.
- What to Expect: High functional capacity returns, but full pain resolution with extreme loads (heavy overhead presses) can take a year.
You might move through phases at different speeds. The rule is not age-based; it is response-based. Do not progress to Phase 3 strengthening if you still feel a sharp pinch with shoulder-height arm movements.
Acute Shoulder Impingement Pain Management
Acute shoulder impingement pain management in the first 72 hours relies on offloading the pinched tendon, modulating nociceptive input with cold, and using over-the-counter analgesics for their anti-inflammatory effect on the subacromial bursa, not as a mask for harmful activity. The subacromial bursa, a fluid-filled sac that sits between the rotator cuff tendon and the acromion, is often the primary pain generator in acute flares. It becomes inflamed and thickened, taking up even more space in the already crowded joint. Your goal is to shrink that swelling and stop the mechanical pinch.
- Offloading is mandatory. A complete sling is generally not recommended by the American Academy of Orthopaedic Surgeons because it can promote stiffness, but in the first 48 hours of a severe acute flare, a simple arm sling used intermittently, especially during unavoidable walking or standing, can prevent reflexive guarding that tenses the neck and upper back. The key word is intermittent. Remove it hourly to let the elbow gently move.
- Pharmacology as a tool. Oral NSAIDs, like naproxen or ibuprofen, taken with food as directed on the label, reduce the chemical inflammation within the bursa and tendon. They work best when tissue levels are consistent for the first 3 to 5 days. A 2022 clinical review in Best Practice & Research Clinical Rheumatology confirms that short-course NSAIDs are appropriate for acute rotator cuff-related pain when no contraindications exist. Always consult a pharmacist or physician if you have kidney, stomach, or blood pressure concerns.
- Differential compression. A simple shoulder wrap with an elastic bandage can reduce swelling but must not pull the arm forward into internal rotation, which worsens impingement. Wrap the shoulder in a neutral, slightly externally rotated position. If wrapping increases pain, discontinue it.
How to Sleep with Shoulder Impingement
The correct way to sleep with a shoulder impingement is on your uninvolved side, hugging a pillow to prevent the painful arm from rolling forward and down, or on your back with a small towel roll supporting the painful shoulder in a neutral, slightly opened position. Sleep is often the most frustrating component of impingement because unconscious movement can wrench the shoulder into a painful pinch. A 2020 study in the Journal of Shoulder and Elbow Surgery identified sleep disturbance as one of the strongest negative predictors of recovery speed, making sleep posture a primary treatment target.
The worst sleeping position is on the painful side with the arm tucked under the pillow, which jams the humerus directly into the acromion for hours. On the stomach with arms overhead is a close second. Here is the optimized setup for the two safe positions:
Position 1: Uninvolved-Side Sleeping
Lie on the side without pain. Place a firm queen-size pillow in front of you, running the length of your torso. Rest the forearm and hand of the painful arm on the pillow so the elbow is roughly at a 90-degree angle and the hand is slightly lower than the shoulder. This position maintains a slight external rotation and abduction, maximizing the subacromial space.
Position 2: Back Sleeping with Scapular Support
Lie flat on your back. Fold a bath towel into a thin, firm roll about 3 inches in diameter and place it vertically along the inner border of your shoulder blade on the painful side. This props the scapula into a slightly retracted, posteriorly tilted position. Support the painful arm on a small folded cushion resting on your stomach, so the elbow is away from your side.
Avoid memory foam toppers if you have shoulder pain. The sinking effect can curl your shoulders forward into a protracted position, shrinking the subacromial space. A firmer mattress or a supportive plywood board under the mattress is often more effective.
Shoulder Impingement: Ice or Heat Therapy?
For shoulder impingement, ice is best for the acute, swollen phase to control bursal inflammation, while heat is best for the subacute, stiff phase to improve muscle and tendon elasticity before movement exercises. Neither is a treatment for the root impingement mechanics. Both are adjunctive tools to make rehabilitation more comfortable and efficient. The decision point hinges on how your shoulder feels right now.
| Symptom Profile | Recommended Modality | Application | Mechanism |
|---|---|---|---|
| Acute, Sharp Pain: Constant ache, feels warm, pain at night, swollen sensation. | Cold Therapy (Cryotherapy) | Ice pack wrapped in a damp towel applied to the front and top of the shoulder for 15 minutes. | Vasoconstriction reduces blood flow and metabolic waste, quieting the inflamed bursa and slowing nerve conduction velocity for a numbing effect. |
| Dull, Stiff, Achy: Morning stiffness, ache after sitting still, no visible swelling, feels tight when moving. | Moist Heat Therapy | Warm, damp towel or microwavable heat pack for 15 to 20 minutes directly before stretching or pendulums. | Increases blood flow and collagen extensibility in the tendons and muscles, allowing for greater, safer pain-free range of motion during exercise. |
| Deep, Burning, Spasming: Trigger points in the upper trapezius and levator scapulae. | Targeted Heat | Electric heating pad placed over the neck and upper shoulder, not the glenohumeral joint, for 20 minutes. | Reduces muscle guarding and secondary muscle spasm that pulls the scapula into an impingement-favoring position. |
A common mistake is using heat on a freshly inflamed, hot-feeling shoulder. This increases vascular permeability and can worsen bursal swelling, making the tight space even tighter. Apply the same rule as any soft tissue injury: if it feels hot and angry, cool it down. If it feels stiff and cold, warm it up.
Key Takeaway: Ice calms the acute inflamed bursa in the first week. Moist heat prepares stiff muscles and tendons for exercise in later weeks. Do not use heat on a red, hot, acutely painful shoulder.
Why Relative Rest Is Key for Shoulder Impingement
Relative rest, defined as avoiding the specific painful arc of overhead reaching and behind-the-back motions while continuing all other pain-free movement, is key because complete immobilization causes muscle atrophy and joint stiffness, while unmodified activity perpetuates the tendon pinch. The concept of “rest” for tendinopathy changed significantly in the 2020s. Tendons require mechanical load to signal cells called tenocytes to produce collagen and repair the extracellular matrix. Remove all load, and the tendon weakens. Apply the wrong load, and the impingement continues. Relative rest finds the therapeutic window between those two extremes.
To practice relative rest, you must identify your provocative zone. For most people, this is lifting the arm sideways or forward between 60 and 120 degrees. So, you stop doing lateral raises and overhead presses. But you continue walking with a natural arm swing, you continue typing with elbows supported, and you perform your prescribed pendulums and low-level isometrics. A 2021 clinical guideline in the British Journal of Sports Medicine emphasized that early, pain-monitored movement is superior to prolonged rest for shoulder tendinopathies. Pain during movement in the subacute phase is not automatically a sign of damage. A 2023 pain neuroscience education framework for physical therapists distinguishes between “adaptive hurt” and “harmful hurt.” If your pain stays below a 3 out of 10 during a movement and subsides within 24 hours, the load is likely therapeutic. If it spikes above a 6 or lingers as a constant ache the next day, you have exceeded the tendon’s current tolerance and must scale back.
Shoulder Impingement Exercises to Avoid
Specific shoulder impingement exercises to avoid are those that compress the shoulder joint under heavy load in a narrow, impinged position, with the behind-the-neck overhead press and the upright row being the most mechanically harmful. These two exercises place the glenohumeral joint in extreme internal rotation and/or abduction at the moment of peak force, directly grinding the supraspinatus against the acromion. Even a healthy shoulder can become irritated by these movements; an impinged shoulder will be significantly aggravated by them. Beyond these two, the broader principle is to avoid any exercise that forces the arm into the painful arc under external resistance.
The Full Avoidance List During Acute and Subacute Phases:
- Behind-the-Neck Lat Pulldowns or Presses: Forces maximal external rotation and horizontal abduction, the classic impingement test position.
- Upright Rows: Lifting a barbell or dumbbell close to the chin with an internal rotation grip shreds the subacromial space.
- Lateral Raises Above Shoulder Height: The “pouring from a pitcher” thumb-down lateral raise is particularly risky.
- Deep Dips: Full-range dips load the anterior capsule and impingement zone with entire bodyweight.
- Behind-the-Back Bottom Arm in a Triceps Stretch: This stretch aggressively yanks the arm into extension and internal rotation, a direct pinch mechanism.
A useful substitute for lateral deltoid work is a side-lying dumbbell external rotation with a rolled towel between the elbow and body, keeping the arm below shoulder height. This trains the critical rotator cuff stabilizing function without any impingement risk.
Key Takeaway: If an exercise requires your elbow to travel above shoulder height with a loaded hand, or twists your arm into extreme internal rotation, stop it. Substitute it with scapular plane elevation exercises that maintain external rotation.
Pendulum Exercises for Shoulder Impingement
Pendulum exercises are a gravity-assisted, low-velocity mobility drill where the arm hangs passively while the body’s momentum creates a gentle, pain-free tractioning and oscillation effect in the glenohumeral joint, ideal for early-phase synovial fluid movement and pain modulation. They are not a strength exercise. Their therapeutic value comes from gently moving the joint without any rotator cuff muscle firing that would compress the supraspinatus into the acromion. This is the first active movement you can safely add, often within 24 to 48 hours of an acute flare.
Here is the precise, evidence-based pendulum protocol:
- Setup: Lean forward and support your non-painful arm on a stable chair or table. Let the painful arm hang completely loose like a dead weight. Your spine should be flat, parallel to the floor if possible, or as low as comfort allows.
- The Weight: Optionally, hold a light 1- or 2-pound dumbbell or a can of soup in the painful hand. The weight provides a gentle inferior glide of the humeral head, literally pulling it away from the acromion. Do not use more than 2 pounds; active muscle recruitment defeats the purpose.
- The Motion: Initiate movement from your hips and trunk, not your shoulder. Rock your body gently to create momentum. Start with forward-and-back swings, then progress to side-to-side swings, and finally clockwise and counter-clockwise circles. The arm should remain completely floppy.
- Duration and Frequency: Perform for 2 to 3 minutes, 3 to 4 times per day. If dizziness occurs, perform seated, leaning forward onto a table.
- Pain Rule: Zero sharp, pinching pain is acceptable. The sensation should be a dull, global ache or a painless traction sensation. If it pinches, reduce the range of motion or eliminate the hand weight.
Effective Shoulder Impingement Stretches and Strengthening
A complete program pairs targeted stretches that release the muscles forcing the shoulder forward with specific strengthening exercises that retrain the weak posterior muscles responsible for maintaining subacromial space during movement. The structural cause of impingement is rarely just the tendon. It is a posture of the scapula. A 2019 electromyography study in Physical Therapy in Sport demonstrated that individuals with shoulder impingement consistently show delayed activation of the lower trapezius and serratus anterior, causing the humerus to jam upward during arm elevation. Your program must rebuild this timing.
Phase 1: Stretches to Open the Space
- Pectoralis Minor Doorway Stretch: Stand in a doorway with your forearm against the doorframe at shoulder height. Gently turn your body away until you feel a stretch in the front of your chest. Hold for 30 seconds, keeping the shoulder blade pulled down. The pectoralis minor tilts the scapula anteriorly, and this stretch directly reverses that pull.
- Sleeper Stretch with Modification: Lie on your uninvolved side. Bring the painful arm to 90 degrees directly in front. Use the opposite hand to gently press the painful hand down toward the bed. The standard sleeper stretch can be harsh. Modify it by placing a folded towel under the painful elbow to reduce the end-range pressure on the anterior capsule.
- Upper Trapezius Stretch: Sit on your left hand to anchor the shoulder. Tilt your right ear toward the right shoulder. The goal is to relax the muscle that hikes the shoulder blade upward.
Phase 2: Foundational Strengthening
- Isometric External Rotation: Stand in a doorway with the painful elbow bent to 90 degrees. Press the back of your wrist into the doorframe as if trying to rotate your hand outward. Use about 20% of your maximal effort. Hold for 10 seconds, 10 repetitions. This engages infraspinatus and teres minor without joint movement.
- Low Rows with Scapular Squeeze: Using a light resistance band, pull your elbows back while squeezing your shoulder blades together. Focus on the shoulder blade moving, not the arm. The cue is “put your shoulder blades in your back pockets.”
- Wall Slides for Serratus Activation: Stand with your back against a wall, a small towel roll behind your lower back. Raise your arms to a “goalpost” position. Slowly slide the arms up the wall, keeping your wrists and elbows in contact. Stop at the first sign of a pinch. This teaches the scapula to rotate in coordination with the arm.
Your Shoulder Impingement Desk Setup and Ergonomics
A protective desk setup prevents the habitual protracted shoulder posture and forward head position that narrows the subacromial space for 8 to 10 hours daily, functionally re-impinging the shoulder every workday. Ergonomics is not a secondary concern. It is a primary, continuous mechanical intervention. A 2022 study in the International Journal of Occupational Safety and Ergonomics linked prolonged computer use with mouse placement that forces arm extension to a higher prevalence of rotator cuff-related shoulder pain. The force of gravity on an unsupported, slightly extended arm is enough to chronically irritate the supraspinatus.
The 2026 Impingement-Safe Workstation Blueprint:
| Component | Incorrect Setup (Impairs Healing) | Correct Setup (Promotes Healing) |
|---|---|---|
| Chair Armrests | Armrests too low, forcing the shoulder to hang. Armrests too high, hiking the humerus up. | Adjust armrests so your elbows are at exactly 90 degrees and your forearms are fully supported parallel to the floor. The weight of the arm should transfer to the chair, not the shoulder. |
| Monitor Height | Monitor is too high, requiring a slight, persistent neck extension and upper trap engagement to see the screen. | Top line of text on the screen is at or slightly below eye level. The head is balanced over the thorax, not jutting forward. |
| Keyboard and Mouse | Mouse is placed far to the side, requiring internal rotation and slight extension at the shoulder to reach it. | A compact keyboard without a number pad or a standalone trackball mouse placed directly in front of the shoulder. The goal is to keep the mouse hand within the silhouette of your torso. |
| Lumbar Support | Slouched, C-shaped spine posture, which rounds the upper back and forces the scapula to slide forward and tilt anteriorly. | Firm lumbar support that promotes a neutral spine, which naturally facilitates scapular retraction and opens the acromial space. |
For a standing desk, the same arm and monitor rules apply. The addition is anti-fatigue matting; standing with locked knees and a forward hip lean creates a chain reaction that collapses the shoulders forward.
Key Takeaway: The force of an unsupported arm hanging or reaching for a mouse for hours is a chronic, low-grade impingement mechanism. Armrests that support the full forearm are a non-negotiable healing tool.
Shoulder Impingement Self-Massage and Trigger Points
Self-massage for shoulder impingement targets the soft tissues that, when tight, alter scapular mechanics, specifically the pectoralis minor, posterior rotator cuff, and upper trapezius, using a ball or your hand to release myofascial restrictions and reduce referred pain. The rotator cuff tendons themselves are too deep to massage, but the muscles that control the scapula are highly accessible and responsive to pressure. A 2021 pilot trial in the Journal of Manual & Manipulative Therapy found that adding soft tissue release to a shoulder exercise program improved pain-free range of motion more quickly than exercises alone.
Use a lacrosse ball for precision. The two primary targets are:
- Pectoralis Minor Release: Stand facing a wall. Place the lacrosse ball just below your collarbone, in the soft spot between your chest muscle and armpit. Lean into the ball, pinning it between you and the wall. Once you find a tender spot, hold static pressure without moving. Breathe deeply. Hold for 30 to 60 seconds until the tenderness fades slightly. A released pec minor allows the scapula to posteriorly tilt, giving the supraspinatus more room.
- Infraspinatus and Teres Minor Release: Lie on your back on a firm surface. Place the lacrosse ball on the back of the shoulder blade, on the meaty part below the bony spine of the scapula. Find a tender, knotted point. You can place your painful arm’s hand across your body to stretch the muscle. Gently roll your bodyweight over the ball. The sensation can be intense but should not cause tingling or numbness down the arm. This area often has latent trigger points that refer pain deep into the front of the shoulder, mimicking bursitis.
Crucial Safety Rule: Roll on the muscles of the shoulder blade, not the joint. Never place a ball directly on the bony point of the shoulder or into the armpit with deep pressure. The brachial plexus, a bundle of nerves, runs through that region.
Anti-Inflammatory Diet for Shoulder Healing
An anti-inflammatory diet for shoulder healing emphasizes foods that provide the specific amino acids and micronutrients required for collagen synthesis and inflammation resolution, while systematically reducing the ultra-processed foods that perpetuate low-grade systemic inflammation. This is not a “detox.” The tendon healing environment is influenced by what circulates in your bloodstream. A 2023 nutritional science review in Nutrients highlighted that chronic low-grade inflammation, driven by a Western diet pattern, impairs the function of fibroblasts, the cells responsible for building collagen. Your supraspinatus tendon needs those fibroblasts working optimally.
Focus on these three nutritional pillars:
- Collagen Peptide Loading: Type I collagen makes up 95% of a healthy tendon. Supplementing with 10 to 15 grams of hydrolyzed collagen peptides, taken 30 to 60 minutes before your strengthening exercises, provides the building blocks (glycine, proline, hydroxyproline) at the exact moment that load-induced blood flow delivers them to the tendon. A 2019 study in the American Journal of Clinical Nutrition showed that this vitamin C-enriched gelatin protocol doubled collagen synthesis rates in engineered ligaments.
- Pro-Resolving Fats: Omega-3 fatty acids from fatty fish (EPA and DHA) are precursors to resolvins, specialized molecules that actively resolve inflammation, rather than merely blocking it like NSAIDs. Eat salmon, mackerel, or sardines 2 to 3 times per week.
- Color and Spice: Deeply colored fruits and vegetables (berries, tart cherry, pomegranate) and spices like turmeric (combined with black pepper) provide polyphenols that inhibit COX-2, the inflammatory enzyme. This offers a gentle, dietary anti-inflammatory effect.
- Eliminate Pro-Inflammatory Drivers: High-fructose corn syrup, industrial seed oils, and excessive alcohol raise systemic inflammatory markers. Removing them reduces the background noise of inflammation, allowing your tendon’s localized healing process to progress more efficiently.
The Stress and Shoulder Pain Connection
Chronic psychological stress activates the hypothalamic-pituitary-adrenal (HPA) axis and sympathetic nervous system, creating a physiological state that lowers pain thresholds, increases muscle guarding in the upper trapezius, and impairs tissue healing by prolonging the release of cortisol, a catabolic hormone. The connection is not merely “you carry stress in your shoulders.” A 2020 study in the Journal of Pain Research demonstrated that individuals with high perceived stress and poor coping strategies had significantly worse outcomes in physical therapy for shoulder pain. The anxious brain is hypervigilant. It interprets the normal mechanical signals of a recovering tendon (a mild ache, a sensation of stretch) as danger signals, which amplifies pain perception. This is central sensitization: the volume knob on pain gets turned up.
To manage the stress-skin and stress-tissue healing axis, you must downregulate the nervous system. This is a mechanical and chemical necessity for healing.
- Sleep as Medication: Sleep is when growth hormone, a potent tissue repair signal, peaks. The fragmented sleep from shoulder pain interrupts this. By prioritizing sleep hygiene (see the sleep section) and using a guided body scan meditation before bed, you can train your brain to perceive the shoulder as safe, reducing muscle tone and facilitating deeper sleep.
- Diaphragmatic Breathing: 5 minutes of slow, belly-based breathing, where the exhale is longer than the inhale, directly stimulates the vagus nerve, which pushes the body from “fight or flight” to “rest and digest.” This lowers muscle tension in the accessory breathing muscles of the neck and upper back.
- Cognitively Reframe the Pain: When you feel the ache during a pendulum exercise, instead of thinking, “I am damaging it,” think, “This is my tendon getting more blood flow.” This cognitive reappraisal reduces the threat value of the pain signal, decreasing the cortical amplification that drives chronicity.
Key Takeaway: Chronic stress drives up muscle tension and pain sensitivity in the shoulder. Diaphragmatic breathing and cognitive reframing are evidence-based tools that create a pro-healing neurochemical environment.
Shoulder Impingement vs Rotator Cuff Tear: Self-Care Differences
Self-care for a non-retracted, degenerative partial rotator cuff tear is virtually identical to shoulder impingement self-care, following the same phased rehabilitation principles, whereas a full-thickness, retracted traumatic tear often fails to improve with self-care alone and requires a prompt surgical consultation. This is a critical clinical distinction because both conditions often coexist and feel the same to you. Impingement can cause a small tear, and a tear can cause impingement. The differentiation is in the mechanism of injury and the functional severity, not just the MRI finding.
| Feature | Shoulder Impingement (Subacromial Pain Syndrome) | Partial/Small Degenerative Tear | Full-Thickness Acute Traumatic Tear |
|---|---|---|---|
| Onset | Gradual, overuse, postural | Gradual, age-related attrition | Sudden pop, fall, lifting a heavy object forcefully |
| Pain Pattern | Painful arc (60-120 deg), minimal pain at rest once calmed | Similar painful arc, may have slightly more night pain | Severe pain at rest, constant, unrelenting night pain |
| Strength Loss | Primarily pain-limited weakness. Can hold the arm up if placed there. | Moderate structural weakness, but can usually lift the arm with effort. | Marked, sudden, genuine inability to lift the arm at all (pseudoparalysis). |
| Self-Care Role | Primary, standalone treatment. | Primary, standalone treatment for most. | Pre-operative preparation at best. Self-care will not reattach a retracted tendon. |
| Response to First 6 Weeks | Significant improvement in daily pain. | Similar improvement, but mild weakness may persist longer. | Little to no functional improvement. Inability to lift the arm persists. |
The rule is this: if you can lift your arm, even with pain, you are appropriate for a full trial of self-care. If you cannot physically lift the arm away from your body due to weakness, not just pain, you need an urgent referral to a board-certified orthopedic surgeon for a diagnostic ultrasound or MRI arthrogram to assess tendon continuity and retraction.
When to See a Doctor for Shoulder Impingement
You should see a board-certified orthopedic surgeon or a sports medicine physician for your shoulder impingement if you have experienced no meaningful functional improvement after 6 to 12 weeks of consistent, evidence-based self-care, or immediately if you develop any cardinal red-flag sign: sudden complete loss of arm elevation, deep unremitting night pain unresponsive to any position, or symptoms following a significant trauma like a fall. This is not a failure. Most impingement resolves nonsurgically. The clinical threshold for referral exists to catch the smaller percentage of cases where the structural damage is beyond self-repair capacity, or where the initial diagnosis was wrong (frozen shoulder, glenohumeral arthritis, cervical spine referral).
When you schedule the appointment, bring specific documentation. Doctors rely on your subjective history heavily for shoulder pathology. Write down: the exact location of pain (draw it on a body diagram), the specific activities you cannot do, what time of night you wake up with it, and a list of the exercises you have been doing, including frequency and weight. This data tells the physician that this is a high-quality failure of conservative care, not a lack of effort, fast-tracking you to the appropriate next step, which might be a cortisone injection, formal physical therapy with a licensed physical therapist, or advanced imaging. A short course of physical therapy is often the best first escalation step before considering surgery. The therapist provides manual techniques, objective strength measurement, and real-time movement feedback that self-care cannot replicate.
Key Takeaway: A non-improving shoulder after a 6-to-12-week serious self-care trial is not a personal failure; it is diagnostic information. Take that information to an orthopedic specialist.
Frequently Asked Questions About Shoulder Impingement Self-Care
What is the fastest way to heal a shoulder impingement?
The fastest method is not a single technique but the disciplined application of phase-matched care: offloading the acute inflammation with relative rest and ice, immediately followed by a daily, consistent program of scapular stabilization and rotator cuff strengthening exercises within a pain-monitored range.
Trying to rush into heavy lifts or, conversely, resting completely both extend the recovery timeline.
Can shoulder impingement heal on its own?
A mild, posture-driven shoulder impingement can resolve with the removal of the aggravating activity and incidental movement, but a persistent impingement with tendon swelling rarely heals fully without a structured exercise program to correct the biomechanical cause.
Your body cannot change the shape of the acromion or spontaneously rebalance weak and tight muscles; it requires intentional retraining.
How should I sleep with shoulder impingement?
Sleep on your back with a thin pillow supporting the painful arm on your stomach, or sleep on the uninvolved side hugging a full-length body pillow so the painful arm rests on it at a 90-degree angle.
Never sleep on the painful shoulder or on your stomach with your arms overhead, as these positions maximally compress the subacromial space.
What exercises should be avoided with a shoulder impingement?
Avoid overhead pressing with a barbell, behind-the-neck pulldowns, upright rows, and deep dips, as these place the shoulder in maximal internal rotation and abduction under heavy load.
Additionally, stop any exercise that reproduces your specific sharp, pinching pain during the motion, even if it is on a “recommended” list elsewhere.
Is heat or ice better for shoulder impingement pain?
Ice is better for the sharp, acute, inflammatory pain of the first few days to calm bursal swelling.
Heat is better for the dull, stiff, chronic ache in later phases to improve tissue pliability before performing mobility exercises, but should not be used on a hot, visibly swollen shoulder.
What happens if shoulder impingement is left untreated?
If left untreated, the chronic mechanical compression can progressively degrade the supraspinatus tendon from reversible tendinopathy to a partial-thickness tear and, eventually, a large, potentially retracted full-thickness rotator cuff tear.
You may also develop a frozen shoulder as a secondary protective response to the pain, or chronic central sensitization where the pain becomes a self-sustaining neurological loop even after the original impingement is mechanically improved.
The framework for managing a shoulder impingement at home in 2026 has evolved. It rejects the passive advice to just rest and wait. You now have a phased, active plan that respects the biology of tendon healing while addressing the mechanical dysfunction that caused the problem in the first place. The most important action you can take today is to stop the provoking movement pattern and simultaneously start the gentle, repetitive motion that feeds the joint and signals healing.
Begin tonight by setting up your sleep position correctly. Tomorrow, analyze your desk and remove the reach that irritates your shoulder for hours. The pendulums, the specific stretches, and the methodical strengthening are your tools to rebuild capacity. Measure your progress in weeks, not days, and use the 6-to-12-week marker as your check-in point for a professional referral if the arc of your arm’s movement has not expanded. Trust in the process, because the process is built on the consistent ability of the human shoulder to adapt when the right mechanical and biological conditions are provided.