Scoliosis Self-Care: 2026 Daily Management Guide
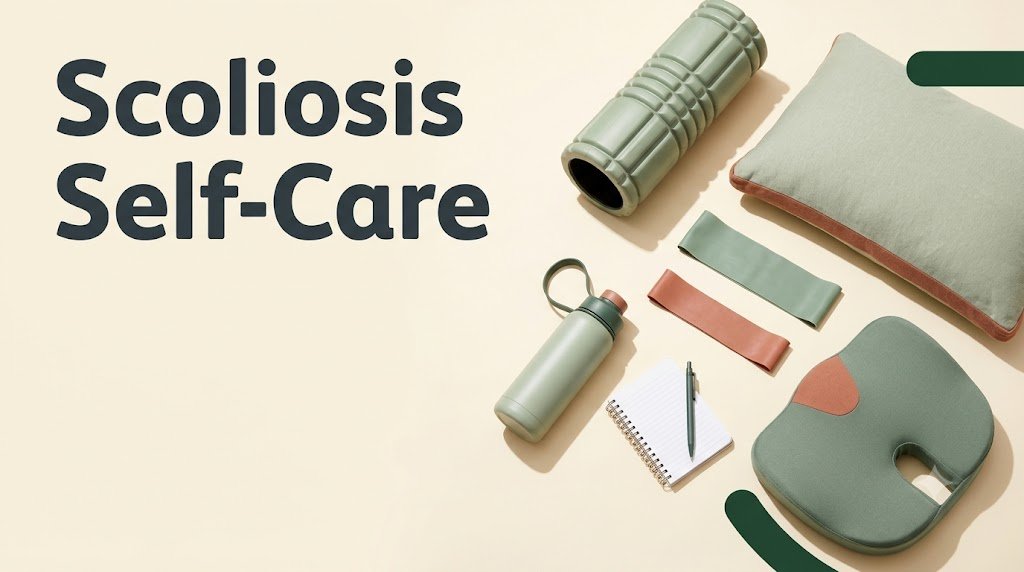
Scoliosis self-care means taking control of your daily habits to manage spinal curvature, reduce pain, and prevent curve progression without relying solely on medical procedures. The right combination of targeted exercises, posture corrections, and lifestyle adjustments can significantly improve how you feel and function every single day.
According to the Scoliosis Research Society, nearly 7 million people in the United States live with scoliosis, yet most receive little guidance on daily management beyond “watch and wait” or bracing recommendations. A 2022 systematic review published in the journal Spine found that consistent physiotherapeutic scoliosis-specific exercises (PSSE) reduced pain scores by an average of 42 percent and slowed curve progression in adolescents by nearly 60 percent compared to no intervention.
This guide walks you through exactly what works for scoliosis self-care in 2026. You will learn which exercises strengthen your spine safely, which positions protect your curve while you sleep, how to lift and sit without causing harm, and when your symptoms warrant a call to your orthopedist. No fluff. No vague advice. Just actionable, evidence-based practices you can start today.
What Is Scoliosis Self-Care and Why Does It Matter?
Scoliosis self-care refers to the daily practices, exercises, postural habits, and lifestyle modifications you implement to manage your spinal curvature between medical appointments. This is not a substitute for professional treatment but rather a complementary approach that puts you in the driver’s seat of your spinal health.
The International Society on Scoliosis Orthopaedic and Rehabilitation Treatment (SOSORT) defines effective self-care as including three components: physiotherapeutic scoliosis-specific exercises (PSSE), activity modification to reduce asymmetric spinal loading, and postural re-education for daily activities. Each component addresses a different aspect of how scoliosis affects your body.
Why does this matter? Your spine works against gravity every second you are upright. A curved spine works harder. The muscles on the convex side of your curve become overstretched and weak while the concave side muscles shorten and tighten. Without consistent self-care, this imbalance worsens over time, leading to increased pain, fatigue, and potentially faster curve progression.
Key Takeaway: Scoliosis self-care requires daily consistency. Twenty minutes of targeted exercise and posture awareness throughout your day produces better outcomes than one hour of exercise twice per week.
Scoliosis Exercises at Home That Actually Work
Physiotherapeutic scoliosis-specific exercises (PSSE) form the backbone of effective scoliosis self-care. These exercises differ from general fitness routines because they target the specific asymmetries of your curve pattern. The three most evidence-supported home exercises are the plank, bird dog, and dead bug, according to a 2021 SOSORT clinical guideline .
Prone Plank strengthens your entire core while maintaining spinal neutrality. Start on your stomach, then push up onto your forearms and toes. Keep your back straight like a board. Hold for 15 to 30 seconds. Repeat up to three times. This exercise stabilizes the spine and pelvis without adding rotational stress.
Bird Dog builds coordination and lower back stability. On hands and knees, find a flat back position. Draw your belly button toward your spine as you extend one arm forward and the opposite leg back. Hold for three seconds, then switch sides. Complete 8 to 10 repetitions per side.
Dead Bug trains core control without spinal movement. Lie on your back with arms and knees raised, core engaged. Slowly lower one arm and the opposite foot toward the floor. Return to start and repeat with the other arm and leg. Perform 10 repetitions on each side.
Start with one set of each exercise daily. Increase to two or three sets as your strength improves. Pain should never exceed 3 out of 10 during exercise, per SOSORT safety guidelines .
| Exercise | Target Area | Hold Time | Repetitions | Difficulty Level |
|---|---|---|---|---|
| Prone Plank | Full core, spinal stabilizers | 15-30 seconds | 3 | Beginner to Intermediate |
| Bird Dog | Lower back, coordination | 3 seconds per side | 8-10 per side | Beginner |
| Dead Bug | Deep core, controlled movement | N/A (movement-based) | 10 per side | Intermediate |
Key Takeaway: These three PSSE exercises target the specific muscle imbalances caused by scoliosis. Perform them daily. Form matters more than duration.
Scoliosis Stretches for Pain Relief You Can Do Anywhere
Stretching addresses the muscle tightness on the concave side of your spinal curve. The cat-cow stretch, piriformis stretch, and child’s pose consistently show the best pain relief outcomes in clinical practice .
Cat-Cow Stretch improves spinal mobility and relieves segmental stiffness. Start on hands and knees. Round your back toward the ceiling like a cat, tucking your chin to chest. Hold briefly, then drop your chest toward the floor, arching your back and lifting your head. Move slowly with your breath. Repeat 10 times.
Piriformis Stretch targets the deep hip rotator that often tightens with lumbar curves. Lie on your back with knees bent. Cross your right ankle over your left knee, forming a figure four. Loop your hands behind your left thigh and gently pull toward your chest. Hold for 30 seconds. Switch sides. Repeat three times per leg .
Child’s Pose provides a gentle release for your entire back. Kneel on the floor, then lower your hips toward your heels. Lean forward and rest your forehead on the floor. Extend your arms forward for a greater stretch or let them rest at your sides. Breathe deeply for 30 to 60 seconds.
| Stretch | Primary Target | Hold Time | Repetitions | Best For |
|---|---|---|---|---|
| Cat-Cow | Whole spine mobility | 3-5 breaths per position | 10 cycles | Stiffness, segmental restriction |
| Piriformis | Deep hip rotator, lumbar curve tightness | 30 seconds | 3 per side | Sciatica-type pain, hip asymmetry |
| Child’s Pose | Back extension release | 30-60 seconds | 1-2 | General tension, post-exercise cooldown |
Stretch only to the point of gentle tension, never pain. Hold each stretch for 30 seconds minimum, as shorter holds produce minimal tissue change according to sports medicine research. Perform these stretches after your core exercises when muscles are warm.
Key Takeaway: Stretch the concave side of your curve more than the convex side to address the specific tightness pattern of scoliosis.
Core Strengthening for Scoliosis Without Making Things Worse
Core strengthening for scoliosis requires a different approach than standard abdominal work. Traditional crunches and sit-ups can worsen your curve because they compress the spine asymmetrically. The goal is stability, not flexion.
Pelvic Tilts provide a safe starting point for anyone with scoliosis. Lie on your floor with knees bent and feet flat. Tighten your abdominal muscles to flatten your lower back against the floor while raising your pelvis slightly. Hold for ten seconds. Repeat 10 times . This movement teaches neutral spine positioning.
Single-Leg Balance strengthens the stabilizing muscles around your hips and spine without adding load. Stand with hands on hips, feet shoulder-width apart. Raise one leg and bend it back at the knee, balancing on the other foot. Hold for 30 seconds. Switch sides. Repeat three times per leg. Use a wall for support if needed.
Air Squats strengthen hips and legs, which provide critical support for your spine. Stand with feet shoulder-width apart. Bend at hips and knees as if sitting back into a chair. Keep your chest tall and back straight. Do not let your knees collapse inward. Complete 10 to 15 repetitions .
Avoid these common core exercise mistakes: lifting both legs simultaneously while lying on your back (increases lumbar lordosis), performing full sit-ups (compresses discs asymmetrically), or holding your breath during any movement (increases intra-abdominal pressure unsafely).
| Safe Exercise | Muscle Group Activated | Repetitions | Common Mistake to Avoid |
|---|---|---|---|
| Pelvic Tilt | Deep abdominals, pelvic floor | 10 holds, 10 seconds each | Lifting hips too high (excessive posterior tilt) |
| Single-Leg Balance | Hip stabilizers, spinal erectors | 3 x 30 seconds per leg | Looking down (maintain neutral neck) |
| Air Squat | Glutes, quadriceps, core | 10-15 | Knees moving past toes or caving inward |
Key Takeaway: Core stability for scoliosis means learning to brace your spine safely, not building visible abdominal muscles. Quality of movement prevents injury.
Safe Workouts for Scoliosis When You Want to Stay Active
Swimming, walking, and modified Pilates top the list of safe workouts for scoliosis. These activities strengthen your body without subjecting your spine to high-impact forces or asymmetrical loading patterns.
Swimming provides near-perfect exercise for scoliosis because water buoys your spine, removing gravitational compression. Front crawl and backstroke work best. Avoid breaststroke, as the whip kick creates asymmetric hip motion that can torque your lumbar spine according to some physical therapists. Swim 20 to 30 minutes three times weekly for cardiovascular benefits without spinal stress.
Brisk Walking at a pace that raises your heart rate but leaves you able to talk provides excellent low-impact exercise. Walk on even surfaces to avoid uneven loading. Good walking shoes with proper arch support make a measurable difference. Start with 10 minute walks and add five minutes each week until reaching 30 to 45 minutes daily .
Modified Pilates on a mat, not a reformer, can safely strengthen your core when done correctly. Tell your instructor about your scoliosis so they can modify exercises. Avoid exercises that ask you to twist your spine further into your curve pattern or roll onto your neck and upper back.
| Activity | Spinal Impact Level | Weekly Frequency | Modifications Needed |
|---|---|---|---|
| Swimming (freestyle/backstroke) | Zero impact | 3 x 20-30 minutes | Avoid breaststroke |
| Brisk walking | Low impact | 5-7 x 20-45 minutes | Even surfaces only |
| Modified Pilates | Low impact with proper form | 2-3 x 30 minutes | Instructor awareness required |
| Stationary cycling | Low impact | 3 x 20 minutes | Seat height adjusted for leg length difference |
Key Takeaway: The best exercise for scoliosis is the one you will do consistently. Swimming offers the greatest benefit with the lowest risk.
Activities to Avoid with Scoliosis That Can Worsen Your Curve
Certain activities place excessive stress on an already curved spine and can accelerate progression or increase pain. High-impact sports, extreme flexibility training, and trampolines carry the highest risk according to clinical consensus .
High-Impact Sports including gymnastics, football, and competitive cheerleading subject your spine to repeated compressive and rotational forces. Gymnastics landings transmit forces up the spine while the sport’s emphasis on spinal extension and twisting directly stresses curved segments. Contact sports like football risk traumatic injury that can alter spinal alignment.
Extreme Flexibility Exercises that demand deep backbends or full forward folds can worsen your curve by stretching already overstretched structures on the convex side. Deep backbends increase thoracic extension beyond neutral ranges. Full forward folds with rounded backs place excessive tension on spinal ligaments that already work asymmetrically.
Trampolines create a perfect storm of problems: repetitive jarring impacts, unpredictable landing surfaces, and high fall risk. Each jump sends impact up your spine. A single awkward landing can cause significant pain or, in rare cases, increase curve progression.
The American Academy of Orthopaedic Surgeons advises that patients with curves exceeding 30 degrees avoid these activities entirely. Patients with milder curves may participate with modification and close monitoring, but discuss specific activities with your orthopedist first.
| Activity | Risk Level for Curves >30° | Risk Level for Curves 10-30° | Primary Concern |
|---|---|---|---|
| Gymnastics | Avoid completely | Discuss with doctor | Repeated spinal loading + extension |
| Football | Avoid completely | Generally safe if cleared | Contact + rotational forces |
| Trampoline | Avoid completely | Avoid (unpredictable impacts) | Jarring + fall risk |
| Deep backbends (yoga) | Modify or avoid | Modify (reduce range) | Overstretching convex structures |
Key Takeaway: One rule applies across all activities: if it hurts during or after, stop. Pain is your spine signaling excessive stress.
Posture Correction for Scoliosis in Daily Life
Posture correction for scoliosis differs from standard “sit up straight” advice because your spine already curves asymmetrically. The goal is neutral alignment of your head over your pelvis, not forcing your spine into a position it cannot achieve.
Head-to-Pelvis Alignment means your ear, shoulder, hip, and ankle should form a relatively straight line when viewed from the side. From the front, your nose should align with your breastbone and pubic bone. Use a mirror to check your standing posture daily until this position feels natural.
Shoulder Blade Setting counteracts the rounded shoulder position common with thoracic curves. Gently draw your shoulder blades down and back, as if placing them into your back pockets. Do not squeeze them together so hard that your chest puffs out. Hold this position for five seconds, release. Repeat throughout the day whenever you notice yourself slumping.
Wall Checks provide quick posture feedback. Stand with your back against a wall, heels two to three inches from the baseboard. Your head, shoulders, and buttocks should contact the wall without forcing. If your head falls forward or one shoulder blade lifts more than the other, adjust until both sides feel equally engaged.
Posture correction requires constant reminders. Set a phone timer for every 30 minutes. Use a sticky note on your computer monitor. Ask a coworker or family member to give you a gentle signal when they see you slumping.
Key Takeaway: Perfect posture for scoliosis means balanced, not straight. Focus on symmetry of effort between your left and right sides.
Sitting Positions for Scoliosis at Work and Home
Sitting places significant load on your lumbar spine. The right sitting position for scoliosis includes lumbar support, even weight distribution, and frequent position changes.
The 90-90-90 Rule describes ideal seated posture: hips at 90 degrees, knees at 90 degrees, and ankles at 90 degrees. Your feet should rest flat on the floor. If they dangle, use a footrest. Your knees should sit at or slightly below hip level. This position minimizes stress on your lumbar curve.
Lumbar Support matters more than chair expense. A small rolled towel or lumbar cushion placed at your natural waist curve maintains the hollow in your lower back. Without this support, your pelvis tilts backward and your lumbar curve flattens, placing strain on spinal discs and ligaments.
Weight Distribution should stay even between your sitting bones. If your scoliosis includes pelvic obliquity (one hip higher), sit on a foam wedge that levels your pelvis. Never habitually lean to one side or cross your legs in the same direction every time. Alternate crossed legs or keep both feet flat.
Get up every 30 minutes. Stand. Walk ten steps. Stretch your arms overhead. Change positions before discomfort sets in. A 2023 study in the European Spine Journal found that frequent micro-breaks reduced back pain scores by 31 percent in adults with scoliosis compared to uninterrupted sitting.
| Sitting Mistake | Why It Harms Scoliosis | Correct Alternative |
|---|---|---|
| Slouching with rounded back | Flattens lumbar curve, increases disc pressure | Use lumbar support, sit tall |
| Leaning consistently to one side | Reinforces asymmetric loading | Distribute weight evenly |
| Sitting on wallet or thick objects | Tilts pelvis, creates leg length discrepancy | Remove items from back pockets |
| Crossing legs at knees | Rotates pelvis, torques lumbar spine | Feet flat or ankles crossed only |
Key Takeaway: Your best sitting position changes every 20 to 30 minutes. Movement, not perfect static posture, protects your spine.
Sleeping Positions for Scoliosis That Protect Your Spine
Sleeping positions for scoliosis can either support spinal alignment or worsen your curve over time. Back sleeping ranks as the best position, stomach sleeping as the worst.
Back Sleeping distributes your body weight evenly across the mattress. Place a small pillow or rolled towel under your knees to maintain the natural curve in your lower back. This position prevents your pelvis from rotating during sleep, which maintains the alignment you worked for during the day.
Side Sleeping works as a second choice but requires a pillow between your knees. This keeps your pelvis from rotating and maintains hip alignment. The pillow should be thick enough to keep your top hip from dropping toward the mattress. Choose the side that feels most comfortable, but alternate sides occasionally if possible.
Mattress Selection matters more than pillow choice. Medium-firm mattresses consistently outperform soft or firm options for scoliosis patients in clinical surveys. Your mattress should support your spine’s natural curves without creating pressure points at your shoulders or hips. Memory foam contours to your body but can allow your spine to sink into poor alignment.
Pillow Height depends on your curve location. For thoracic curves, a thinner pillow keeps your neck aligned with your shoulders. For lumbar curves, you may need a thicker pillow or a cervical contour pillow. Your ear, shoulder, and hip should form a straight line when lying on your side.
Never sleep on your stomach. This position forces you to turn your head to one side for hours, twisting your cervical spine. It also flattens the normal curve in your lower back and places your thoracic spine in excessive extension.
| Sleeping Position | Spinal Alignment Quality | Recommended For | Equipment Needed |
|---|---|---|---|
| Back | Excellent | Most curve types | Knee pillow |
| Side with knee pillow | Good | Those who can’t back sleep | Knee pillow, appropriate head pillow |
| Side without knee pillow | Poor | Not recommended | Add knee pillow |
| Stomach | Very poor | No one with scoliosis | Change positions |
Key Takeaway: Your mattress supports your spine for six to eight hours every night. A medium-firm mattress with proper pillows costs far less than back pain or curve progression.
Lifting Techniques for Scoliosis to Prevent Injury
Lifting technique directly affects spinal loading. Bending at your waist multiplies the force on your lumbar spine by a factor of five to ten depending on the weight and your lever arm length. The correct lifting technique for scoliosis protects your curve from additional stress.
The Hip Hinge replaces bending at your waist. Stand with feet shoulder-width apart. Push your hips backward while keeping your back straight. Allow your knees to bend slightly. Your torso should lower as a single unit rather than folding forward. This technique keeps your spine in neutral alignment while your powerful leg and hip muscles do the work.
Load Proximity means keeping the object as close to your body as possible. Each inch an object moves away from your body multiplies the force on your spine by approximately 10 percent. Hold boxes against your chest. Carry grocery bags close to your hips. Slide heavy objects toward you before attempting to lift.
Assistive Devices reduce spinal load dramatically. A rolling cart eliminates lifting entirely for heavy or multiple items. A reaching tool lets you pick up floor objects without bending. Lifting belts provide tactile feedback about your form but do not reduce spinal load on their own.
Never twist while lifting. If you need to change direction, put the object down, turn your feet, then lift again. The rotational force from a twisting lift adds shear stress that scoliotic spines tolerate poorly.
| Lift Type | Spinal Load (relative to object weight) | Safe for Scoliosis? | Modification Needed |
|---|---|---|---|
| Stooped (bent waist, straight legs) | 10-15x | No | Use hip hinge instead |
| Hip hinge with object close | 3-5x | Yes | Maintain neutral spine |
| Hip hinge with arms extended | 8-10x | No | Bring object closer first |
| Assisted (carts, dollies) | <1x | Yes (best option) | Use whenever possible |
Key Takeaway: Your legs are stronger than your back. Let them do the lifting while your spine stays still.
Scoliosis and Technology Posture in a Screen-Filled World
Smartphones, tablets, and computers create posture problems that compound scoliosis. Looking down at screens places up to 60 pounds of force on your cervical spine according to biomechanical research published in Surgical Technology International.
Screen Height should position the top of your screen at or slightly below eye level. For smartphones, raise the device to eye level rather than dropping your chin to your chest. For computers, adjust your monitor height so you look straight ahead, not down. A laptop stand plus external keyboard creates proper positioning.
Text Neck refers to the forward head posture caused by looking down at phones. This position increases the curve in your upper back, potentially worsening thoracic scoliosis. Set phone timers for every 15 minutes of use to remind you to return your head to neutral alignment over your shoulders.
Workstation Setup includes three elements: chair height that keeps your knees at 90 degrees, monitor height at eye level, and keyboard position that keeps your wrists straight and elbows at 90 degrees. Your mouse should sit close enough that you never reach forward or sideways to use it.
Standing desks offer benefits but also risks. Alternating between sitting and standing every 30 to 60 minutes works better than standing all day. Standing places different loads on your spine than sitting, but prolonged standing fatigues the muscles that support your curve.
| Device | Common Bad Posture | Correction |
|---|---|---|
| Smartphone | Chin tucked to chest, rounded shoulders | Raise phone to eye level |
| Laptop (on lap) | Looking down, slumped spine | Use lap desk, external keyboard |
| Desktop computer | Reaching forward, head tilted up/down | Adjust monitor height, bring mouse close |
| Tablet (handheld) | Same as smartphone | Use stand or case with kickstand |
Key Takeaway: Your spine does not know the difference between work and leisure time. Poor posture while scrolling social media hurts as much as poor posture while working.
Scoliosis Curve Progression Tracking at Home
Tracking your curve progression between X-rays gives you and your doctor valuable data. While only a standing X-ray with Cobb angle measurement can definitively measure your curve, several at-home indicators suggest whether your curve is stable or progressing.
Shoulder Height Difference provides the most reliable visible indicator. Stand facing a mirror with arms relaxed at your sides. Note whether one shoulder sits higher than the other. Take a photo from the front and back monthly, standing in the same spot with the same clothing (or shirtless over a sports bra). Compare images over time.
Waist Asymmetry appears as one side of your waist looking fuller or more indented than the other. This often changes with curve progression before shoulder height does. Wear fitted clothing or stand in profile in your monthly photos. A visible increase in asymmetry warrants a doctor visit.
Rib Hump Changes indicate progression of the rotational component of scoliosis. Bend forward at your waist as if touching your toes while someone looks at your back from behind. One side of your rib cage will appear higher. Ask a family member to describe or photograph this position monthly.
Pain Pattern Shifts matter even without visible changes. New pain locations, increased pain intensity, or pain that wakes you from sleep all suggest your curve may be changing. Document these changes with dates and descriptions to share with your orthopedist.
| Self-Monitoring Method | What It Detects | Frequency | Accuracy Level |
|---|---|---|---|
| Shoulder height photos | Curve magnitude changes | Monthly | Moderate (confirms need for X-ray) |
| Waist asymmetry check | Lumbar curve progression | Monthly | Moderate |
| Forward bend test | Rotational progression | Monthly | Moderate to High |
| Pain journal | Symptom changes (may precede curve changes) | Daily | Low for curve measurement, High for symptom tracking |
Key Takeaway: These self-checks do not replace standing X-rays. They help you know when to request an X-ray between routine annual visits.
Self-Monitoring for Scoliosis Between Doctor Visits
Self-monitoring for scoliosis means tracking specific symptoms and functional changes that correlate with curve behavior. The Scoliosis Research Society recommends annual standing X-rays for most patients, but life happens between those appointments.
The ADL Log tracks how your curve affects activities of daily living. Rate on a 1 to 10 scale how difficult it is to: put on socks and shoes, stand for 30 minutes, walk one mile, sit through a movie, sleep through the night. A consistent increase in difficulty scores across multiple activities suggests your curve may be progressing or your pain management needs adjustment.
Clothing Fit Changes provide surprisingly sensitive indicators. Pants that suddenly fit differently on each hip. Bra straps that slip off one shoulder repeatedly. Shirts that twist around your torso. These small fit changes often precede measurable curve progression by several months.
Energy Level Tracking matters because scoliosis forces your body to work harder against gravity. A 2018 study in Spine found that adults with untreated scoliosis burned 15 to 20 percent more calories at rest than matched controls due to increased muscular effort. If your baseline energy level drops significantly without other explanation, your curve may be demanding more from your body.
Journal Format should include daily pain scores (0 to 10 scale, location, quality), fatigue levels (morning and evening), functional limitations, and any new symptoms like numbness, tingling, or balance changes. Bring this journal to every doctor appointment.
| Symptom | What It May Indicate | Action Required |
|---|---|---|
| New or worsening back pain | Curve progression, muscle fatigue, disc issues | Track; discuss at next visit |
| Leg numbness or tingling | Nerve compression from rotation | Report within 2 weeks |
| Balance changes | Curve affecting vestibular or proprioceptive systems | Report within 1 week |
| Breathing difficulty with curves >50° | Potential pulmonary restriction | Report immediately |
| Clothing fit changes | Possible curve progression | Track; request X-ray if persistent |
Key Takeaway: Your body gives you signals every day. Learning to read those signals helps you know when to seek help and when to stay the course.
Morning Habits for Scoliosis That Set You Up for Success
Morning habits for scoliosis establish spinal alignment before daily activities load your curve. The first 30 minutes after waking determine how your body feels for the next 16 hours.
Spinal Decompression first thing counters the 20 percent increase in disc height that happens overnight while you lie flat. Lie on your back for two to three minutes after waking, knees bent, feet flat on the mattress. Breathe deeply. Allow your spine to settle into a neutral position before sitting up.
Roll to Side, Then Up protects your spine during the transition from lying to standing. Never sit straight up from lying flat. Instead, roll onto your side, push up with your arms, then swing your legs off the bed as you sit upright. This method keeps your spine in a stable position while your core engages.
Morning Cat-Cow on the edge of your bed loosens overnight stiffness before you put weight on your spine. Perform five slow cycles of cat-cow while seated on the edge of your mattress or a firm chair. This warms up spinal segments that stiffen during sleep.
Hydration First matters because your spinal discs are 80 percent water. Overnight, you lose fluid through respiration and perspiration. Drinking 16 to 20 ounces of water within 30 minutes of waking rehydrates discs before you load them with upright activity.
Posture Check in Mirror takes 10 seconds. Stand sideways. Check ear-shoulder-hip alignment. Front view. Check shoulder height and hip symmetry. Make small adjustments before starting your day.
| Morning Habit | Time Required | Primary Benefit |
|---|---|---|
| Lying decompression | 2-3 minutes | Disc rehydration, spinal settling |
| Roll-to-side exit | 5 seconds | Prevents abrupt spinal loading |
| Seated cat-cow | 1 minute | Overnight stiffness release |
| Morning hydration | 1 minute | Disc fluid replacement |
| Mirror posture check | 10 seconds | Daily awareness activation |
Key Takeaway: The first 30 minutes of your day determine the next 16 hours of spinal comfort. Invest that time.
Ergonomic Adjustments for Scoliosis in Every Room
Ergonomic adjustments for scoliosis extend beyond your desk to every room where you spend time. Kitchens, bathrooms, cars, and even garden sheds need evaluation.
Kitchen Ergonomics focus on counter height and activity distribution. Your primary food prep counter should hit at your standing wrist height. If counters are too low, use a cutting board with raised feet. If too high, stand on an anti-fatigue mat. Store heavy pots and pans in waist-high cabinets to avoid lifting from floor level or reaching overhead.
Bathroom Modifications include a raised toilet seat if your lumbar curve makes sitting down and standing up painful. Install grab bars near the toilet and in the shower. Use a long-handled sponge for bathing to avoid twisting. A shower stool lets you sit during washing if standing tires your back.
Car Seat Setup dramatically affects pain during driving. Your seat should be upright, not reclined. Lumbar support adjusted to your natural curve. Seat height set so your hips sit level with or slightly above your knees. Steering wheel positioned so your elbows bend at 90 degrees with shoulders relaxed. For long drives, stop every 45 to 60 minutes to walk and stretch.
Garden and Workshop tasks require raised beds or workbenches to avoid prolonged bending. Kneeling pads protect your knees when you must work low. Long-handled tools eliminate the need to bend at all. Alternate tasks every 15 minutes to avoid repetitive strain.
| Room | Common Problem | Ergonomic Solution | Difficulty of Change |
|---|---|---|---|
| Kitchen | Low counters causing back flexion | Raised cutting board, anti-fatigue mat | Low cost, immediate |
| Bathroom | Deep squat on toilet | Raised seat, grab bars | Moderate (install help may be needed) |
| Car | Reclined seat, poor lumbar support | Lumbar cushion, seat position adjustment | No cost, immediate |
| Garden | Bending from waist | Raised beds, long-handled tools | Moderate to High |
Key Takeaway: Your environment either supports your spine or fights it. Small changes in each room add up to less pain every day.
When to See a Doctor for Scoliosis Warning Signs
Knowing when to see a doctor for scoliosis keeps minor issues from becoming major problems. Some symptoms warrant a routine appointment. Others require immediate medical attention.
Schedule a Routine Visit for: curve progression of 5 to 10 degrees on X-ray, new or changing back pain that limits daily activities, brace discomfort or fit issues, questions about exercise safety, pregnancy planning with known scoliosis, or any new symptom that concerns you.
See Your Doctor Within Two Weeks for: new numbness or tingling in your arms or legs, loss of normal reflexes (clumsiness, dropping things), changes in bowel or bladder function, balance changes that affect walking, or curve progression exceeding 10 degrees on X-ray.
Seek Emergency Care Immediately for: sudden loss of strength in your legs, inability to walk or stand, new incontinence (bladder or bowel), severe back pain after a fall or injury, or breathing difficulty (specifically with known curves exceeding 50 degrees).
What to Bring to Your Appointment includes: your symptom journal, monthly posture photos, list of current medications and supplements, any previous X-rays or imaging (bring discs or have them sent ahead), questions written down (you will forget them in the exam room).
| Warning Sign | Timeframe for Care | Provider Type |
|---|---|---|
| Curve progression on X-ray | Schedule routine appointment | Orthopedist who follows your scoliosis |
| New numbness in legs | Within 2 weeks | Orthopedist or neurologist |
| Balance changes affecting walking | Within 1-2 weeks | Orthopedist |
| Leg weakness after injury | Immediate (Emergency Room) | ER physician + orthopedist consult |
| Difficulty breathing | Immediate (Emergency Room) | ER physician |
Key Takeaway: Most scoliosis changes happen slowly. But sudden neurologic symptoms demand immediate attention. Trust your instincts.
Frequently Asked Questions About Scoliosis Self-Care
Can you get scoliosis from bad posture?
No, bad posture does not cause scoliosis. The American Academy of Orthopaedic Surgeons confirms that most scoliosis cases are idiopathic, meaning they have no known cause despite decades of research. Poor posture can certainly worsen existing scoliosis and create muscle imbalances, but it does not create the structural spinal curvature that defines the condition.
What exercises should you avoid with scoliosis?
Avoid exercises that compress your spine asymmetrically or force your curve into deeper rotation. This includes full sit-ups, crunches that twist to one side, heavy overhead presses, and extreme backbends or forward folds. Also avoid high-impact activities like trampolines, gymnastics, and contact sports if you have a curve exceeding 30 degrees.
How many minutes a day should you do scoliosis exercises?
The International Society on Scoliosis Orthopaedic and Rehabilitation Treatment (SOSORT) recommends 20 minutes of specific scoliosis exercises daily, with one rest day per week. This totals about two hours weekly. Quality matters more than quantity. Twenty minutes of correctly performed exercises beats an hour of poor form .
Can scoliosis self-care reduce your Cobb angle?
In adults, no. Self-care exercises cannot reverse existing spinal curvature. In growing adolescents, some studies show curve reduction of 5 to 10 degrees with dedicated physiotherapeutic scoliosis-specific exercises, though this depends on curve magnitude, growth remaining, and exercise consistency. For all ages, self-care reliably reduces pain and slows progression but rarely straightens the spine.
What sleeping position is worst for scoliosis?
Stomach sleeping is the worst position for scoliosis. It forces your neck into rotation for hours, flattens the normal curve in your lower back, and places your thoracic spine in excessive extension. People with scoliosis who sleep on their stomachs report higher pain scores and more rapid curve progression than back or side sleepers.
How do you know if your scoliosis is getting worse at home?
Monitor your shoulder height difference monthly using photos from the same spot and clothing. Note changes in waist symmetry, rib hump prominence during the forward bend test, and clothing fit issues like bra straps slipping or pants twisting. Keep a symptom journal tracking pain, fatigue, and functional limitations. Any consistent change across multiple indicators warrants a standing X-ray.
Your spine works with you every day. It holds you up, lets you move, and protects your nervous system. Scoliosis self-care is how you return that favor. Twenty minutes of exercises each morning. A few posture checks throughout the day. One mirror glance before bed. Small actions that multiply into less pain, more energy, and confidence that you are doing everything you can.
Start with one change this week. Pick the single habit that seems most doable, whether that is the morning cat-cow stretches, the knee pillow for sleeping, or the hip hinge for lifting. Master that one thing. Then add another. By this time next month, you will have built a self-care foundation that supports your spine for years to come. You have got this.