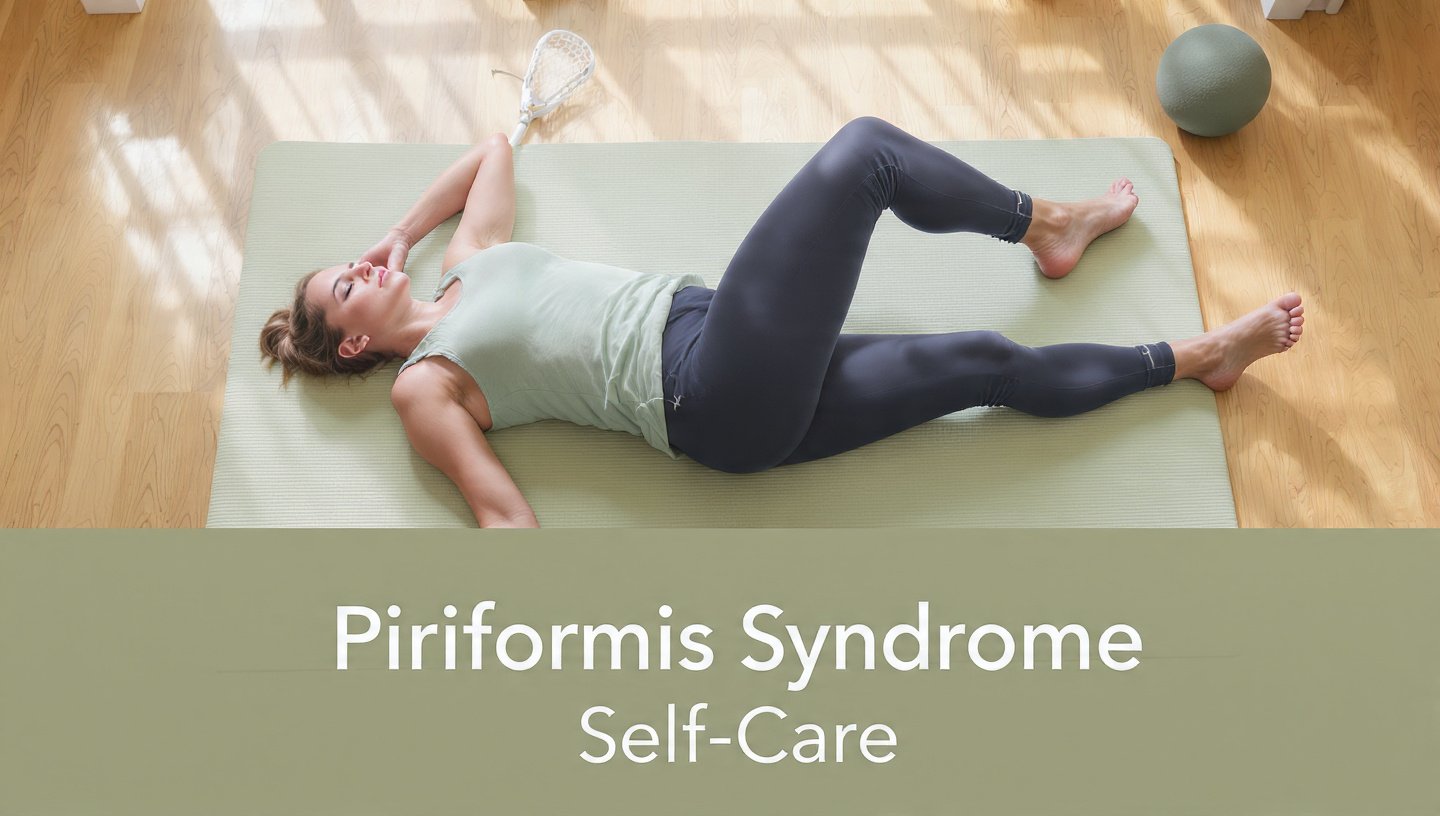
Piriformis Syndrome Self-Care: A 2026 Guide to Sciatic Pain Relief at Home
Piriformis syndrome self-care is the strategic use of targeted stretches, nerve glides, and strengthening exercises to relieve a tight piriformis muscle compressing your sciatic nerve. The right at-home approach, built on muscle release and nerve mobility, often provides more lasting relief than simply resting and waiting for the pain to pass.
The piriformis is a small, deep muscle in your buttock responsible for rotating your hip outward. When it becomes tight or spasms, it can clamp down on the nearby sciatic nerve, creating a literal pain in the backside that can radiate down your leg. A 2024 review in the Journal of Orthopaedic & Sports Physical Therapy reinforced that conservative management, centered on specific physical therapy and self-care protocols, is the first-line and most effective treatment for this neuromuscular condition.
What you will find here is a practical, evidence-informed sequence of actions. We will map out the difference between piriformis syndrome and other sciatica, pinpoint the daily habits that cause flare-ups, and walk you through a specific progression of stretches, nerve flossing, and muscle activation drills that move you from pain relief to long-term resilience.
what is piriformis syndrome self-care
Piriformis syndrome self-care is a personalized program of home-based techniques designed to reduce the compression of the sciatic nerve by the piriformis muscle. This approach shifts you from being a passive sufferer to an active participant in calming your nervous system, releasing muscle tension, and correcting the biomechanical imbalances that perpetuate the pain cycle.
The core of this self-care practice rests on three interconnected pillars: muscle relaxation, nerve mobility, and dynamic re-strengthening. Muscle relaxation uses sustained positional stretches and self-massage to quiet a hypertonic, or overly tight, muscle. Nerve mobility involves specific, gentle movements called nerve flossing to coax the sciatic nerve to glide freely within its sheath without being snagged or stretched beyond its tolerance.
Dynamic re-strengthening addresses the root cause for many people: gluteal amnesia. This occurs when the larger gluteus maximus muscle becomes inhibited and fails to do its job, forcing the small piriformis to work overtime. According to pain neuroscience education models, understanding this mechanism also reduces the threat perception of the pain itself, calming an over-protective nervous system.
| Self-Care Pillar | Primary Goal | Example Technique |
|---|---|---|
| Muscle Relaxation | Reduce resting tone and trigger point activity in the piriformis | Sustained supine piriformis stretch, lacrosse ball trigger point release |
| Nerve Mobility | Restore pain-free gliding of the sciatic nerve | Seated sciatic nerve flossing (slump-sit variations) |
| Dynamic Strengthening | Re-engage inhibited gluteal muscles to reduce piriformis overload | Side-lying clamshell with proper pelvic alignment |
piriformis syndrome vs sciatica
Piriformis syndrome refers to a neuromuscular disorder where the piriformis muscle irritates or compresses the sciatic nerve, while sciatica is a broader term describing symptoms of pain, numbness, and tingling radiating along the path of the sciatic nerve. The critical distinction is that sciatica is a symptom, and piriformis syndrome is one of several possible causes.
The most common cause of sciatica is a compressive spinal issue, such as a herniated lumbar disc or spinal stenosis. This is radicular pain that originates at the nerve root near the spine. Piriformis syndrome, on the other hand, is an entrapment neuropathy that occurs outside the spine, deep in the buttock. The location of the problem dictates entirely different self-care strategies; a forward-bending stretch that helps a disc issue could seriously flare up an irritated piriformis-nerve complex.
A 2017 clinical commentary in the Journal of Orthopaedic & Sports Physical Therapy highlighted that no single physical test definitively diagnoses piriformis syndrome. A skilled clinician uses a cluster of findings from your history and specific movement tests to rule out the lumbar spine. Your self-care plays a diagnostic role here: if you can consistently pinpoint your deepest pain to the buttock just lateral to the sacrum, and spinal bending movements don’t alter it, the piriformis is a primary suspect.
- Your pain is reproduced by sitting on a hard surface or with a thick wallet in a back pocket.
- Passive external rotation of the hip, such as by letting the foot fall outward when lying on your back, eases the pain.
- Deep palpation in the center of the buttock recreates your familiar pain down the leg.
- Straight leg raise pain occurs primarily below 45 degrees of elevation.
- You have no imaging evidence of a new disc herniation that matches the pain pattern.
what causes piriformis syndrome to flare up
A piriformis syndrome flare-up is most commonly triggered by an abrupt increase in activities that overload the muscle while it is in a shortened or overworked state. The classic and most pervasive trigger is the sustained hip-flexed, outwardly rotated position of prolonged sitting, which traps the muscle in a chronically shortened state for hours each day.
Another major cause is a sudden spike in training intensity without adequate preparatory strengthening. Think of the weekend warrior who hikes a steep trail or the runner who adds too many miles too quickly. The underpowered gluteus maximus fatigues, offloading its workload onto the smaller, synergistic piriformis. This muscle then tightens as a protective response to the novel strain, leading to spasm and nerve compression.
Gait and structural mechanics can also set the stage for a flare-up. Overpronation, where the foot rolls inward excessively, forces the entire leg into internal rotation. The piriformis, an external rotator, has to contract harder and longer to counteract this force with every step you take. This creates a repetitive strain injury pattern that can simmer silently before erupting into full-blown nerve pain after what seems like a trivial trigger, like a long car ride.
- Prolonged sitting on hard or uneven surfaces without a supportive cushion.
- Starting a new exercise routine with excessive lunging, squatting, or hill running.
- A direct fall on the buttock or a sudden twisting injury.
- Consistently carrying a child on one hip, which forces one piriformis into a constant short-hold.
- Worn-out, unsupportive shoes that alter your natural gait mechanics.
Key Takeaway: The most important diagnostic differentiator is that piriformis pain is deeply localized in the buttock and is often reproduced by direct sitting pressure, whereas generalized sciatica from the spine is more often affected by coughing, sneezing, or bending forward.
piriformis syndrome stretches
The most effective piriformis syndrome stretches create a gentle, targeted pull directly in the center of the buttock without provoking a surge of nerve pain down the leg. Your goal is to lengthen a tight muscle, not to stretch an already sensitized and irritated sciatic nerve. The difference is felt in the location of the sensation: muscle stretch feels local and dull; nerve stretch feels sharp, electric, and distal.
The supine figure-four stretch is the foundational starting point for most people. You perform this by lying on your back with both knees bent. Cross one ankle over the opposite knee, creating a figure-four shape, then reach through the opening to pull the uncrossed thigh toward your chest. The Journal of Orthopaedic & Sports Physical Therapy notes that this position targets the piriformis directly by flexing and adducting the hip, which is the exact movement combination that lengthens the muscle most effectively.
Hold the stretch for a sustained 30 to 60 seconds, breathing deeply and rhythmically into your belly. A common mistake is to crank the knee aggressively toward the opposite shoulder, which can shear the sacroiliac joint. Think instead of keeping your hips level on the floor and drawing your thigh directly toward your torso until you feel a distinct local stretch in the rear hip, then stop. No back pain. No leg zinging.
| Stretch Name | Position | Key Action & Sensation Goal |
|---|---|---|
| Supine Figure-Four | Lying on back | Pull uncrossed thigh toward chest; feel localized buttock stretch |
| Seated Figure-Four | Seated in chair | Place ankle on opposite knee; hinge forward from hips with a flat back |
| Long-Sit Piriformis Stretch | Sitting on floor, legs extended | Cross one leg over the other, pull the crossed knee toward opposite shoulder gently |
| Standing Piriformis Stretch | Standing, using a desk for support | Cross the painful side’s ankle over the standing thigh and slowly sit back into a mini-squat |
nerve flossing for piriformis syndrome
Nerve flossing for piriformis syndrome is a gentle, rhythmic exercise technique designed to free the sciatic nerve from adhesions around the tight piriformis muscle by gliding it smoothly back and forth within its neural pathway. When the nerve is irritated, sustained stretching can worsen the compression and pain, so flossing is often a safer and more effective first step than aggressive static stretches.
The sciatic nerve is not just a static cable; it needs to slide freely between its interfaces, like a string moving through a pulley, as your body moves. A 2023 systematic review in the Journal of Orthopaedic & Sports Physical Therapy on neurodynamic techniques found evidence supporting neural mobilization for reducing nerve mechanosensitivity in lower limb entrapment neuropathies. The key is to move two joints in a coordinated way that lengthens the nerve bed at one end while shortening it at the other, creating a “pumping” action.
To perform a basic seated sciatic nerve glide, sit tall on the edge of a chair. Slump your spine gently and tuck your chin down to tension the entire neural pathway. Then, while holding that head position, slowly extend your painful leg straight out until you feel the very first hint of a stretch or tingle in the back of your leg, then immediately drop your foot back down. This alternating motion of knee extension with neck flexion, and knee bending with neck extension, glides the nerve without trapping it.
- Sit on a firm chair with knees bent and feet flat. Keep your back comfortably rounded.
- Slowly tuck your chin to your chest to engage the proximal nerve.
- Extend one leg straight out, pointing your toes back toward your shin, only to the point of gentle pull.
- Immediately return the foot to the floor and lift your chin, sliding the nerve in the opposite direction.
- Perform 10 to 15 smooth, slow oscillations once daily, stopping immediately if pain worsens.
Key Takeaway: If a stretch sends a sharp, electric sensation down your leg, you are pulling on an angry nerve, not a muscle. Stop that movement immediately and switch to the gentler motion of nerve flossing, which moves the nerve without stretching it to its end range.
piriformis syndrome massage
Piriformis syndrome massage is a self-administered manual therapy technique that uses sustained, pinpoint pressure on a hyper-irritable knot within the muscle to release the spasm. This process, known clinically as ischemic compression or trigger point release, works by temporarily blocking local blood flow to the taut band of muscle, forcing it to relax when the pressure is removed.
Your most effective tool for self-massage is not an expensive massage gun, but a simple, dense ball. A lacrosse ball provides the necessary firmness to penetrate the thick gluteal muscles and reach the deep piriformis underneath. Lie on your back with your knees bent, place the lacrosse ball under the painful side’s buttock, and slowly lower your body weight onto the ball, searching for a spot that feels like a sharp, deep ache that might refer a sensation down your leg.
When you locate that “sweet spot” of referred pain, hold still. Do not roll around aggressively. A study on trigger point compression found that a 30 to 90-second sustained hold at a pain tolerance of 7 out of 10 is sufficient to effectively deactivate a trigger point. Breathe deeply through the intense sensation. You should feel a gradual release, a melting of the knot, and a reduction in the local and referred pain within the minute. Release and move to a new spot.
- Use a lacrosse ball, not a tennis ball (too soft) or a massage gun (too diffuse for a deep pinpoint trigger point).
- Lie on your back on the floor, not a soft bed, to provide a stable surface.
- Find the spot of maximal tenderness and hold perfectly still for 30 to 90 seconds.
- Breathe slowly in through your nose and out through your mouth to down-regulate your nervous system.
- Stop immediately if you experience a sharp, electric increase in nerve pain down your leg—this means you are on the nerve itself, not the muscle.
foam rolling piriformis syndrome
Foam rolling for piriformis syndrome is best used as a broad, preparatory tool to warm and desensitize the surrounding larger gluteal muscles before specific trigger point work, rather than as the primary treatment for the piriformis itself. A foam roller’s large, diffuse surface area cannot effectively target a deep, small muscle that lies beneath the gluteus maximus; it primarily works on the overlying tissues.
Think of the foam roller as prepping the paint surface and the lacrosse ball as removing a specific splinter. Use the roller first to increase blood flow and reduce the resting tone of the gluteus maximus and medius. Sit on the roller with it crossing under your buttock. Cross the painful side’s ankle over the opposite knee in a seated figure-four position, which tilts your pelvis and exposes the deeper gluteal region.
Roll in slow, deliberate strokes from the top of your pelvic bone down to your sitting bone, spending no more than 30 seconds on this broader area. Your goal is not to grind the tissue until it bruises; it is to achieve a gentle, warm release that makes the environment more receptive. Then, you transition from the foam roller directly to the lacrosse ball for the precise, sustained piriformis trigger point release that will yield a therapeutic change.
| Tool | Primary Target | Best Use & Technique |
|---|---|---|
| Foam Roller | Gluteus maximus, gluteus medius | Broad, general warm-up; 30-45 seconds of slow, whole-muscle rolling |
| Lacrosse or Therapy Ball | Piriformis, deep hip rotators | Specific trigger point release; 30-90 second pinpoint sustained holds |
| Tennis Ball | Gluteus medius, tender points | A gentler starting point if a lacrosse ball is too intense initially |
heat or ice for piriformis syndrome
Heat therapy is typically the most effective self-care tool for loosening a chronically tight piriformis muscle, while ice is reserved for acute, fresh injury flare-ups with sharp, inflammatory nerve pain. The choice hinges on what is driving your current symptoms: muscle spasm calls for heat, while acute nerve inflammation calls for ice.
A tight, spasmed muscle responds well to moist heat because it increases localized blood flow, which delivers oxygen and nutrients while flushing out metabolic waste products that accumulate in trigger points. Apply a moist heat pack, or soak in a warm bath, for 15 to 20 minutes. The American Academy of Orthopaedic Surgeons supports using heat to relax muscles before stretching, as it makes the tissue more pliable and receptive to lengthening, thus increasing the effectiveness of your subsequent piriformis stretches.
Ice is a nerve analgesic. If you’ve just experienced a traumatic flare-up from a fall or a sudden awkward movement and the pain down your leg is searing and hot, use an ice pack directly over the buttock for 10 to 15 minutes. The cold acts as a local anti-inflammatory and slows the nerve’s pain signal transmission. A practical 2026 approach is to use ice for the first 24 to 48 hours of an acute flare, then transition entirely to moist heat before performing your self-care routine.
- Use moist heat for 15-20 minutes before stretching to improve muscle extensibility.
- Apply a cloth-wrapped ice pack for 10-15 minutes to calm an acute, searing nerve pain flare.
- Never sleep with a heat or ice pack on your skin.
- Monitor skin condition closely; people with diabetes or neuropathy should check with a healthcare provider before applying heat or ice due to altered skin sensation.
Key Takeaway: A foam roller is your broad-stroke warm-up tool for the larger glute muscles, but the deep, transformative release of the piriformis itself requires the pinpoint, sustained pressure of a small ball.
sitting with piriformis syndrome
Sitting with piriformis syndrome requires a proactive strategy to float the central buttock, where the sensitive muscle and nerve are located, above the seat surface to relieve direct compression. The goal is to transfer your sitting weight to the back of your thighs and your sitting bones, the ischial tuberosities, which are positioned slightly medial and distal to the tight, sensitive belly of the muscle.
The “wallet in the back pocket” effect is the classic aggravator. Sitting on a thick object creates a focal point of high pressure that compresses the piriformis directly onto the sciatic nerve. The immediate, non-negotiable self-care step is to remove your wallet, phone, or any other object from your back pockets and never sit on them. A simple shift of these items to a front pocket or jacket can break a chronic pain cycle.
A specialized seat cushion or a strategically rolled towel is your best tool here. A coccyx cushion, which is a wedge-shaped cushion with a cutout at the back, removes pressure from the central posterior region. An even simpler fix is to sit on a firm but cushioned surface and roll a small, soft hand towel into a log. Place the towel roll directly under the back of both thighs, just behind the sitting bones. This tilts your pelvis forward slightly, lifting the piriformis area off the chair and encouraging an upright, spine-axial posture.
- Place a small towel roll under the back of your thighs, not directly under your buttock, to tilt your pelvis and offload the piriformis.
- Use a wedge or coccyx cushion with a cutout to remove direct central pressure.
- Set a 30-minute movement alarm; no sitting marathon is healthy for this condition.
- Position your hips slightly higher than your knees to minimize deep hip flexion.
glute strengthening for piriformis syndrome
Glute strengthening for piriformis syndrome specifically targets the gluteus maximus and medius to treat the underlying cause of many cases: the weakness and underactivity that force the small piriformis to chronically overcompensate. The corrective exercise principle is to first reawaken the sleeping glute with low-load, high-awareness moves before adding resistance.
The foundational activation drill is the side-lying clamshell, but it must be performed with a precise mental focus that most people miss. Lie on your side with your knees bent and heels together. The critical rule is to isolate the hip movement. Do not rock your pelvis backward or let your trunk roll open. Place your thumb on your gluteus maximus and your fingers on your gluteus medius. Slowly open your top knee like a clam, feeling the contraction under your fingers, while your pelvis remains perfectly still. A 2022 study in the Journal of Sport Rehabilitation confirmed that this conscious, biofeedback-driven clamshell generates higher and more targeted gluteal activation than mindless repetitions.
Progression from there must be slow and methodical. Once you can perform 20 clean, cramp-free clamshells without your piriformis kicking in to help, you can advance to bridges and lateral band walks. The single most important rule is this: any glute exercise that reproduces your buttock or leg nerve pain is being performed incorrectly or you are not ready for it. The piriformis is trying to do the job because the glutes are still offline. Regress the movement, reduce the range of motion, and re-establish the gluteal contraction before proceeding.
- Side-lying Clamshell: Lie on your side, knees bent to 45 degrees. Perform 15-20 reps, opening only as far as you can without pelvic rotation.
- Bilateral Glute Bridge: Lie on your back, knees bent. Squeeze your glutes to lift your hips, not your low back. Lower slowly. Perform 10-12 reps.
- Seated Hip Hinge with Band: Sit on a chair with a small resistance band above your knees. Press knees outward against the band, hinging your torso slightly forward to feel glute medius burn. Perform 15 reps.
piriformis syndrome exercises
A complete piriformis syndrome exercise program moves beyond simple stretching to a phased progression of muscle activation, nerve gliding, and functional strength integration. The sequence is critical: first, release the tight muscle; second, glide the sensitive nerve; third, activate the weak, compensating muscles in isolation; and finally, integrate those new patterns into dynamic, whole-body movements like a squat.
The transition to integrated exercises often fails because the brain has neurologically “forgotten” how to use the glutes. This is a motor control deficit, not just a strength deficit. An exercise like the single-leg mini-squat is a perfect test. Stand on one leg, facing a mirror. As you perform a very small, shallow squat, watch your pelvis. It must stay level. If the opposite hip drops dramatically, your gluteus medius is not stabilizing your femur, and the piriformis will be recruited to help, defeating the entire purpose of the exercise.
Your progression over 4 to 6 weeks must be guided by symptoms and form quality, not by a rigid schedule. If a new exercise causes a flare-up lasting more than 24 hours, you progressed too soon. The 2021 physical therapy clinical guidelines for piriformis syndrome advocate for an impairment-based approach. This means you self-correct your chosen exercises daily based on what your body tells you: use a stretch or nerve glide for a tight, painful day, and a strengthening drill for a pain-free, stiffer day.
| Exercise Phase | Objective | Exercise Example |
|---|---|---|
| Phase 1: Release & Calm | Reduce pain and muscle spasm | Lacrosse ball release, supine figure-4 stretch |
| Phase 2: Mobilize & Glide | Restore pain-free nerve motion | Seated sciatic nerve flossing |
| Phase 3: Isolate & Activate | Re-engage inhibited glutes | Clamshell with biofeedback, seated hip hinge |
| Phase 4: Integrate & Load | Build functional strength | Single-leg shallow squat, lateral band walk |
piriformis syndrome yoga
Piriformis syndrome yoga is a careful selection of specific poses that stretch the deep hip rotators without provoking nerve pain, paired with an explicit avoidance of forceful forward folds or deep twists that can compress the nerve further. A therapeutic yoga practice acts as a gentle, body-weight-based physical therapy session if approached with precision and awareness.
The safest and most accessible yoga pose is “Thread the Needle” or Supta Kapotasana, which is essentially a supine figure-four stretch. Lying on your back, you cross one ankle over the opposite knee and draw the legs in. The biomechanical target is the same as the clinical stretch, but the yoga context emphasizes a longer hold with diaphragmatic breathing, which activates the parasympathetic nervous system and reduces muscle guarding. Hold for 90 seconds, breathing into the local sensation.
Poses to be wary of are any that force the spine into deep flexion. A full, rounded seated forward fold like Paschimottanasana, when done with a tight, guarded body, can traction the sciatic nerve against an immobile piriformis. This is a classic cause of a yoga-induced flare-up. A study on yoga-related injuries noted that forced end-range spinal flexion is a common culprit. Instead, fold from a seated position with a straight spine, bending the knees deeply, to redirect the stretch away from the nerve and toward the lower back and gluteal muscles.
- Safe Pose (Modified Pigeon): Reclining Pigeon (Thread the Needle) on your back is safer than the prone full Pigeon pose, as it eliminates gravity’s compressive load on the hip joint and nerve.
- Safe Pose (Bound Angle): Baddha Konasana in a reclined position with a bolster under your spine opens the hips without pinching the piriformis.
- Pose to Avoid (Deep Seated Twist): A forceful Ardha Matsyendrasana can shorten one piriformis while trapping the nerve, creating direct compression.
Key Takeaway: An exercise that is too advanced for you will not feel like a “good burn” in the glute; it will reproduce your familiar nerve pain down the leg because the piriformis is still taking over the movement.
how to sleep with piriformis syndrome
The most protective sleeping position for piriformis syndrome is on your back with a substantial pillow placed directly under your knees, which tilts your pelvis backward and slackens the piriformis muscle. This neutral, spine-aligned posture prevents the hours-long, passive muscle shortening and nerve tension that can occur in other positions, meaning you wake up with less stiffness and morning pain.
Side sleeping on the non-painful side is the second-best option, but it requires a specific pillow placement to prevent the top leg from drifting into a position that internally rotates and shortens the piriformis. Place a full-length, firm body pillow between your knees and ankles. The pillow must be thick enough that your top thigh remains perfectly parallel to the mattress surface. Without it, the top leg will drop down, pulling the pelvis into a twisted position that torques the buttock.
The worst position is sleeping flat on your stomach. This forces the lower back into an extended arch and, crucially for the piriformis, places the feet and legs into a fully turned-out, externally rotated position. This is the exact position that shortens the piriformis for 6 to 8 hours overnight. The American Chiropractic Association supports back or side sleeping for spinal health, and this guidance extends to protecting the deep hip muscles from a chronic, tension-maintaining posture while you sleep.
- Back Sleeping: Place one pillow under your knees, not too thick. This prevents the legs from flattening out and internally rotating.
- Side Sleeping: Sleep on your pain-free side with a thick, firm body pillow hugging the entire length of your legs, from knee to ankle.
- Back Sleeping Alternative: Place a small, rolled hand towel horizontally under your low back to support a slight arch if your pelvis naturally tucks under.
- Pre-Sleep Routine: Perform a 60-second supine figure-four stretch and a brief session of deep belly breathing immediately before settling into your sleeping position.
how to fix piriformis syndrome permanently
Fixing piriformis syndrome permanently requires a long-term commitment to correcting the neuromuscular and biomechanical drivers of the condition, not just treating the symptom of a tight muscle. A permanent fix is achieved when you have built a resilient, strong, and well-coordinated gluteal complex that automatically handles load without offloading the work to the piriformis.
This involves a shift in your identity from someone who does “rehab exercises” to someone who has fundamentally reprogrammed their movement patterns. The sciatic nerve entrapment was the alarm bell. Once you have silenced it with the release and glide work, the permanent structural repair is found in consistent, progressive strength training. This means mastering a pain-free, deep goblet squat with perfect form, gliding your hips back and keeping your chest proud, which grooves a healthy hip hinge pattern and trains the glutes to be the primary engine of your lower body.
Movement variety is the final key. The human body was not designed for a single plane of motion, like the forward-only stride of running and cycling. Permanently solving this involves incorporating consistent cross-body and lateral movement. This means integrating lateral lunges, monster walks with a resistance band, and even activities like recreational dance or tennis into your weekly routine. A 2025 review in the British Journal of Sports Medicine on gluteal tendinopathy, which shares many mechanical drivers with piriformis syndrome, emphasized that a varied, progressive loading program is superior for long-term outcomes and preventing recurrence compared to isolated, low-load exercises.
- A pain-free, deep goblet squat signals you have achieved the necessary hip and glute mobility and motor control.
- You can sit for a 3-hour car ride without adjusting your position or feeling a deep, aching nerve twinge.
- A weekly program of lateral and multi-planar leg strengthening has fully replaced your old forward-dominant exercise routine.
Key Takeaway: A permanent fix is achieved not when you feel better for a week, but when you can perform a deep squat without pain, signaling that your glutes have finally learned to be the primary mover of your lower body.
piriformis syndrome walking
Walking with piriformis syndrome can be a gentle, therapeutic lubricant for the sciatic nerve or a repetitive-strain irritant, and the difference lies entirely in your stride length, speed, and glute activation strategy. The goal is to use a short, intentional stride that minimizes the hip’s extension and rotation demands on a tight piriformis.
When you walk with a long, over-striding gait, your trailing leg extends far behind you, which simultaneously stretches the hip flexors and compresses the hip external rotators, including the piriformis. With every long stride you take, you are forcefully stretching and irritating a muscle that is already in a protective, tightened state. Shorten your stride deliberately by about 20 percent of your normal length. This feels initially unnatural, like taking baby steps, but it mechanically reduces the stretch load on the deep hip muscles.
The second non-negotiable is a conscious, gentle contraction of your gluteus maximus at the moment of push-off. Do not let your leg just trail back passively. Think of squeezing a sheet of paper between your buttock cheeks for a fraction of a second as your back leg prepares to leave the ground. This small motor control cue activates the glute to do the work of propulsion, preventing the piriformis from stepping in as the dominant hip extender. Walk for a time limit based on symptoms, not distance. Stop walking when you first notice a change in your gait, a limp, or an increase in nerve symptoms, not when you reach your pre-set target.
- Shorten your stride by 20% to reduce the terminal hip extension that provokes the muscle.
- Walk on softer, flat surfaces like a packed dirt trail or track rather than banked concrete or sand.
- Actively squeeze your glute at the push-off phase to ensure the major muscle is doing the work.
- Wear supportive, non-worn footwear; a collapsed shoe with no arch support promotes the overpronation that overworks the piriformis.
piriformis syndrome self-care at work
Piriformis syndrome self-care at work is a micro-dosing strategy of posture resets, seated nerve glides, and strategic cushioning integrated into your desk-bound day to interrupt the compression cycle before pain escalates. The modern workplace, built around the chair, is a hostile environment for this condition, and your defense is pre-planned movement variety.
The sit-to-stand desk is a powerful therapeutic tool if used with a specific, piriformis-conscious protocol. Standing, even perfectly still, removes the direct compression of sitting. However, simply standing for hours creates its own static loads. The most effective 2026 approach is a 20-10-20 desk cycling protocol: 20 minutes of sitting on your wedge cushion with perfect pelvic tilt, followed by 10 minutes of standing with a glute medius-focused stabilization exercise, and 20 minutes of standing work with your feet on a slight anti-fatigue mat. The variation itself is the therapeutic agent.
The hidden desk exercise that can be done in any meeting is an invisible glute contraction. Whether sitting or standing, perform a slow, 10-second maximum isometric squeeze of both glutes. Do not let your pelvis thrust forward. Just cinch the muscles in isolation, hold, and slowly release. Perform 10 repetitions of this contraction every hour. This drill fires the sleeping glute, increases local blood flow, and neurologically checks in with a muscle that the brain has been ignoring while you focus on your computer screen.
- Replace a standard office chair with a coccyx or wedge cushion, and remove your wallet or phone from your back pocket permanently.
- Use a 20-minute sit, 10-minute stand movement rotation to prevent static compression overload.
- Perform invisible glute contractions (10 reps of a 10-second hold) at the top of every hour.
- Under your desk, quietly perform the seated sciatic nerve glide (10 smooth, slow repetitions) two times per afternoon.
Key Takeaway: The most powerful desk-based intervention is not a single gadget, but a consistent, hourly behavioral interruption of the sitting position, using a 20-minute sit, 10-minute stand cycle to prevent the muscle from ever locking into a static short position.
Frequently Asked Questions About Piriformis Syndrome Self-Care
Can I run with piriformis syndrome?
You should stop running entirely during the acute, painful phase of piriformis syndrome, as the repetitive hip extension and impact will continually re-irritate the compressed nerve.
A safe return-to-run protocol begins after you have been pain-free with all daily activities and walking for at least one week.
When you resume running, start with a walk-run protocol of 1 minute of running to 4 minutes of walking, and immediately stop if your stride shortens or the deep buttock pain returns.
How long does piriformis syndrome last with self-care?
With consistent, correctly applied self-care focused on muscle release, nerve gliding, and glute strengthening, significant symptom reduction can occur within 4 to 6 weeks.
Stubborn cases that have been present for several months may take 3 to 6 months of dedicated rehabilitation to fully resolve the chronic muscle spasm and sensitized nerve pathway.
The recovery timeline is entirely dependent on accurately identifying and eliminating your specific daily triggers, especially the unconscious habit of prolonged, uninterrupted sitting.
What is the fastest way to fix piriformis syndrome?
The fastest way to reduce the acute pain of piriformis syndrome is a two-step sequence of a 15-minute moist heat application followed by a very gentle, 30-second lacrosse ball hold on the central buttock trigger point.
Avoiding aggressive deep tissue massage or prolonged aggressive stretching is critical because these can inflame the already hyper-sensitized sciatic nerve and prolong your recovery.
Pair this immediate release with a zero-wallet-back-pocket rule and a wedge cushion for sitting, as removing the constant compression provides the quickest environmental relief.
Is walking good for piriformis syndrome?
Yes, walking can be therapeutic when performed with a deliberately shortened stride and a conscious gluteal squeeze at the push-off of each step.
Walking becomes harmful, and a flare-up trigger, when you over-stride with a long, fast gait that forces your hip into deep extension and tugs on the tight, spasmed muscle.
If you develop a limp or the nerve pain increases after only 10 minutes, you must temporarily reduce your walking time and focus solely on non-weight-bearing nerve gliding and muscle release exercises.
Does piriformis syndrome go away on its own?
Piriformis syndrome rarely resolves permanently on its own without active intervention because it is usually driven by persistent, underlying biomechanical issues like gluteal weakness and chronic sitting postures.
A very mild, acute flare-up might calm down with a few days of rest, but the muscle imbalance that caused it remains, setting the stage for a recurring cycle of pain.
Active self-care, specifically the progressive loading of the gluteus maximus and medius, is required to address the root cause and create a lasting solution.
Can a chiropractor fix piriformis syndrome?
Yes, a licensed chiropractor with a specialty in sports medicine or soft tissue therapy can effectively treat piriformis syndrome, particularly when the root cause involves sacroiliac joint dysfunction or a pelvic misalignment pattern that drives the muscle tightness.
Chiropractic care often combines manual adjustments of the sacroiliac joint with deep soft tissue release techniques, like Active Release Technique (ART), directly to the piriformis muscle, which can be difficult to release on your own.
Your self-care program is the essential counterpart to this professional care, as the adjustments will not hold if you return to the same sitting and movement habits that created the muscle spasm in the first place.
Your path through piriformis syndrome self-care depends on understanding one thing: your pain is not a mystery. It is a solvable biomechanical equation. The muscle is tight because it is overworking. It is overworking because larger muscles are underworking. The nerve is angry because it is compressed. Release the muscle, glide the nerve, and wake up the sleeping glutes. That is the sequence. Start with the simple supine figure-four stretch and the seated nerve glide tonight on your living room floor.
Do not chase massive, immediate changes. The piriformis is a deep, stubborn muscle that responds to consistent, gentle, and precisely targeted pressure over weeks, not one aggressive hour of foam rolling. Monitor your sitting posture with the same diligence you would use to track a food diary. Remove that wallet. Set that 30-minute movement alarm. Use the towel roll in your car. These small, boring, and relentlessly consistent environmental fixes carry the heavy load of your recovery.
You have the exact tools you need right now. The most advanced technology required is a wall, a floor, and a lacrosse ball. Trust the progression. When the acute pain quiets, become relentless about strengthening your glutes. That is where the permanent fix lives. Build a body where your piriformis is just a small, quiet stabilizer again, and not the loud, painful protagonist of your every movement.