Ingrown Toenail Self-Care: Home Treatment Steps (2026)
An ingrown toenail happens when the edge of your nail plate grows into the surrounding skin, and most Stage 1 cases can be managed safely at home with a specific soaking, lifting, and bandaging routine. You do not need to dig into the nail sulcus or attempt bathroom surgery to fix this condition. The right self-care steps, applied consistently over 3 to 7 days, reduce inflammation, redirect nail growth, and give the nail fold tissue time to heal without the nail edge pressing into it.
According to the American Podiatric Medical Association, ingrown toenails (onychocryptosis) are one of the most common foot complaints seen in primary care and podiatry clinics, and improper at-home cutting technique is the leading contributor to both initial occurrence and recurrence. The condition is not just a cosmetic nuisance. When a nail plate penetrates the lateral nail fold, it creates a wound that can progress from localized inflammation to bacterial infection and, in advanced cases, to the formation of granulation tissue that requires surgical removal. This matters because knowing which stage you are dealing with, and applying the correct protocol for that stage, determines whether your self-care efforts will succeed or fail.
This article walks you through the exact anatomy of what is happening inside your toe, the three clinical stages that tell you whether home treatment is safe for your case, and the complete step-by-step protocol for soaking, lifting, bandaging, and preventing recurrence. You will learn what concentration of magnesium sulfate (Epsom salt) to use, why water temperature matters more than most people realize, which topical antibiotic creams have evidence for periungual wounds, and the specific signs that mean it is time to see a podiatrist or board-certified dermatologist rather than continuing home treatment. Every recommendation here is grounded in podiatric clinical guidance, dermatological research, and the wound care principles that govern skin and nail apparatus healing.
What Causes Ingrown Toenail
An ingrown toenail develops when the distal corner or edge of the nail plate grows into the lateral nail fold, the soft tissue ridge that runs alongside each side of the nail. The primary mechanical cause is pressure mismatch: the nail edge acts as a foreign body driving into skin that has nowhere to go. The most common trigger across all age groups is improper nail trimming, specifically cutting the nail corners on a curve rather than straight across, which leaves a sharp edge or a small nail spicule buried in the lateral nail sulcus.
Tight footwear creates the second major causal pathway. Shoes with a narrow toe box compress the toes laterally, forcing the nail fold tissue against the nail plate edge. The American Academy of Dermatology identifies pointed-toe shoes, high heels that shift body weight forward into the toe box, and athletic shoes sized too small as significant contributors to ingrown toenail development in both adolescents and adults. Pressure from footwear turns what might have been a minor nail irregularity into an active wound because the nail edge cannot grow past the compressed tissue without penetrating it.
Additional contributing factors include trauma to the toe (stubbing, dropping an object, repetitive pressure from running or soccer), genetic predisposition to naturally curved or involuted nail plates, and excessive sweating that macerates the periungual skin and makes it more vulnerable to nail edge penetration. Onychomycosis, or fungal nail infection, can thicken the nail plate and alter its growth trajectory, creating an irregular edge that presses into the nail fold. Some people simply inherit a nail matrix shape that produces a wider or more curved nail plate than their nail bed can accommodate, a structural mismatch that requires consistent prevention habits rather than one-time treatment.
| Causal Factor | Mechanism | Prevention Relevance |
|---|---|---|
| Curved nail cutting | Leaves sharp nail spicule in lateral sulcus | Cut nails straight across; never curve corners |
| Tight toe box footwear | Compresses lateral nail fold against nail plate edge | Choose shoes with wide toe box; thumb-width space beyond longest toe |
| Toe trauma | Direct force drives nail edge into surrounding tissue | Protective footwear during sports; prompt treatment of any nail injury |
| Genetic nail curvature | Nail matrix produces involuted nail plate wider than nail bed | Regular straight-across trimming; possible need for professional nail splinting |
| Hyperhidrosis (excess sweating) | Macerated periungual skin is softer, tears more easily at nail edge | Moisture-wicking socks; foot powder; shoe rotation for drying |
Quick Tip: If you trim your own toenails, cut them straight across and never shorter than the tip of the toe. Use a nail file to soften the sharp corners slightly after cutting. The goal is a nail edge that extends just past the lateral nail fold without diving into it.
Ingrown Toenail Stages
The Heifetz classification system, published in podiatric medicine literature and used by podiatrists and dermatologists to guide treatment decisions, divides ingrown toenails into three clinical stages. Knowing your stage is the single most important step in ingrown toenail self-care because Stage 1 is manageable at home, Stage 2 sits on the boundary where professional evaluation may be needed, and Stage 3 requires a podiatrist or dermatologist for surgical management.
Stage 1, the inflammatory stage, involves redness, mild swelling, and pain along the lateral nail fold. The skin is intact at the surface, though the nail edge has pierced into the tissue. There is no pus, no drainage, and no visible granulation tissue. The nail sulcus is inflamed but not infected. This stage responds well to the full home treatment protocol of warm Epsom salt soaks followed by gentle cotton wick elevation. According to the American College of Foot and Ankle Surgeons, the majority of Stage 1 cases resolve within 5 to 7 days when soaking and lifting are performed consistently.
Stage 2, the infectious stage, adds visible purulent drainage, increased swelling, and more intense pain to the Stage 1 presentation. The nail fold may appear yellowish or whitish where pus has accumulated. The infection at this stage is typically localized to the nail sulcus and has not spread into the deeper soft tissue of the toe. Some Stage 2 cases can still be managed with home treatment combined with topical antibiotic cream, but this is the threshold where professional evaluation becomes advisable, particularly if you have diabetes, peripheral neuropathy, or any immunocompromising condition.
Stage 3, the granulation tissue stage, represents chronic inflammation. The body has responded to the ongoing nail edge irritation by producing granulation tissue, a beefy red, moist, friable tissue that grows over and around the nail edge. This tissue bleeds easily and serves as a barrier between the nail edge and proper healing. At Stage 3, the nail edge cannot be elevated successfully at home because the granulation tissue physically obstructs access to the sulcus. A podiatrist or dermatologist typically needs to remove the granulation tissue, often with silver nitrate cauterization or surgical excision, and perform a partial nail avulsion to remove the offending nail segment.
| Stage | Clinical Features | Self-Care Appropriate? | Professional Referral |
|---|---|---|---|
| Stage 1 | Redness, swelling, pain; no pus; no granulation tissue | Yes, fully appropriate | Not required unless no improvement after 7 days |
| Stage 2 | Pus or drainage present; increased swelling and pain | Possible with caution; infection must remain localized | Advised if you have diabetes, neuropathy, or no improvement after 3 days |
| Stage 3 | Granulation tissue (red, moist, fleshy tissue) overgrowing nail edge | No; granulation tissue prevents effective nail elevation | Required; podiatrist or dermatologist for surgical management |
Key Takeaway: Stage 1 means proceed with home care. Stage 2 means proceed with caution and a shorter timeline for improvement. Stage 3 means stop home treatment and schedule a podiatry or dermatology appointment. The cotton wick technique cannot work if granulation tissue has already overgrown the nail edge.
Ingrown Toenail vs Paronychia
An ingrown toenail and paronychia are distinct conditions that can look similar and sometimes occur together, but they differ in cause, location, and treatment approach. An ingrown toenail is a mechanical problem: the nail plate penetrates the lateral nail fold. Paronychia is an infection of the periungual skin (the skin surrounding the nail) that may or may not involve nail plate penetration. Distinguishing between them matters because paronychia can occur without any nail ingrowth, and treating it purely with ingrown toenail techniques misses the infection component.
Acute paronychia develops rapidly, usually over hours to a day, and presents as a swollen, red, painful area along the nail fold that often contains a visible pocket of pus. It typically follows a break in the skin barrier, a hangnail pulled off, aggressive cuticle trimming, or nail biting. The most common bacterial culprit is Staphylococcus aureus, followed by streptococcal species. The key clinical distinction: paronychia sits superficial to the nail plate relationship. The nail itself may not be ingrown at all. An ingrown toenail, by contrast, always involves the nail plate edge embedded in the lateral sulcus. The pain from an ingrown toenail is usually provoked by pressure on the toe or the nail edge, while paronychia pain is often throbbing and present even without touch.
Chronic paronychia behaves differently. It develops over weeks and involves multiple nails or nail folds, often related to repeated water exposure, irritant contact dermatitis, or fungal colonization with Candida species. People who work with wet hands or feet (dishwashers, swimmers, healthcare workers, food handlers) are at higher risk. The nail fold becomes red, swollen, and thickened, with loss of the cuticle seal, but without the dramatic pus pocket of acute bacterial paronychia. Treatment for chronic paronychia focuses on barrier protection, antifungal therapy when fungal involvement is confirmed, and strict avoidance of moisture entrapment.
Think of an ingrown toenail as a nail problem causing skin irritation, while paronychia is a skin infection near the nail that may not involve the nail edge at all. The soaking and lifting protocol for ingrown toenails is appropriate for both conditions in their early stages, but paronychia with a frank abscess (a walled-off pus collection) requires incision and drainage by a healthcare provider, not home soaking alone.
Ingrown Toenail Infection Signs
Infection in an ingrown toenail begins in the nail sulcus, the narrow groove where the nail plate meets the lateral nail fold, and recognizing the signs early prevents progression from a localized wound to a deeper soft tissue infection requiring antibiotics or surgical intervention. The earliest infection sign is a change in drainage character: clear serous fluid shifts to cloudy, yellowish, or greenish pus. This pus may be visible at the nail edge or may ooze when gentle pressure is applied to the lateral nail fold.
Increased swelling that does not resolve between soaks is the second major indicator. In Stage 1 inflammation, swelling typically decreases after a warm soak as the osmotic effect of magnesium sulfate draws fluid from the tissue. When infection is present, the swelling persists or worsens because bacterial proliferation and the body’s immune response drive ongoing fluid accumulation and white blood cell recruitment. The toe feels warmer than the same toe on the opposite foot, and redness may begin to spread beyond the immediate nail fold onto the dorsal surface of the toe.
A 2022 review published in the International Journal of Dermatology identifies three systemic signs that, if present, mean the infection has spread beyond the toe: fever, red streaking extending from the toe up the foot (ascending lymphangitis), and enlarged, tender lymph nodes in the groin on the same side. These findings indicate cellulitis that has breached the local tissue boundary and entered the lymphatic system. This is no longer a self-care situation. A primary care physician, urgent care provider, or podiatrist must evaluate you promptly because systemic antibiotics may be needed to prevent progression to deeper infection.
| Infection Sign | What It Indicates | Action Required |
|---|---|---|
| Purulent drainage (yellow/green pus) | Bacterial proliferation in nail sulcus | Continue soaks; add topical antibiotic cream; monitor closely |
| Persistent or worsening swelling between soaks | Active infection driving ongoing inflammation | Evaluate for professional care if no improvement after 48 hours |
| Erythema (redness) spreading beyond nail fold | Early cellulitis extending into surrounding soft tissue | Seek podiatric or medical evaluation within 24 hours |
| Red streaking up the foot or leg | Ascending lymphangitis | Emergency or urgent care visit; systemic antibiotics likely needed |
| Fever, chills, or groin lymph node tenderness | Systemic infection | Emergency evaluation required |
Quick Tip: Use your phone camera to take a photo of the toe once daily at the same time, in the same lighting. Comparing images day to day gives you objective evidence of whether redness and swelling are improving, stable, or worsening. This is far more reliable than memory and helps you make a data-based decision about seeking care.
Key Takeaway: Clear or slightly blood-tinged drainage during the first 48 hours of treatment is normal and not a sign of infection. The transition from clear to cloudy to frankly purulent tells you bacteria have established themselves. If pus appears, do not stop soaking, but add topical antibiotic cream and shorten your timeline for professional evaluation to 48 hours if improvement is not obvious.
How to Treat Ingrown Toenail Yourself
Treating an ingrown toenail yourself involves a specific sequence of four steps performed once or twice daily: soak, lift, protect, and monitor. This protocol is appropriate for Heifetz Stage 1 ingrown toenails and carefully selected Stage 2 cases without spreading infection. The goal is to soften the nail plate enough to allow gentle elevation of the offending edge, reduce inflammation in the nail fold, and create a physical barrier between the nail edge and the tissue it has been penetrating.
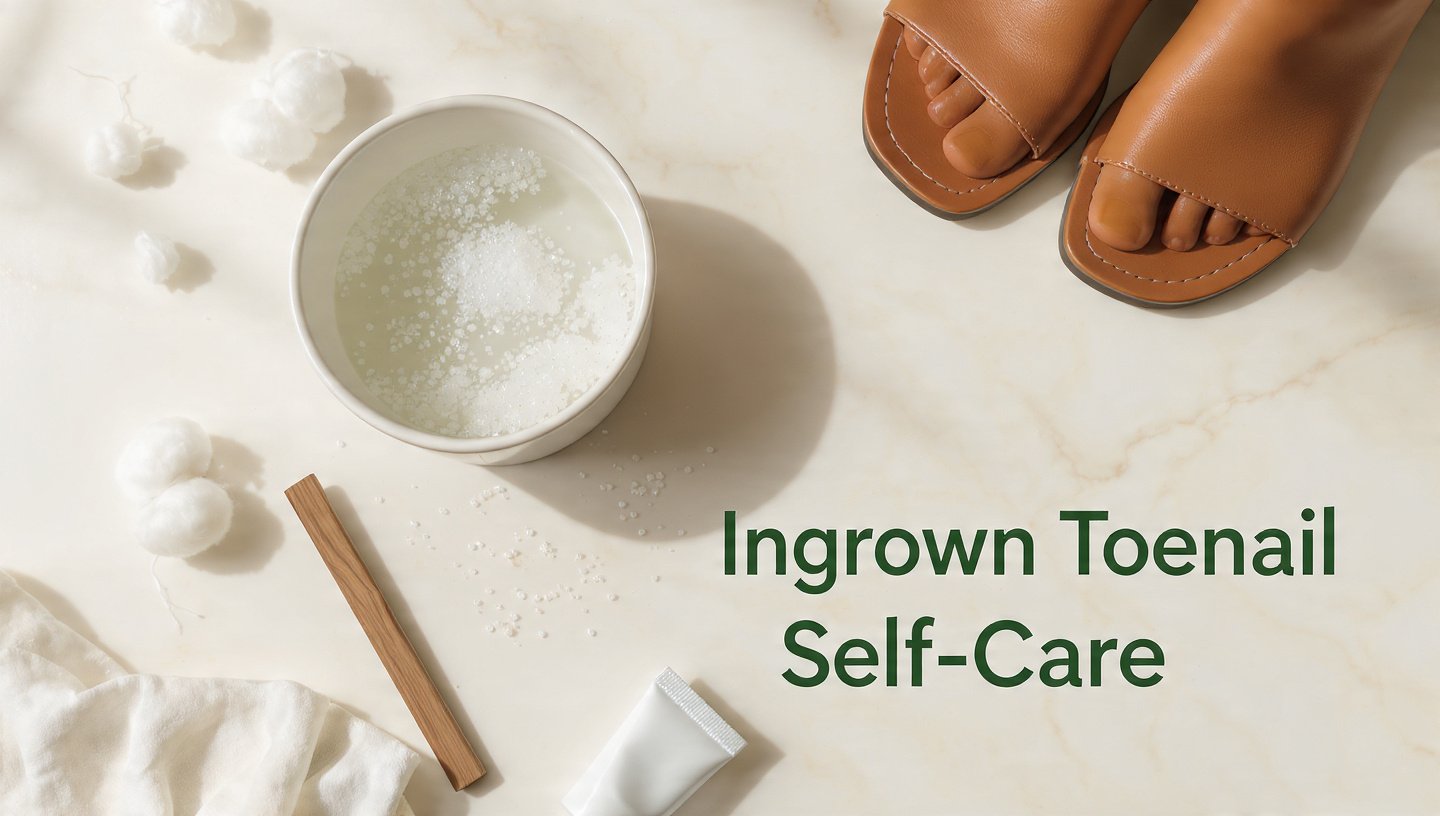
Before starting any home treatment, wash your hands thoroughly with soap and water for at least 20 seconds. Gather your supplies: a clean basin large enough to fit your foot, Epsom salt or plain warm water, clean cotton or sterile cotton wisps, a blunt-edged instrument for gentle elevation (a clean orange stick cuticle pusher or a specifically designed nail elevator tool), antibiotic cream if indicated, and a bandage. All tools that will touch the nail sulcus must be clean. The nail sulcus is a wound, even if it does not look dramatic, and introducing bacteria on a non-sterile tool can convert a Stage 1 situation into an infection.
The full treatment sequence follows this order: soak the foot for 15 to 20 minutes, dry thoroughly with a clean towel, gently lift the nail edge using a clean blunt tool, insert a small wisp of cotton or waxed dental floss under the lifted edge, apply antibiotic cream if any skin break is visible, and cover with a bandage. Do not skip drying. Macerated skin tears more easily and provides a better environment for bacterial and fungal growth. Do not attempt to cut out the ingrown portion. Your goal is elevation and redirection of the nail edge so it grows past the nail fold rather than into it.
The frequency question depends on your schedule and pain level. Twice daily soaks, morning and evening, provide the most consistent softening and inflammation reduction. Once daily is the minimum for effectiveness. Consistency over 5 to 7 days matters more than intensity on any single day. A single aggressive attempt to lift the nail will cause more trauma than five gentle, consistent attempts spaced across a week. Think of nail plate flexibility like leather softening: repeated exposure to moisture followed by gentle manipulation achieves the result gradually.
Soak for Ingrown Toenail
Soaking is the foundational step in ingrown toenail self-care because warm water softens the keratin structure of the nail plate, making it temporarily more flexible and easier to elevate, while simultaneously reducing edema in the inflamed nail fold through gentle heat-induced vasodilation and, when Epsom salt is added, osmotic fluid shift. The soak does three things at once: it prepares the nail for elevation, it reduces the swelling that makes the nail edge feel more embedded, and it cleanses the nail sulcus of debris and bacteria.
The water temperature range that achieves nail plate softening without causing thermal injury is 37 to 40 degrees Celsius (98.6 to 104 degrees Fahrenheit). Water hotter than 40 degrees Celsius risks burning the skin, particularly in people with diabetes or peripheral neuropathy who may not sense excessive heat. Water cooler than 37 degrees does not soften the nail plate effectively. Test the water temperature with a thermometer if you have any condition that affects sensation. If you do not have a thermometer, the water should feel comfortably warm on your wrist, not hot. The skin on your wrist is more temperature-sensitive than the skin on your feet.
Soak duration should be 15 to 20 minutes. Soaking for less than 10 minutes does not provide adequate nail plate hydration for meaningful flexibility change. Soaking beyond 25 minutes macerates the periungual skin excessively, making it fragile and more prone to tearing during the lifting step. Set a timer. The difference between 12 minutes and 18 minutes matters for nail flexibility. After soaking, dry the foot thoroughly with a clean, lint-free towel, paying particular attention to the spaces between the toes and the nail sulcus area. Residual moisture trapped against the skin promotes fungal growth and maceration.
The soaking solution options include plain warm water, Epsom salt solution, diluted povidone-iodine (Betadine), or a weak saline solution. The evidence for each varies. The American Academy of Dermatology recommends plain warm water or Epsom salt soaks as first-line. Povidone-iodine adds an antimicrobial component that may benefit Stage 2 cases with early infection. Dilute it to the color of weak tea, as full-strength povidone-iodine is unnecessarily strong and can be irritating. Avoid adding hydrogen peroxide to soak water. While hydrogen peroxide kills bacteria on contact, it also damages healthy granulation tissue and slows wound healing when used repeatedly.
Ingrown Toenail Epsom Salt
Magnesium sulfate heptahydrate (Epsom salt) added to a warm water soak provides an osmotic effect that draws excess interstitial fluid from the inflamed nail fold, reducing swelling and relieving the pressure sensation that makes an ingrown toenail feel like it is throbbing. The mechanism is straightforward: dissolved magnesium and sulfate ions create a solution more concentrated than the fluid in the swollen tissue. Water moves down its concentration gradient out of the tissue and into the soak water, shrinking the edema. This is the same osmotic principle that makes salt water soaks effective for other localized inflammatory skin conditions.
The correct concentration for ingrown toenail soaks is 2 to 3 tablespoons of Epsom salt per quart (approximately 1 liter) of warm water. This creates a roughly hypertonic solution without being so concentrated that it stings or dries the skin excessively. Using more does not improve results and may cause skin irritation. Using less does not achieve the osmotic gradient needed to meaningfully draw fluid from the nail fold. Dissolve the salt completely in the warm water before placing your foot in the basin. Undissolved crystals can be abrasive against already tender tissue.
According to a 2019 article in the Journal of the American Podiatric Medical Association, while the clinical use of Epsom salt foot soaks is well established in podiatric practice for edema reduction, the transdermal absorption of magnesium ions through intact skin is minimal. The benefit comes from the hypertonic environment, not from magnesium entering the body. This distinction matters because marketing claims about systemic magnesium absorption through foot soaks are not supported by evidence. The soak works locally on the toe, not systemically.
Dry your foot completely after the Epsom salt soak and rinse the skin with fresh warm water before drying if you have sensitive skin or eczema, as residual salt can be drying when left on the skin surface. People with diabetes should use Epsom salt soaks with the same temperature verification protocol they would use for plain water soaks. The salt does not change the thermal injury risk, and a foot that cannot sense heat is vulnerable to burns regardless of what is dissolved in the water.
| Soak Solution | Active Mechanism | Best For | Caution |
|---|---|---|---|
| Plain warm water | Nail plate softening, gentle cleansing | Stage 1 with minimal swelling | Least effective for edema reduction |
| Epsom salt (2 to 3 tbsp/quart) | Osmotic edema reduction, nail softening | Stage 1 and Stage 2 with swelling | Rinse skin after if sensitive or eczema-prone |
| Dilute povidone-iodine | Antimicrobial plus nail softening | Stage 2 with purulent drainage | Dilute to weak tea color; do not use if iodine-allergic |
| Saline (1 tsp salt/quart) | Mild osmotic effect plus cleansing | Stage 1 in people sensitive to Epsom salt | Weaker edema reduction than Epsom salt |
Key Takeaway: Epsom salt is the evidence-supported first choice for ingrown toenail soaks when swelling is present, but plain warm water is still effective for nail softening alone. The soak works by drawing fluid out of the tissue, not by putting magnesium into the body.
How to Lift Ingrown Toenail
Lifting the ingrown nail edge after soaking separates the nail plate from the nail fold tissue it has been penetrating and creates the space needed to insert a protective barrier. This step requires gentleness and patience, not force. The nail plate softens during the 15 to 20 minute soak, but it is still keratin, not putty. Attempting to pry the nail up aggressively will split the softened nail or tear the nail fold, creating a larger wound than you started with.
Begin with a clean, blunt-edged instrument. A wooden orange stick (cuticle pusher) that has been cleaned with soap and water, or a stainless steel nail elevator tool designed specifically for this purpose, works well. Sharp instruments, metal nail files, sewing needles, pocketknives, and tweezers with pointed tips should never enter the nail sulcus. They create puncture wounds, introduce bacteria, and turn a Stage 1 ingrown toenail into an infection or a nail matrix injury that permanently alters nail growth.
Slide the flat edge of the instrument gently under the ingrown corner of the nail, aiming to lift the nail edge just enough to clear the nail fold, typically 1 to 2 millimeters of elevation. Work from the free edge of the nail and slide toward the ingrown corner. Do not start at the side of the nail and try to lever it up from the side. The nail is most securely attached at the lateral sulcus, and side-levering rips the nail plate from the nail bed, a painful injury that can cause permanent nail dystrophy. If the nail edge does not lift easily, it may not be sufficiently softened. Soak for an additional 10 minutes and try again.
If the nail edge is truly embedded and cannot be elevated even after adequate soaking, this may indicate that you are dealing with a deeper Stage 2 or early Stage 3 situation where granulation tissue has already begun forming over the nail edge. Do not force it. Forcing an embedded nail causes more inflammation and may drive bacteria deeper. This is the point where a podiatrist visit is appropriate. A podiatrist has the tools and local anesthesia access to lift, trim, or partially remove the offending nail edge without traumatizing the nail bed.
Ingrown Toenail Cotton Method
The cotton wick technique, also called the cotton method, involves inserting a tiny wisp of clean cotton under the freshly lifted nail edge so it acts as a physical spacer between the nail plate and the nail fold. This single step, when done correctly after soaking and lifting, changes the mechanical relationship between nail and tissue. The nail edge, instead of pressing directly into inflamed skin, rests on a soft cotton cushion. The nail fold gets space to heal. Over several days of consistent wick placement, the nail gradually grows forward above the nail fold rather than into it.
Sterility of the cotton matters. Use sterile cotton wisps, sterile cotton balls from a sealed package, or cotton from a freshly opened bandage pack. The nail sulcus is a wound bed, and introducing bacteria-laden cotton from an open bathroom drawer can seed an infection. Do not use cotton balls that have been sitting out on the bathroom counter for weeks. Tear off a very small amount of cotton, roughly the size of a grain of rice or a few millimeters in length, and roll it gently between clean fingers into a thin wisp.
Slide the cotton wisp under the lifted nail corner using the same blunt instrument you used for lifting. Position it so it sits in the lateral nail sulcus, between the nail edge and the inflamed tissue. The cotton should be small enough that it does not create painful pressure and does not protrude so far that it catches on socks. You want just enough material to maintain the separation. Replace the cotton wisp with fresh, sterile cotton after each soak, which means twice daily if you are soaking twice daily. Leaving the same cotton in place for days allows it to become saturated with wound exudate and colonized with bacteria, defeating the purpose.
A 2018 study published in the Journal of the American Podiatric Medical Association on conservative ingrown toenail treatments found that the cotton wick method, when combined with consistent soaking and proper footwear modification, resolved approximately 70 to 80 percent of mild to moderate cases within 2 to 4 weeks. The key variable was consistent wick replacement, not initial technique. Patients who replaced the cotton daily had significantly higher resolution rates than those who left the same wick in place.
Ingrown Toenail Bandage Technique
Bandaging an ingrown toenail correctly after the cotton wick is placed serves three purposes: it holds the cotton in position, it protects the nail sulcus from sock friction and debris, and it keeps topical antibiotic cream in contact with any broken skin. The bandage technique most podiatrists recommend avoids wrapping the toe so tightly that circulation is compromised. A toe that turns white, blue, purple, or feels cold after bandaging is a toe with compromised blood flow.
Start with a clean, dry toe. Apply a thin layer of antibiotic cream if skin is broken. The cotton wick should already be in place under the lifted nail edge. Position a small adhesive bandage (standard fingertip or knuckle bandages work well) over the toe so the pad covers the ingrown side of the nail. Wrap the adhesive strips around the toe without pulling them tight. They should adhere to the skin but not indent it. If you see the skin on either side of the bandage bulging, the wrap is too tight.
For people who find adhesive bandages irritating to the surrounding skin or who have difficulty keeping bandages dry, a small piece of sterile gauze held in place with paper medical tape provides the same protection with less adhesive skin contact. The goal is coverage without constriction. Change the bandage after each soak, which again means twice daily if you are doing the full protocol twice daily. A wet or soiled bandage left in place creates the warm, moist environment that bacteria prefer.
A specific caution applies to overnight bandaging. If you tend to toss your feet under heavy blankets where they get warm and sweaty through the night, consider using a lighter bandage at night or, for Stage 1 cases without broken skin, leaving the toe unbandaged overnight after the evening soak to allow full air drying. The nail sulcus heals faster when it is not continuously moist. Daytime bandaging protects against shoe and sock friction. Nighttime air exposure promotes tissue repair.
| Bandage Type | Best Use | Avoid If |
|---|---|---|
| Standard adhesive bandage (fingertip or knuckle size) | Holding cotton wick in place, protecting sulcus from shoe friction | Circulation compromise if wrapped too tightly |
| Sterile gauze with paper medical tape | Sensitive skin that reacts to adhesive bandages; overnight coverage | Loose application that allows debris entry |
| Tubular gauze toe sleeve | Full toe protection with even pressure distribution | Wet environment; maceration risk if worn continuously |
| No bandage (air exposure) | Nighttime in Stage 1 with no broken skin | Open wound or antibiotic cream application requiring coverage |
Key Takeaway: Replace the bandage and cotton wick after every soak. A bandage should protect, not constrict. If the toe changes color or feels cold after bandaging, remove the bandage and reapply with less tension.
Ingrown Toenail Pain Relief
Pain from an ingrown toenail comes from two sources: the mechanical pressure of the nail edge pressing into inflamed, swollen tissue, and the inflammatory chemical mediators (prostaglandins, bradykinin, substance P) that sensitize nerve endings in the nail fold. Effective pain relief addresses both the mechanical trigger and the inflammatory cascade. The soaking and lifting protocol reduces the mechanical component. Anti-inflammatory strategies reduce the chemical component.
Over-the-counter nonsteroidal anti-inflammatory drugs (NSAIDs) such as ibuprofen or naproxen sodium taken orally according to package directions provide systemic pain relief by blocking cyclooxygenase (COX) enzymes that produce pain-sensitizing prostaglandins. These medications work on the inflammatory source of the pain rather than simply masking it. Acetaminophen (paracetamol) provides pain relief through a different central nervous system mechanism and reduces pain perception without the anti-inflammatory effect. For ingrown toenail pain specifically, ibuprofen or naproxen has the mechanistic advantage because the pain is predominantly inflammatory.
Topical pain relief options are limited for ingrown toenails because the nail plate blocks most topical agents from reaching the nail bed and surrounding tissue. Topical lidocaine creams applied to the nail fold surface may provide mild, temporary numbing but do not reach the deeper inflamed tissue effectively. Ice wrapped in a thin cloth and applied to the toe for 10 minutes following soaking can provide brief vasoconstriction and pain reduction, but ice should not be applied directly to skin and should not be used for extended periods on a toe with any circulatory compromise.
Footwear modification is an underappreciated pain relief strategy. Switching to an open-toed shoe, a sandal, or a shoe with a wide, deep toe box immediately removes the compression that drives the nail edge deeper into the nail fold. If you must wear closed shoes, choose the roomiest pair you own and remove the insole if needed to create more vertical space for the toe. Even a few hours without compression can significantly reduce the pain-producing pressure.
Ingrown Toenail Antibiotic Cream
Topical antibiotic creams become part of the ingrown toenail self-care protocol when the skin is broken at the nail sulcus, creating an entry point for bacteria. The nail sulcus is not sterile under normal conditions. It harbors bacteria, and once the skin barrier is disrupted, those bacteria can multiply in the wound. Applying an over-the-counter topical antibiotic after each soak reduces bacterial colonization and may prevent progression from Stage 1 inflammation to Stage 2 infection.
The three most common OTC topical antibiotic ointments are bacitracin, neomycin combined with polymyxin B and bacitracin (triple antibiotic ointment), and mupirocin (available only by prescription in the United States). Bacitracin alone provides coverage against gram-positive organisms, including Staphylococcus and Streptococcus species, the most common bacteria in ingrown toenail infections. Triple antibiotic ointment adds gram-negative coverage with polymyxin B and broader gram-positive coverage with neomycin. The trade-off: neomycin is a well-documented contact allergen, and approximately 10 percent of the population develops allergic contact dermatitis to neomycin with repeated use.
The FDA’s OTC topical antibiotic monograph supports bacitracin and the bacitracin-neomycin-polymyxin B combination for minor wound infection prevention. A 2016 Cochrane review on topical antibiotics for minor wounds found that topical antibiotics modestly reduce infection rates compared to placebo but noted that the absolute risk reduction is small in clean, well-cared-for wounds. For ingrown toenails specifically, the evidence is clinical consensus rather than large trials. Podiatrists generally recommend a thin layer of antibiotic cream applied to the nail sulcus after soaking and before bandaging when skin is broken.
Apply only a thin layer. Thick ointment application does not improve bacterial coverage and creates a greasy environment that prevents the wound from breathing. Petroleum jelly, which is not an antibiotic, can serve as a wound protectant and moisture barrier if you prefer to avoid topical antibiotics, though it does not address bacterial colonization directly. If you have used a topical antibiotic for 5 days and the wound is not improving or appears worse, discontinue use and see a podiatrist. Topical antibiotics do not treat established infection that has penetrated deeper tissue.
Ingrown Toenail Healing Time
Healing time for an ingrown toenail depends on the Heifetz stage at which treatment begins and the consistency of the home care protocol. Stage 1 ingrown toenails, with inflammation but no infection, typically show noticeable pain reduction within 48 to 72 hours of consistent soaking and cotton wick elevation. The nail fold swelling decreases over 3 to 5 days as the osmotic effect of the soaks draws edema fluid from the tissue. Complete resolution, meaning no pain, no redness, and the nail edge growing above the nail fold rather than into it, usually takes 7 to 14 days.
Stage 2 ingrown toenails with localized infection heal more slowly because the body must clear both the bacterial colonization and the inflammatory debris. With consistent soaking, topical antibiotic application, and cotton wick elevation, improvement is typically visible within 5 to 7 days. If no improvement occurs after 5 days of diligent home treatment, professional evaluation is indicated. Complete healing in Stage 2 may extend to 14 to 21 days. The cotton wick should be continued even after pain resolves because the nail edge needs time to grow past the nail fold, and removing the wick too early allows the edge to re-impinge.
The nail plate itself grows slowly. Toenails grow at roughly 1 to 1.5 millimeters per month, significantly slower than fingernails. This means the ingrown portion of the nail that has been embedded may take 2 to 3 months to grow fully past the nail fold, even after symptoms resolve. The cotton wick does not need to remain in place for that entire period. Once the nail edge has clearly cleared the nail fold and is growing forward without impingement, typically after 2 to 3 weeks, the wick can be discontinued. Prevention habits then take over as the primary management strategy.
Healing can stall or reverse if the inciting cause continues. If you soak, lift, and wick every day but continue wearing tight shoes that compress the toe, the nail fold keeps getting pushed against the nail edge, and healing will not progress. Footwear modification during the healing period is not optional. Open-toed or wide toe box shoes are part of the treatment, not a separate recommendation.
| Stage | Pain Reduction | Visible Improvement | Complete Symptom Resolution |
|---|---|---|---|
| Stage 1 | 48 to 72 hours | 3 to 5 days | 7 to 14 days |
| Stage 2 | 3 to 5 days | 5 to 7 days | 14 to 21 days |
| Stage 3 | N/A (professional care required) | N/A | Varies; typically requires surgical intervention |
Key Takeaway: Pain relief within 3 days is the sign that home treatment is working. If pain is unchanged or worse after 5 days of consistent protocol, the stage may be more advanced than you assessed, or an infection may be developing that requires professional care.
How to Cut Ingrown Toenail
Cutting an ingrown toenail correctly requires understanding one principle: the nail must be cut straight across, not curved at the corners, and it must be left long enough that the corners clear the lateral nail folds. The most common mistake in toenail cutting, cutting the nail on a curve that matches the toe shape, is also the primary cause of ingrown toenail development and recurrence. When you cut a curve into the nail corners, you leave a pointed edge or small nail spicule that, as the nail grows forward, pierces directly into the lateral nail fold.
Use a clean, sharp toenail clipper, not a fingernail clipper and not scissors. Toenail clippers have a straight or slightly curved cutting edge that is wider and stronger than fingernail clippers, allowing a clean straight cut across the nail without splintering the nail plate. Cut the nail straight across, leaving the corners square. The nail should extend just past the tip of the toe, with the corners visibly clear of the lateral nail folds. After cutting straight across, use a nail file to soften the sharp tip of each corner slightly, removing the needle-sharp edge without rounding the corner inward. The goal is a corner that is blunt but not curved.
If the nail is already ingrown at the time of cutting, do not attempt to cut out the ingrown portion. Cutting into the nail sulcus to dig out the embedded corner risks splitting the nail plate further, injuring the nail bed, introducing bacteria, and leaving behind a smaller, sharper nail fragment that will cause more trouble as it grows. Treat the ingrown portion with the soaking and lifting protocol first. Wait until the nail edge has been elevated and has grown clear of the nail fold before trimming. If the nail edge cannot be elevated, see a podiatrist for a partial nail avulsion, where the ingrown portion is removed under local anesthesia.
The American Academy of Dermatology recommends that people who have recurrent ingrown toenails, diabetes, peripheral neuropathy, peripheral artery disease, or difficulty reaching their feet due to mobility or vision limitations have their toenails trimmed by a podiatrist rather than attempting self-trimming. For these groups, the consequences of even a minor cutting error are magnified, and professional maintenance is safer.
Ingrown Toenail Prevention
Preventing ingrown toenails requires changing the two factors that cause most cases: how you cut your nails and what you put on your feet. Once an ingrown toenail has healed, the same nail is at elevated risk for recurrence because the nail fold has been stretched and may remain more prominent, and the nail matrix may produce a nail plate that tends toward the same growth pattern. Prevention is not a one-time effort. It is a set of maintenance habits that continue indefinitely.
Footwear is the most important prevention variable for most people. Shoes with a wide, deep toe box allow the toes to sit in their natural position without lateral compression. When you try on shoes, there should be a thumb’s width of space between the tip of your longest toe and the end of the shoe. The toe box should be wide enough that you can wiggle all your toes freely. Pointed-toe shoes, shoes with a narrow toe box even if the length is correct, and high heels that shift body weight forward all increase lateral nail fold pressure. The American Podiatric Medical Association recommends footwear with a square or rounded toe box and adequate depth as first-line ingrown toenail prevention.
Sock and moisture management matters because macerated skin tears more easily at the nail edge. Wear moisture-wicking socks made of merino wool or synthetic technical fibers rather than cotton, which holds moisture against the skin. Change socks when they become damp. If you sweat heavily, consider using a foot powder to reduce moisture accumulation inside shoes. Rotate shoes so each pair dries completely between wears. Damp shoes create a humid environment that softens periungual skin and increases vulnerability to nail edge penetration.
Nail cutting maintenance must be consistent, not just corrective. Trim toenails every 4 to 6 weeks, cutting straight across and leaving the corners square. Do not cut nails shorter than the tip of the toe. A nail cut too short gives the nail fold tissue an opportunity to roll over the leading edge, creating the same mechanical relationship as an ingrown nail when the nail does grow forward. If you have naturally curved or involuted toenails, consider having them trimmed professionally by a podiatrist every 6 to 8 weeks. For some people, consistent professional trimming is the most reliable prevention strategy.
| Prevention Strategy | What to Do | What to Avoid |
|---|---|---|
| Nail cutting | Cut straight across every 4 to 6 weeks; file corners slightly blunt | Curved cutting; cutting shorter than toe tip; digging into corners |
| Footwear | Wide, deep toe box; thumb-width space beyond longest toe | Pointed-toe shoes; narrow toe box; high heels for extended wear |
| Sock management | Moisture-wicking socks (merino wool or synthetic); change when damp | Cotton socks worn for extended periods; damp socks against skin |
| Professional maintenance | Podiatrist trimming every 6 to 8 weeks for recurrent cases or high-risk feet | Attempting self-trimming with diabetes, neuropathy, or poor vision |
When to See Doctor Ingrown Toenail
The threshold for seeking professional care for an ingrown toenail is not a fixed timeline. It depends on clinical stage, the presence of specific infection indicators, the effectiveness of home treatment, and whether you have any underlying health conditions that change the risk calculus. A Stage 1 ingrown toenail that improves noticeably with soaking and cotton wick treatment within 5 days does not require professional evaluation. A Stage 2 ingrown toenail with purulent drainage that does not improve after 3 to 5 days of consistent home treatment including topical antibiotic does.
Specific signs that require prompt professional evaluation include: spreading redness beyond the immediate nail fold onto the toe or foot, red streaking extending up the foot or leg (ascending lymphangitis), fever or chills, an abscess or pus pocket that does not drain with soaking, granulation tissue that has grown over the nail edge (Stage 3), or pain severe enough that you cannot wear a shoe or walk comfortably. These indicate infection that may require systemic antibiotics, incision and drainage, or surgical nail intervention.
The appropriate provider type for ingrown toenail evaluation is a podiatrist (Doctor of Podiatric Medicine, DPM) or a board-certified dermatologist. Podiatrists are foot and ankle specialists who perform partial nail avulsions, phenol matrixectomies, and other nail surgeries routinely. Dermatologists are skin and nail specialists trained in nail apparatus surgery. A primary care physician can also evaluate and treat uncomplicated ingrown toenails and prescribe oral antibiotics if needed, but they may refer to a podiatrist or dermatologist for surgical management.
For any Stage 3 presentation, self-care is not appropriate, and surgical intervention is typically needed. A partial nail avulsion involves removing the ingrown portion of the nail under local anesthesia, often followed by application of phenol to the corresponding section of the nail matrix to prevent that portion of nail from regrowing. This procedure has a high success rate and is performed in-office, not in an operating room. The recovery period is typically 1 to 2 weeks, and most people return to normal footwear and activity promptly.
Diabetic Ingrown Toenail Care
Diabetes changes ingrown toenail management fundamentally because peripheral neuropathy can eliminate pain sensation in the feet, peripheral artery disease can slow wound healing, and immune function changes can reduce the body’s ability to contain a local infection. An ingrown toenail that a person without diabetes would notice immediately as painful may go undetected in someone with diabetic neuropathy until it has progressed to infection or ulceration. This is not a theoretical concern. According to the CDC, diabetic foot infections that begin as seemingly minor wounds, including ingrown toenails, are a leading cause of hospitalization and lower-extremity amputation in people with diabetes.
Home self-care for ingrown toenails in people with diabetes follows stricter rules than for the general population. The core requirements: verify soak water temperature with a thermometer (never test with your hand or foot; use a thermometer reading of 37 to 38 degrees Celsius), inspect the feet daily using a mirror to see the bottom of the foot and between all toes, use only sterile tools and sterile cotton wicks, and report any break in the skin, any drainage, or any change from baseline appearance to a healthcare provider promptly. Do not wait until the toe hurts. With neuropathy, it may never hurt, and pain is not a reliable safety indicator.
The NIH National Institute of Diabetes and Digestive and Kidney Diseases recommends that people with diabetes have a comprehensive foot examination at least annually, with more frequent examinations for those with neuropathy, foot deformity, or a history of foot ulcers or infection. This examination should include assessment of nail condition and trimming technique. Many people with diabetes benefit from having a podiatrist manage their toenail trimming on a regular schedule, removing the self-care risk entirely.
If you have diabetes and develop an ingrown toenail, the threshold for professional evaluation is lower. Any sign of infection, any break in the skin beyond the nail sulcus, any drainage, or any failure of home treatment to produce improvement within 48 hours warrants a podiatrist or primary care evaluation. Do not use OTC topical antibiotics for more than 2 days without professional guidance. Do not soak the foot if an ulcer is present anywhere on the foot, as soaking can macerate ulcer margins and introduce bacteria.
Should You Cut Out an Ingrown Toenail Yourself
No. You should not cut out an ingrown toenail yourself. Bathroom surgery on an ingrown toenail, whether with nail clippers, cuticle scissors, a pocketknife, sewing needle, or any other non-sterile instrument, converts a condition that is manageable at home in its early stages into a situation that frequently requires professional surgical intervention. The risks of self-surgery include splitting the nail plate further and leaving a sharp nail spicule deeper in the nail sulcus, cutting into the nail bed and causing permanent nail growth deformity, introducing bacteria from non-sterile instruments deep into the tissue, and triggering bleeding that obscures what you are cutting and leads to more aggressive digging.
The anatomy explains why this is so dangerous. The nail plate is attached to the nail bed, the specialized skin that lies beneath it and extends from the nail matrix to the hyponychium. Cutting into the nail sulcus blind means you cannot see whether you are cutting nail plate, nail bed, or periungual skin. The nail bed does not regenerate. Damage to the nail bed often results in permanent nail dystrophy, splitting, or non-adherence of the nail plate. The nail matrix, located under the proximal nail fold, produces the nail plate. If you inadvertently cut into or damage the matrix, the nail may grow back permanently thickened, ridged, split, or not at all.
If the ingrown portion of the nail is visible and accessible above the skin and is clearly a separate spicule, you can gently lift it after soaking and clip only the clearly free, non-embedded portion straight across. This is not the same as digging into the nail sulcus. If the nail edge is embedded and cannot be lifted with gentle technique after soaking, it is not accessible for safe home trimming. A podiatrist can remove the ingrown portion under local anesthesia with sterile instruments and proper lighting, and can apply phenol to prevent that portion from regrowing if needed. The procedure takes minutes and has a far better outcome than the weeks of infection and nail deformity that often follow self-surgery attempts.
Key Takeaway: The soaking, lifting, and cotton wick protocol treats the ingrown toenail without requiring you to cut into the nail sulcus. If that protocol fails, the next step is a podiatrist appointment, not a sharper instrument.
Frequently Asked Questions About Ingrown Toenail Self-Care
How long should I soak an ingrown toenail?
Soak an ingrown toenail for 15 to 20 minutes per session, once or twice daily.
Water temperature should be 37 to 40 degrees Celsius (98.6 to 104 degrees Fahrenheit), comfortably warm on the wrist but not hot.
Soaking longer than 25 minutes macerates the skin and makes the nail fold more fragile during the lifting step.
Can I use hydrogen peroxide on an ingrown toenail?
Hydrogen peroxide is not recommended for repeated use on an ingrown toenail wound because it damages healthy granulation tissue and slows healing.
While it kills bacteria on contact, the oxidative effect also destroys fibroblasts and new skin cells attempting to close the wound.
Warm water, Epsom salt solution, or dilute povidone-iodine are better choices for soaking.
What does an infected ingrown toenail look like?
An infected ingrown toenail shows purulent drainage (yellow, green, or cloudy fluid), increased swelling that does not improve between soaks, spreading redness beyond the nail fold, and warmth compared to the other foot.
The toe may throb even without pressure.
A localized infection in the nail sulcus can progress to cellulitis, which appears as redness spreading across the toe or foot and requires medical evaluation.
Will an ingrown toenail heal on its own without treatment?
A mild Stage 1 ingrown toenail can sometimes resolve on its own if the nail edge grows past the nail fold without continuing to penetrate.
However, most ingrown toenails do not resolve without intervention because the nail continues growing forward into the same tissue.
Consistent soaking and cotton wick elevation greatly improve the probability of self-resolution.
Is it safe to dig out an ingrown toenail with tweezers?
Digging into the nail sulcus with tweezers or any pointed instrument is not safe and frequently causes infection, nail bed injury, or permanent nail deformity.
The only safe technique for home management is gentle nail edge elevation after adequate soaking, using a blunt instrument, followed by cotton wick placement.
If the nail edge cannot be lifted gently after soaking, see a podiatrist.
How do I know if my ingrown toenail needs surgery?
An ingrown toenail needs surgical evaluation when granulation tissue has overgrown the nail edge (Stage 3), when purulent drainage persists despite 5 days of consistent home treatment, when infection spreads beyond the nail fold, or when ingrown toenails recur repeatedly despite proper prevention.
A podiatrist or dermatologist performs a partial nail avulsion under local anesthesia, often with phenol matrixectomy to prevent regrowth of the ingrown portion.
This in-office procedure has a high success rate and typically heals within 1 to 2 weeks.
Ingrown toenail self-care done correctly works because it addresses the mechanical problem at the heart of the condition: a nail edge pressing into tissue that needs space to heal. The protocol is simple but precise. Soak with Epsom salt at the right temperature and concentration for 15 to 20 minutes, lift the nail edge gently after it softens, place a sterile cotton wick under the corner, and protect the toe with a bandage that does not constrict. Repeat once or twice daily, replace the cotton and bandage each time, and wear shoes that do not compress the toe.
The line between self-care and professional care is drawn by three things: the clinical stage of the ingrown toenail, the presence or absence of conditions like diabetes or neuropathy that amplify risk, and whether the protocol produces clear improvement within 3 to 5 days. Stage 1 responds to home care. Stage 2 may respond but has a shorter leash. Stage 3 belongs to a podiatrist. If the toe shows spreading redness, purulent drainage that does not clear with consistent treatment, or signs that go beyond the nail fold, see a podiatrist or board-certified dermatologist without delay.
You now have the anatomy knowledge to understand why the nail behaves the way it does, the staging framework to assess what you are dealing with, and the step-by-step protocol to treat it safely. Nail care is not glamorous, but it is one of those body maintenance skills that pays back every day you spend on your feet. Treat your nail folds with the same thoughtful, evidence-based care you would give any other skin on your body. They deserve it.