Lordosis Self-Care Guide: Posture, Exercises, and Daily Relief (2026)
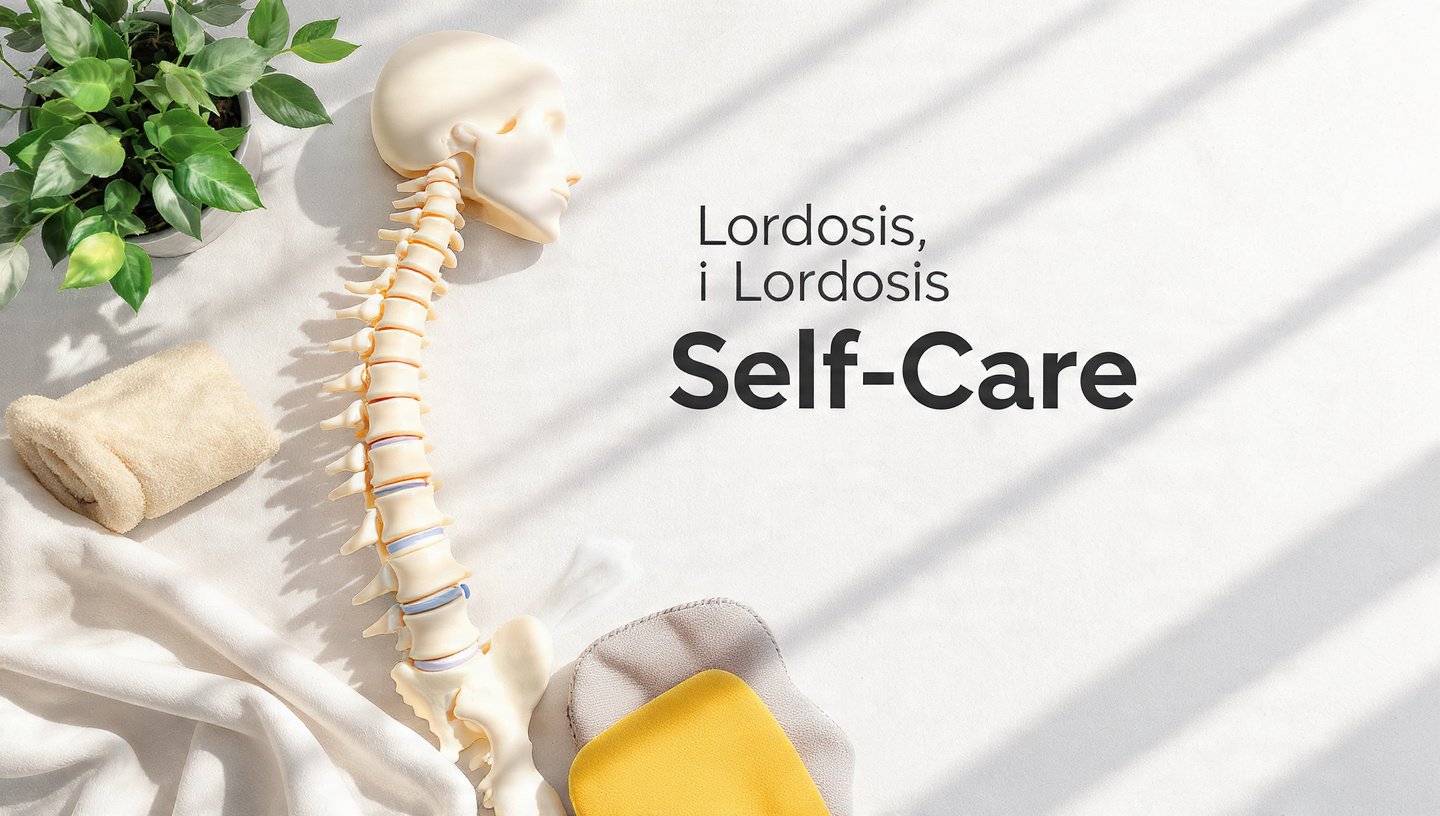
Lordosis self-care is the set of daily posture habits, targeted exercises, stretches, ergonomic adjustments, and pain management strategies you can implement at home to manage excessive spinal curvature and its associated discomfort. It is not a replacement for physical therapy or medical treatment, but it is the work that makes those interventions stick between appointments. Most people with symptomatic lordosis can reduce their pain and improve their function meaningfully through consistent self-care, according to the North American Spine Society’s clinical guidelines.
A 2023 systematic review published in the Journal of Orthopaedic and Sports Physical Therapy found that supervised exercise programs targeting core stabilization and hip flexor mobility produced clinically meaningful pain reduction in adults with lumbar hyperlordosis within 8 to 12 weeks. The catch is that the benefit disappears when people stop. Self-care bridges the gap between supervised sessions, making the difference between temporary relief and lasting improvement. You do not need a gym membership or expensive equipment. You need to know which movements help, which ones harm, how to position your body during the eight-plus hours you spend sitting and sleeping each day, and when to recognize that home care is no longer enough.
This guide walks you through exactly that. You will learn what lordosis actually is in plain terms, how the type and location of your curve changes what self-care looks like, why anterior pelvic tilt is the mechanism behind most lumbar hyperlordosis, and then receive a complete, evidence-informed self-care system. You will get specific exercises with progression guidance, stretching protocols, sleeping position adjustments, sitting and standing ergonomics, pain management strategies, and clear safety lines. Every recommendation is attributed to a named clinical organization or research finding so you know what is supported by trials and what is expert-informed practice.
Lordosis Self-Care: What It Actually Means
Lordosis self-care refers to the daily, non-medical practices you control that influence your spinal alignment, muscular balance, and symptom experience. It covers how you sit, stand, sleep, move, exercise, stretch, and manage discomfort, all performed independently outside of clinical settings. According to the American Physical Therapy Association (APTA), self-care is the bridge between supervised rehabilitation sessions and the 165-plus hours per week you spend living your life outside a clinic.
Self-care for lordosis is not the same as treating lordosis. Treatment includes formal physical therapy, bracing in growing children, medication for acute pain, and in rare surgical cases, spinal fusion or osteotomy. Self-care is the posture correction you do while working at a desk, the core engagement practice you build into your morning routine, the pillow placement you adjust before sleep, and the movement choices you make during exercise and daily activity. A 2021 study in Spine journal found that patients who received self-care education alongside physical therapy maintained functional gains at 12-month follow-up at significantly higher rates than those who received physical therapy alone.
The line between self-care and treatment is clear in one direction and blurry in the other. Self-care cannot replace a board-certified orthopedic physical therapist’s assessment or manual therapy. It cannot prescribe the specific corrective exercises you need after an individualized movement assessment. It cannot determine whether your lordosis is structural and fixed or postural and correctable. What self-care can do is make you a more informed participant in your own recovery, help you maintain gains, and in mild postural cases, resolve symptoms entirely when applied consistently. If you have not had a formal evaluation, the self-care in this guide is safe to begin, but you should seek a physical therapy assessment if you have persistent pain lasting more than two weeks, any radiating leg symptoms, or if your curve appears to be worsening.
Key Takeaway: Lordosis self-care is the daily posture, exercise, ergonomic, and pain management work you do between professional care sessions. It is supportive, not substitutive, and works best when informed by a physical therapist’s individual assessment.
Lordosis Definition and Types Explained
Lordosis is the natural inward curvature of the spine present in the cervical (neck) and lumbar (lower back) regions. Every healthy human spine has some degree of lordosis. The cervical curve and lumbar curve act as shock absorbers, distributing mechanical load through the vertebral column during walking, running, and lifting. The condition becomes clinically relevant when the curve is excessive (hyperlordosis) or flattened (hypolordosis or flat back), according to the American Academy of Orthopaedic Surgeons (AAOS).
Hyperlordosis, the most common symptomatic presentation, means the inward curve is exaggerated. In the lumbar spine, this creates a visible “swayback” appearance with the abdomen protruding forward and the buttocks extending backward. The curve angle, measured by the Cobb method on a lateral X-ray, normally falls between 20 and 40 degrees in the lumbar spine. Angles above 50 to 60 degrees are generally considered hyperlordotic, though the clinical threshold varies by individual anatomy and symptom presentation. Cervical hyperlordosis creates a forward head posture with the chin jutting out, often seen in people who spend long hours looking at screens.
Hypolordosis, or flat back syndrome, is the loss of normal inward curvature. This changes the spine’s load distribution, concentrating force on the anterior vertebral bodies and intervertebral discs in ways that accelerate degeneration. People with hypolordosis often appear to lean forward slightly when standing and may have difficulty maintaining upright posture without fatigue. This condition is less common than hyperlordosis and is frequently iatrogenic, occurring after spinal fusion surgery that eliminated too much lumbar curve. The self-care approach for hypolordosis differs meaningfully from hyperlordosis management, which is why understanding your type matters before you begin any exercise program.
Quick Tip: If you are unsure which type you have, stand sideways in front of a mirror in your natural posture. In hyperlordosis, your lower back curves deeply inward with your stomach and buttocks protruding. In hypolordosis, your lower back appears flattened with your pelvis tucked under. Take a photo and compare it to lateral spine diagrams from the AAOS patient education library. When in doubt, a single physical therapy evaluation can provide a definitive answer and tailored exercise prescription.
Lumbar Lordosis vs Cervical Lordosis Self-Care Differences
Lumbar lordosis self-care focuses on the lower back, pelvis, and the muscle groups that control pelvic tilt: the hip flexors, abdominals, glutes, and hamstrings. Cervical lordosis self-care targets the neck, upper back, and the muscles controlling head position: the deep cervical flexors, upper trapezius, levator scapulae, and suboccipital muscles. The exercises, stretches, and ergonomic interventions are entirely different for each location, and treating one area with the other’s protocol will yield no benefit.
Lumbar lordosis self-care centers on anterior pelvic tilt reduction. The iliopsoas and rectus femoris muscles, when tight, pull the front of the pelvis downward, increasing the lumbar curve. The rectus abdominis and gluteus maximus, when weak, fail to pull the pelvis back toward neutral. Self-care therefore involves hip flexor stretching, abdominal strengthening, and glute activation. Ergonomic adjustments target sitting depth, lumbar support placement, and sleeping surface firmness under the lower back.
Cervical lordosis self-care addresses forward head posture and upper crossed syndrome. When the head drifts forward of the shoulders, every inch of forward translation adds approximately 10 pounds of effective load to the cervical spine, according to research published in Surgical Technology International. The deep cervical flexor muscles (longus colli and longus capitis) become inhibited while the upper trapezius and levator scapulae become overactive and tight. Self-care involves chin tuck exercises to reactivate deep flexors, upper trapezius stretching, thoracic extension mobility work, and screen height elevation to reduce forward head drift. Sleeping position focuses on pillow height to maintain neutral cervical alignment rather than lumbar support.
| Lordosis Type | Primary Muscle Tightness | Primary Muscle Weakness | Key Self-Care Focus | Key Ergonomic Adjustment |
|---|---|---|---|---|
| Lumbar Hyperlordosis | Iliopsoas, rectus femoris, erector spinae | Rectus abdominis, transverse abdominis, gluteus maximus, hamstrings | Pelvic tilt control, core stabilization, hip flexor release | Lumbar support in sitting, knee elevation in supine |
| Cervical Hyperlordosis | Upper trapezius, levator scapulae, suboccipitals | Deep cervical flexors, lower trapezius, serratus anterior | Chin tucks, thoracic extension, upper trap release | Screen height at eye level, pillow height adjustment |
| Lumbar Hypolordosis | Hamstrings, rectus abdominis (overactive) | Iliopsoas, erector spinae, hip flexors | Lumbar extension mobility, anterior pelvic tilt restoration | Avoid prolonged slumped sitting, use lumbar roll for curve support |
A person can have both lumbar and cervical lordosis issues simultaneously. The self-care approach should address both but be sequenced: start with the more symptomatic area, master its basic routine over two to three weeks, then layer in the second area.
Key Takeaway: Lumbar lordosis self-care is about pelvic position and core control. Cervical lordosis self-care is about head position and deep neck flexor activation. Do not mix protocols between regions. If you have both, address the more painful area first.
Anterior Pelvic Tilt and Lordosis Connection
Anterior pelvic tilt is the forward rotation of the pelvis that directly increases the lumbar lordotic curve. When the front of the pelvis drops downward and the back of the pelvis rises, the lumbar vertebrae must extend further to keep the torso upright. This tilt is the primary biomechanical driver behind most cases of lumbar hyperlordosis, and correcting it is the central goal of lordosis self-care, according to clinical guidelines from the Journal of Orthopaedic and Sports Physical Therapy.
The muscle imbalance pattern is consistent and predictable. The hip flexors, primarily the iliopsoas and rectus femoris, become shortened and hypertonic from prolonged sitting. They pull the anterior pelvis downward. The abdominal muscles, particularly the rectus abdominis and transverse abdominis, lengthen and weaken, losing their ability to pull the anterior pelvis upward. The gluteus maximus becomes inhibited and underactive, a phenomenon physical therapists call “gluteal amnesia,” failing to posteriorly tilt the pelvis. The erector spinae muscles in the lower back become shortened and overactive, further pulling the lumbar spine into extension.
Think of the pelvis as a bowl of water balanced on your hip joints. In neutral alignment, the bowl is level and the water stays put. In anterior pelvic tilt, the front of the bowl tips downward and water spills out the front. Your hip flexors are pulling the front down. Your glutes and abdominals are supposed to pull the back down to level the bowl, but they are not doing their job. Self-care is about releasing the overactive pullers in front, waking up the underactive stabilizers in back and front, and teaching your body what neutral feels like so you can return to it throughout the day.
Addressing anterior pelvic tilt requires a specific sequence, not random core work. Release the tight hip flexors first with targeted stretching. Then activate the glutes with isolation exercises that ensure the gluteus maximus, not the hamstrings or lower back, is doing the work. Simultaneously strengthen the transverse abdominis with exercises that train abdominal drawing-in without spinal flexion. Finally, integrate these components into standing and walking posture. Generic ab exercises like crunches and sit-ups can actually worsen anterior pelvic tilt by reinforcing hip flexor dominance, which is why understanding the mechanism matters before you choose your exercises.
Lordosis Posture Correction Fundamentals
Posture correction for lordosis begins with learning what neutral spine actually feels like, then practicing it until it becomes your default position. Neutral spine preserves the natural cervical and lumbar curves without exaggeration or flattening. According to the American Physical Therapy Association, postural re-education is the foundational skill upon which all other lordosis self-care is built. Without it, strengthening exercises are performed in poor alignment and stretches fail to translate into daily posture changes.
Finding neutral spine requires practice, not just instruction. Lie on your back with your knees bent and feet flat on the floor. Tilt your pelvis forward until your lower back arches off the floor. This is anterior tilt, the hyperlordotic position. Now tilt your pelvis backward, pressing your lower back flat into the floor. This is posterior tilt, the hypolordotic position. Neutral spine sits between these two extremes. Your lower back will have a small natural gap from the floor, roughly the thickness of your flattened hand. Your pelvis will feel level, neither tipped forward nor tucked under. Practice moving between these three positions slowly 10 times each morning.
Standing posture correction builds on this pelvic awareness. Stand with your back against a wall, heels about 3 to 4 inches from the baseboard. Your buttocks, shoulder blades, and the back of your head should all touch the wall. In hyperlordosis, there will be an excessive gap between your lower back and the wall. Engage your lower abdominals gently to reduce that gap without flattening your back completely. A gap large enough to slide a hand through is normal. A gap you could pass a fist through indicates excessive anterior tilt. Hold this corrected position for 30 seconds, step away from the wall, and attempt to maintain it. Check your posture in a mirror from the side. Your ear, shoulder, hip, knee, and ankle should form a roughly straight line.
The correction must be practiced frequently, not held rigidly. Posture is dynamic, not static. Set a reminder on your phone to check your pelvic position three times during the workday. Each check takes five seconds. Ask yourself: Is my pelvis level? Are my lower abdominals lightly engaged? Is my ribcage stacked over my pelvis rather than flaring forward? Over weeks, the checks become less frequent as the corrected position becomes automatic. A 2022 study in the European Spine Journal found that postural awareness training combined with exercise produced greater curve angle improvement than exercise alone, supporting the inclusion of deliberate posture practice in any lordosis self-care program.
Key Takeaway: Neutral spine is a skill you learn, not a position you force. Practice pelvic tilts on your back every morning, check your standing posture against a wall weekly, and set posture reminders during your workday. The goal is awareness that becomes automatic, not rigid holding.
Evidence-Based Lordosis Exercises
Exercise is the most strongly supported self-care intervention for symptomatic lordosis, backed by multiple randomized controlled trials and systematic reviews. The evidence distinguishes between exercises that have demonstrated effectiveness in controlled studies and those that are theoretically sound but untested. Knowing which category an exercise falls into helps you prioritize your limited self-care time.
A 2021 Cochrane systematic review on exercise therapy for chronic low back pain with postural involvement found strong evidence for core stabilization exercises, moderate evidence for hip flexor stretching combined with strengthening, and limited evidence for isolated stretching programs without strengthening components. The highest-quality lordosis-specific trial, published in the Journal of Orthopaedic and Sports Physical Therapy in 2023, compared a combined core stabilization and gluteal strengthening program against general back exercises in 142 adults with lumbar hyperlordosis. The targeted group showed significantly greater reductions in both pain scores and measured lumbar lordosis angle at 12 weeks, with benefits maintained at 6-month follow-up.
The exercises with the strongest clinical trial support target three specific muscle groups simultaneously: the transverse abdominis for deep core stabilization, the gluteus maximus for posterior pelvic tilt force, and the hip flexors for length restoration. No single exercise addresses all three. An effective self-care program combines at least one exercise from each category, performed in the correct sequence. The sequence matters because activating glutes and abdominals before stretching hip flexors can reduce stretch effectiveness by creating protective guarding. The evidence-supported order is: gentle hip flexor release first, glute activation second, core stabilization third, and integration into functional movement last.
| Exercise Category | Example Exercise | Evidence Level | Recommended Frequency | Key Safety Note |
|---|---|---|---|---|
| Hip Flexor Stretching | Half-kneeling hip flexor stretch | Strong RCT support | 2 to 3 sets, 30-second hold, daily | Do not arch lower back during stretch. Keep pelvis neutral |
| Glute Activation | Glute bridge with posterior pelvic tilt | Strong RCT support | 2 to 3 sets of 12 to 15 reps, daily | Squeeze glutes at top. Lower back must not arch |
| Core Stabilization | Dead bug with abdominal drawing-in | Strong RCT support | 2 to 3 sets of 10 reps per side, 4 to 5 days weekly | Lower back must stay in contact with floor throughout |
| Integration | Wall posture hold with glute and core engagement | Moderate clinical support | 3 holds of 30 to 60 seconds, daily | Progress to standing unsupported as tolerated |
The progression principle is critical. Begin with the least challenging version of each exercise. Master form before adding repetitions, resistance, or difficulty. For the glute bridge, start with both feet on the floor and no added weight. When you can perform 15 repetitions with perfect form and no lower back discomfort, progress to single-leg bridges. Rushing progression is the most common reason self-care exercise programs fail or cause setbacks.
Lordosis Core Strengthening Routine
Core strengthening for lordosis targets the transverse abdominis, the deepest abdominal muscle layer that acts like an internal corset stabilizing the lumbar spine. Unlike the rectus abdominis, the “six-pack” muscle that flexes the spine forward, the transverse abdominis pulls the abdominal wall inward and increases intra-abdominal pressure to support the spine from the front. According to research published in Spine journal, people with lumbar hyperlordosis show delayed transverse abdominis activation compared to individuals without postural dysfunction, meaning the muscle fires late or not at all when stability is needed.
The routine below is designed to retrain this delayed activation pattern. It is organized in the order you should perform the exercises, from most supported to most challenging, and it assumes you are not currently in acute pain. If any exercise causes sharp pain, stop and regress to an easier variation. Dull muscle fatigue is expected and appropriate. Sharp or electrical sensations are not.
To perform the lordosis core strengthening routine:
- Begin with the abdominal drawing-in maneuver in a supine position. Lie on your back, knees bent, feet flat. Place two fingers just inside your hip bones. Breathe in, then as you breathe out, gently draw your lower abdomen inward as if pulling your belly button toward your spine without moving your pelvis or flattening your back. You should feel the muscle under your fingers tighten. Hold for 10 seconds while breathing normally. Perform 10 repetitions. This is your foundational activation drill. Master it before progressing.
- Progress to the dead bug exercise. Lie on your back with arms extended toward the ceiling and knees bent at 90 degrees with shins parallel to the floor. Perform the abdominal drawing-in maneuver. While maintaining this engagement and keeping your lower back in contact with the floor, slowly extend your right leg toward the floor while extending your left arm overhead. Return to the starting position. Repeat on the opposite side. Perform 8 to 10 repetitions per side. If your lower back lifts off the floor at any point, reduce the range of motion.
- Advance to the bird dog exercise. Begin on hands and knees with wrists under shoulders and knees under hips. Find neutral spine. Perform the drawing-in maneuver. Slowly extend your right arm forward and left leg backward without allowing your pelvis to rotate or your lower back to arch. Hold for 3 seconds, return to start, and switch sides. Perform 8 to 10 repetitions per side. Place a foam roller or light object on your lower back during this exercise. If it falls off, your spine is moving and you need to reduce range.
- Integrate with the plank progression. Start with a forearm plank on your knees. Maintain the abdominal drawing-in throughout. Your body should form a straight line from knees to head without sagging in the lower back or hiking the hips upward. Hold for 15 to 30 seconds. Progress to a full forearm plank on toes when you can hold 30 seconds without form breakdown. Progress further to a side plank for oblique and quadratus lumborum integration.
The entire routine takes approximately 12 to 15 minutes. Perform it 4 to 5 days per week. Expect noticeable improvements in your ability to maintain neutral spine during daily activities within 3 to 4 weeks.
Lordosis Stretching and Mobility Work
Stretching for lordosis targets the muscles that, when shortened, pull the pelvis and spine into excessive anterior tilt. The iliopsoas is the primary target, supported by the rectus femoris and the lumbar erector spinae. Stretching alone will not correct lordosis, according to a 2022 trial in the Journal of Orthopaedic and Sports Physical Therapy, but stretching combined with strengthening produces greater improvement in pelvic tilt angle and pain scores than strengthening alone.
The half-kneeling hip flexor stretch is the highest-yield stretch for lumbar hyperlordosis. Kneel on one knee with the other foot planted in front, both knees at approximately 90 degrees. Place your hands on your hips. Before you lean forward into the stretch, perform a posterior pelvic tilt by tucking your tailbone under and engaging your glute on the kneeling side. This step is non-negotiable. Without it, you will simply extend through your lower back rather than stretching the hip flexor. With the pelvis tucked, gently shift your weight forward until you feel a stretch across the front of the kneeling hip. Hold for 30 seconds. Repeat 2 to 3 times per side, daily. If you feel the stretch in your lower back rather than the front of your hip, reset and increase the pelvic tuck.
The standing quadriceps stretch addresses the rectus femoris, the only quadriceps muscle that crosses the hip joint and contributes to anterior pelvic tilt. Stand holding onto a wall or chair for balance. Bend one knee, bringing your heel toward your buttock, and grasp your ankle with your hand. Keep your knees together and your standing knee slightly bent. Do not allow your lower back to arch as you pull your heel closer. Hold for 30 seconds per side, 2 repetitions each.
Thoracic spine mobility work addresses the stiffness that often accompanies lumbar hyperlordosis. When the thoracic spine, which should have a natural kyphotic curve, becomes stiff and hypomobile, the lumbar spine compensates by moving excessively into extension. The cat-cow exercise, performed with focus on segmental spinal movement rather than maximal range, improves thoracic mobility without stressing the lumbar spine. On hands and knees, move through spinal flexion and extension slowly, imagining each vertebra moving independently. Spend extra time in the thoracic region, between the shoulder blades, where stiffness is typically greatest. Perform 10 slow repetitions daily.
The child’s pose stretch, performed with knees wide and arms extended forward, provides gentle lumbar decompression and erector spinae relaxation. This is appropriate as a relaxation stretch after more active work. Avoid this position if you have knee concerns or if it reproduces back pain. Hold for 60 to 90 seconds while breathing deeply into the back of the ribcage. Use a pillow under your thighs if hip flexion is limited.
Key Takeaway: The half-kneeling hip flexor stretch with a deliberate posterior pelvic tilt is the single most important stretch for lumbar lordosis. Without the pelvic tilt component, you will stretch your lower back instead of your hip flexors and miss the benefit entirely.
Sleeping Position for Lordosis
Sleeping position directly affects lordosis because you spend six to nine hours in a relatively static posture each night. The goal during sleep is to maintain neutral spinal alignment, neither exaggerating nor flattening the lumbar curve. For most people with lumbar hyperlordosis, the best sleeping position is on the back with a pillow placed under the knees, according to the North American Spine Society.
Placing a pillow under the knees when sleeping on your back creates slight hip and knee flexion. This flexion releases tension in the iliopsoas, allowing the pelvis to settle into a more neutral position rather than tilting anteriorly into the mattress. Without the pillow, tight hip flexors pull the pelvis forward during sleep, increasing the lumbar arch and placing sustained stress on the facet joints. A pillow of 4 to 6 inches in height is typically sufficient. You can use a standard bed pillow folded in half, a wedge pillow, or a cylindrical bolster. The key is that your knees are comfortably bent and supported, not that a specific height is achieved.
Side sleeping is the second-best option, provided you use appropriate support. Place a pillow between your knees to prevent the top leg from dropping forward and rotating the pelvis. This knee pillow keeps the hips aligned in the coronal plane. A small rolled towel or lumbar roll placed in the curve of your waist on the side you are lying on can provide additional support and prevent lateral bending. Avoid the fetal position with both knees drawn up tightly toward the chest, as this flattens the lumbar curve and can cause discomfort upon waking in people with hyperlordosis.
Stomach sleeping is the least recommended position for people with lumbar lordosis concerns. This position extends the lumbar spine further, compresses the facet joints, and requires neck rotation to one side that can aggravate cervical lordosis issues. If you cannot sleep in any other position, place a flat pillow under your pelvis and lower abdomen to reduce the lumbar extension. Use a very thin pillow or no pillow under your head to minimize cervical strain. The goal is harm reduction rather than optimization.
Mattress firmness matters but is highly individual. A 2021 study in the Journal of Chiropractic Medicine found that medium-firm mattresses produced the best spinal alignment during sleep across a general population sample. A mattress that is too soft allows the pelvis to sink, increasing lumbar extension. A mattress that is too firm may not accommodate the natural curves, creating pressure points. If you wake with increased back pain that improves within 30 minutes of getting up and moving, your sleeping position or surface likely needs adjustment.
Sitting Posture and Ergonomics for Lordosis
Sitting is the activity that most consistently worsens lumbar hyperlordosis symptoms because it places the hip flexors in a shortened position for extended periods while simultaneously encouraging a slumped posture that alternately flattens and exaggerates the lumbar curve. Correcting sitting posture and optimizing your workspace ergonomics is the highest-impact self-care change you can make if you have a desk job, according to the American Physical Therapy Association’s ergonomics guidelines.
The fundamental sitting posture for lordosis management is upright with preserved lumbar curve, not ramrod straight with a flattened back. Sit with your buttocks against the back of the chair. Your knees should be at or slightly below hip level with your feet flat on the floor. If your chair height forces your knees above your hips, you need a footrest or a chair adjustment. The lumbar support should fill the curve of your lower back without pushing you forward. A rolled towel or purpose-made lumbar roll placed at belt level works if your chair lacks adequate built-in support. Your shoulders should be relaxed, not retracted forcefully, with your elbows at approximately 90 degrees and your wrists level with your forearms.
The anterior pelvic tilt creeps back in when you tire. Within 15 to 20 minutes of sitting, most people with hyperlordosis drift back into an anteriorly tilted pelvis with an exaggerated lumbar arch, even if they started in good alignment. The correction is not to hold rigidly but to perform micro-resets throughout the day. Set a timer for every 20 minutes. When it goes off, perform a quick pelvic tilt check. Posteriorly tilt your pelvis slightly, engage your lower abdominals, and then relax back to neutral. The entire reset takes five seconds. These frequent resets are more effective than a single posture correction held until failure.
Stand up and move at least once per hour. Sitting creates sustained hip flexor shortening regardless of posture quality. A 2023 study published in Applied Ergonomics found that alternating between sitting and standing every 30 minutes produced better spinal alignment and lower discomfort scores than continuous sitting with optimal ergonomics. A standing desk or convertible workstation is ideal, but simply standing and walking for two to three minutes each hour provides meaningful benefit. Use these breaks to perform a standing hip flexor stretch against a wall.
| Sitting Problem | What It Looks Like | Correction |
|---|---|---|
| Anterior pelvic tilt | Lower back excessively arched, stomach protrudes, weight on front of sit bones | Posterior tilt micro-reset, engage lower abdominals, check that lumbar support contacts belt line |
| Posterior pelvic tilt (slump) | Lower back flattened or rounded, weight on tailbone, chin jutting forward | Sit back in chair, insert lumbar roll, elevate screen height to reduce forward head drift |
| Crossed legs | One leg crossed over opposite knee, pelvis tilted laterally, asymmetric lumbar loading | Both feet flat on floor or footrest, knees hip-width apart |
| Forward head posture | Chin juts toward screen, upper back rounded, cervical hyperlordosis compensation | Raise screen to eye level, perform chin tuck, bring head back over shoulders |
Chair selection matters but no chair fixes posture for you. A chair with adjustable seat depth, lumbar support height, and armrest height is ideal. The seat pan should allow you to sit back against the backrest while leaving two to three finger-widths of space between the front edge of the seat and the back of your knees. If the seat is too deep, you will perch on the front edge and lose back support. If it is too shallow, your thighs will lack support.
Key Takeaway: The most effective sitting intervention for lordosis is not a single posture held all day. It is the combination of a well-supported upright starting position, pelvic tilt micro-resets every 20 minutes, and a standing or walking break every 30 to 60 minutes. The timer on your phone is your most underrated self-care tool.
Standing and Walking with Lordosis
Standing posture with lordosis requires the same pelvic awareness you developed in supine and sitting, applied in a position where your feet are on the ground and your entire body weight is supported by your spine and lower extremities. Walking adds dynamic movement to this postural control, challenging your ability to maintain neutral alignment during repetitive loading. Both skills must be practiced deliberately before they become automatic.
Standing correction begins with foot position. Stand with your feet hip-width apart, weight distributed evenly across both feet, knees soft rather than locked. Locking the knees backward (genu recurvatum) forces the pelvis into anterior tilt and exaggerates the lumbar curve. A slight micro-bend in the knees, almost imperceptible to an observer, allows the pelvis to settle into neutral. Perform your abdominal drawing-in maneuver lightly, about 20 percent of your maximum contraction. Your ribcage should be stacked over your pelvis. A common error in hyperlordosis is the flared ribcage, where the lower ribs protrude forward, pulling the thoracic spine into extension and reinforcing the excessive lumbar curve. Exhale fully and allow your ribs to drop downward.
Standing tolerance builds gradually. If standing with corrected posture for more than five minutes produces discomfort or fatigue, you are either over-correcting by flattening the curve excessively or your postural endurance is simply low from years of compensatory patterns. Start with two-minute standing intervals with corrected posture. Add one minute per week. Use a standing desk in alternating intervals with sitting rather than switching to full-time standing overnight, which often produces new pain patterns as fatigued muscles default to old compensatory strategies.
Walking with lordosis means maintaining pelvic neutrality through the gait cycle. The most common gait deviation in lumbar hyperlordosis is an exaggerated anterior pelvic tilt during the stance phase of each step, visible as an excessive lower back arch with each foot strike. To correct it, walk with slightly shorter strides, maintain light abdominal engagement throughout, and focus on pushing off from the glutes at the end of each step rather than pulling forward with the hip flexors. A 2020 gait analysis study published in Gait and Posture found that individuals with hyperlordosis showed significantly higher hip flexor activation and lower gluteus maximus activation during walking compared to matched controls, confirming the muscle imbalance pattern persists in dynamic movement, not just static posture.
Walking is generally beneficial for lordosis when performed with postural awareness. It provides gentle lumbar motion, promotes blood flow to spinal tissues, and builds postural endurance. Start with 15 to 20 minute walks on flat, even surfaces. Hills, especially downhill walking, increase anterior pelvic tilt and lumbar loading. Treadmill walking at a moderate pace with zero incline is an excellent starting point. Avoid power walking with exaggerated arm swing, which tends to increase lumbar rotation and extension. Walk with a relaxed, natural arm swing and focus on pelvic stability rather than speed.
Lordosis Pain Relief at Home
Lordosis-related pain typically arises from muscle fatigue in the erector spinae, facet joint compression from sustained lumbar extension, or myofascial trigger points in the overactive hip flexors and paraspinal muscles. At-home pain relief strategies target these mechanisms and can reduce discomfort without medication in many cases, according to the American Academy of Orthopaedic Surgeons’ low back pain management guidelines.
Heat therapy is the first-line at-home intervention for muscle-related lordosis pain. Apply a moist heating pad or warm compress to the lower back and the front of the hips for 15 to 20 minutes. Heat increases blood flow to tight, ischemic muscle tissue, reduces muscle spindle excitability, and provides temporary pain relief that allows you to perform corrective exercises with less guarding. Moist heat penetrates more effectively than dry heat. A warm shower directed at the lower back and hips for five to ten minutes achieves the same effect. Use heat before stretching and exercise, not after. Post-exercise icing is appropriate only if there is acute inflammatory pain, which is less common in chronic postural lordosis than in acute injury.
Positional relief uses gravity-assisted positions to unload the lumbar facet joints and relax the paraspinal muscles. Lie on your back with your lower legs resting on a chair, ottoman, or stack of pillows such that your hips and knees are both at approximately 90 degrees. This position, sometimes called the 90-90 position, places the lumbar spine in slight flexion, opens the facet joints, and releases the iliopsoas from its anterior pull. Remain in this position for 10 to 15 minutes during a pain flare. It is the single most effective non-medication pain relief position for lumbar hyperlordosis.
Self-massage addresses myofascial trigger points in the hip flexors and paraspinal muscles. Using a tennis ball or lacrosse ball, lie on your stomach and place the ball on the tight, tender spots in the front of your hips, just inside the bony prominence of the anterior superior iliac spine. Allow your body weight to sink onto the ball for 30 to 60 seconds per tender spot, breathing slowly. Do not roll aggressively. Static pressure allows the trigger point to release through a neurological mechanism called autogenic inhibition. For the paraspinal muscles, lie on your back with two tennis balls taped together in a peanut shape placed vertically along either side of your lumbar spine. Gently allow your back to relax over the balls for two to three minutes.
Pain that does not respond to these measures within three to five days, that wakes you from sleep, that radiates below the knee, or that is accompanied by any numbness, tingling, or weakness in the legs requires evaluation by a healthcare provider. A board-certified orthopedic physical therapist or physiatrist can assess whether your pain is mechanical and posture-related or whether there is an underlying structural or neurological component requiring different management.
Key Takeaway: Heat on the lower back and hips before stretching, 90-90 positional relief during flares, and static ball release on hip flexor trigger points form the evidence-informed, medication-free pain relief toolkit for lordosis. If these fail within three to five days or neurological symptoms appear, seek evaluation promptly.
Exercises and Movements to Avoid with Lordosis
Certain common exercises and movements can worsen lumbar hyperlordosis by reinforcing the anterior pelvic tilt pattern, compressing the lumbar facet joints, or overloading an already extended spine. Avoiding or modifying these movements is as important as performing the corrective exercises correctly. The North American Spine Society’s exercise guidelines for spinal conditions identify several categories of movements that require caution for people with hyperlordosis.
Exercises that involve sustained or repetitive lumbar extension should be avoided or heavily modified. The standing back extension stretch, where you place your hands on your lower back and lean backward, directly increases the lordotic curve and compresses the facet joints. This movement is appropriate for people with disc-related flexion intolerance but harmful for those with extension-related pain from hyperlordosis. Similarly, the “superman” back extension exercise performed on the stomach with arms and legs lifted simultaneously places high compressive loads on the lumbar facet joints and reinforces erector spinae dominance. A 2019 study in the Journal of Strength and Conditioning Research measured lumbar spine compression during the superman exercise and found loads exceeding the safe threshold for individuals with existing extension-related back pain.
Unsupported forward bending, especially with straight legs and a rounded back, alternately stretches then loads the lumbar spine in ways that can trigger pain in someone with hyperlordosis. This includes exercises like standing toe touches, Jefferson curls, and poorly performed deadlifts. The risk is not the forward bend itself but the transition from the hyperextended standing posture into flexion without abdominal support. If you must lift from the floor, use a hip hinge pattern with a neutral spine, as taught in physical therapy and strength coaching settings.
Exercises that overwork the hip flexors without counterbalancing glute and abdominal work can reinforce the anterior pelvic tilt pattern. Full sit-ups, crunches, hanging leg raises, and flutter kicks all heavily recruit the iliopsoas and rectus femoris. The person with hyperlordosis already has overactive hip flexors. Adding more hip flexor work without corresponding glute and deep core activation pulls the pelvis further into anterior tilt. Replace these exercises with dead bugs, planks, and glute bridges that train core stability without hip flexor dominance.
Heavy overhead lifting with a flared ribcage combines lumbar extension with thoracic extension, reinforcing the hyperlordotic pattern through the entire spine. Military presses, overhead squats, and snatches performed without proper core bracing and ribcage control can exacerbate symptoms. If these movements are part of your training, work with a physical therapist or qualified strength coach to ensure your ribcage stays stacked over your pelvis and your lower back does not arch excessively during the overhead phase.
| Exercise to Avoid | Reason | Safer Alternative |
|---|---|---|
| Standing back extensions | Increases lumbar lordosis, compresses facet joints | Cat-cow with focus on thoracic, not lumbar, extension |
| Superman back extension | High lumbar compression, reinforces erector dominance | Bird dog with neutral spine and abdominal bracing |
| Full sit-ups and crunches | Reinforces hip flexor dominance and anterior pelvic tilt | Dead bug, forearm plank, Pallof press |
| Standing toe touches (straight leg) | Alternately stretches then loads hyperextended spine | Hip hinge with neutral spine and soft knees |
| Hanging leg raises | Heavy iliopsoas recruitment without glute counterbalance | Supine leg lowers with pelvic control, stopping before back arches |
| Heavy overhead press with rib flare | Combines lumbar and thoracic hyperextension | Half-kneeling single-arm press with ribcage control |
General fitness activities are not off-limits. Walking, swimming, cycling with proper bike fit, and most bodyweight strength training are beneficial when performed with postural awareness. The key principle is this: any exercise that reproduces your characteristic lordosis pain or leaves you feeling more extended and stiff the next day needs modification or replacement.
Lordosis Self-Care During Pregnancy
Pregnancy creates a predictable increase in lumbar lordosis as the growing uterus shifts the center of mass forward and the hormone relaxin increases ligamentous laxity throughout the pelvis and spine. Most pregnant people develop a compensatory increase in lumbar lordosis by the second trimester, peaking in the third trimester, according to a 2021 study in the Journal of Women’s Health Physical Therapy. The self-care approach must be modified for safety, comfort, and the unique biomechanical demands of pregnancy.
After the first trimester, avoid all exercises performed lying flat on your back (supine). The weight of the uterus can compress the vena cava, reducing blood return to the heart and potentially causing dizziness, nausea, or reduced fetal blood flow. Modify supine core exercises to standing, side-lying, or hands-and-knees positions. The abdominal drawing-in maneuver can be performed in side-lying or seated. Dead bugs can be modified to a standing version using a resistance band. Glute bridges can be performed with the upper back elevated on a wedge or pillows to reduce supine time.
Pregnancy-specific postural support includes a maternity support belt or belly band worn low around the pelvis during prolonged standing or walking. This external support provides proprioceptive feedback that helps maintain pelvic position and can reduce the lumbar discomfort associated with pregnancy-related lordosis. The belt should be snug but not restrictive, and should be removed during seated rest periods. A 2022 trial in the journal Spine found that maternity support belts reduced pregnancy-related low back pain intensity by a clinically meaningful margin compared to standard prenatal education alone.
Pelvic floor integration becomes essential during pregnancy self-care. The pelvic floor muscles work in coordination with the transverse abdominis and diaphragm to manage intra-abdominal pressure. Pregnancy places significant demand on this system. Learning to coordinate pelvic floor relaxation with inhalation and gentle engagement with exhalation supports both lordosis management and pelvic floor health. A women’s health physical therapist can provide individualized pelvic floor assessment and coordination training. Avoid heavy core bracing or breath-holding during exercise, which increases intra-abdominal pressure in ways that may stress the pelvic floor and the linea alba.
Sacroiliac joint pain, distinct from lumbar lordosis pain, becomes more common during pregnancy due to relaxin-mediated ligamentous laxity. It presents as sharp pain localized to one side of the lower back or buttock, often with weight transfer activities like standing on one leg. If your back pain is one-sided and sharp rather than central and achy, the self-care approach differs. Avoid single-leg stance exercises, keep strides short when walking, and sleep with a pillow between your knees in side-lying. Consult a physical therapist who specializes in prenatal care for assessment and tailored management.
Key Takeaway: Pregnancy-safe lordosis self-care avoids supine exercise after the first trimester, uses maternity support belts for prolonged standing, integrates pelvic floor coordination, and distinguishes between central lordosis-related back pain and one-sided sacroiliac joint pain. A prenatal physical therapy evaluation is an underutilized resource that can individualize your entire approach.
Lordosis in Children and Teens
Lordosis in children and adolescents requires a different self-care approach than in adults because the spine is still growing, the vertebral endplates are open, and postural habits have a greater capacity to influence long-term spinal development. Pediatric lordosis is most commonly postural, meaning it corrects when the child is asked to stand up straight, rather than structural, meaning it is fixed by vertebral shape, according to the American Academy of Orthopaedic Surgeons’ pediatric spine guidelines.
Postural lordosis in children often accompanies a growth spurt, particularly in adolescents who gain height rapidly and develop postural habits to compensate for their changing bodies. It is also commonly associated with weak core musculature, tight hip flexors from prolonged sitting during school hours, and heavy backpack use. The self-care approach prioritizes movement variety, core play-based strengthening, and environmental modifications over formal exercise prescriptions that children are unlikely to follow consistently.
Screen time posture is the most significant modifiable risk factor for pediatric postural lordosis. Children and teens spending more than four hours per day on screens show significantly higher rates of postural dysfunction, including forward head posture and lumbar hyperlordosis, according to a 2023 study in the European Spine Journal. Screen height should be elevated so the child looks straight ahead rather than down. For tablets and phones, this means using stands or holders. Time limits and frequent movement breaks matter more than perfect posture during screen use, since children will not maintain a corrected position for extended periods.
Core strengthening for children should be play-based rather than exercise-based. Animal walks (bear crawls, crab walks, frog jumps), wheelbarrow walking with a partner, playground climbing, and swimming all build core strength and postural control without requiring a child to perform repetitive therapeutic exercises. Gymnastics, martial arts, and dance also provide excellent core and postural training in a social, engaging format. Formal exercises like dead bugs and bird dogs can be introduced with older children and teens who can understand the purpose and perform them with proper form.
Backpack safety is a concrete, high-impact intervention for pediatric lordosis. A backpack should weigh no more than 10 to 15 percent of the child’s body weight, should be worn on both shoulders, and should rest in the middle of the back rather than hanging low over the buttocks. A low-hanging backpack pulls the shoulders back and forces the lumbar spine into increased lordosis to counterbalance the load. Load the heaviest items closest to the child’s back. Consider a rolling backpack if the school does not provide locker access between classes.
When lordosis in a child or teen appears to be worsening, is associated with pain (which is less common in pediatric postural lordosis than in adult cases), or does not correct when the child is asked to stand up straight, an evaluation by a pediatric orthopedist or physical therapist is warranted. Structural lordosis may require bracing during growth or, rarely, surgical intervention.
When Lordosis Self-Care Is Not Enough
Lordosis self-care has clear limits, and recognizing them is a form of self-care in itself. Continuing with home management when clinical intervention is needed risks symptom progression, compensatory pattern reinforcement, and in rare cases, structural worsening. The North American Spine Society and the American Physical Therapy Association identify specific clinical thresholds at which self-care should transition to professional evaluation and management.
Pain that persists beyond four to six weeks of consistent, correctly performed self-care warrants a physical therapy evaluation. This timeline allows for the neuromuscular adaptation period required for postural change and strength development. Pain that improves partially but plateaus also warrants assessment. A physical therapist can identify specific muscle activation deficits, joint mobility restrictions, or movement pattern errors that a general self-care protocol cannot address. The therapist provides manual therapy, individualized exercise progression, and real-time feedback that self-care cannot replicate.
Any neurological symptom requires prompt medical evaluation, not continued self-care. This includes numbness or tingling in the legs, feet, or groin area. It includes weakness in the legs, such as difficulty standing on toes or heels, foot drop where the foot catches when walking, or a feeling of leg heaviness. It includes changes in bowel or bladder function, which may indicate cauda equina syndrome, a surgical emergency requiring immediate emergency department evaluation. These symptoms suggest nerve root or spinal cord involvement that self-care cannot address and may worsen with certain exercises.
Progressive visible deformity, where the curve appears to be worsening month to month despite self-care, requires orthopedic evaluation. This is especially important in children and adolescents during growth periods when structural curves can progress rapidly. An orthopedic spine surgeon or physiatrist can obtain standing X-rays to measure the Cobb angle and determine whether bracing or other intervention is indicated. In adults, progressive deformity may indicate underlying conditions such as spondylolisthesis, where one vertebra has slipped forward on another, or degenerative changes altering spinal alignment.
Pain that wakes you from sleep, pain accompanied by unexplained weight loss, fever, or night sweats, or pain following a fall or injury requires medical evaluation to rule out non-mechanical causes including infection, fracture, or malignancy. These systemic symptoms are not consistent with postural lordosis and should not be managed through self-care.
A physical therapy referral is the appropriate first step for most lordosis cases that exceed self-care limits. Look for a board-certified orthopedic clinical specialist (OCS) or a therapist with fellowship training in orthopedic manual physical therapy (FAAOMPT). Bring a description of what self-care you have tried, what helped and what did not, and any patterns you have noticed. This information accelerates the evaluation process and helps the therapist build on your existing self-care foundation rather than starting from zero.
Frequently Asked Questions About Lordosis Self-Care
Can lordosis be corrected with exercise alone?
Exercise can significantly improve postural lordosis by addressing the muscle imbalances that drive excessive anterior pelvic tilt, specifically tight hip flexors and weak abdominals and glutes.
A 2023 randomized controlled trial in the Journal of Orthopaedic and Sports Physical Therapy found that a targeted exercise program reduced measured lumbar lordosis angle by an average of 6 to 8 degrees over 12 weeks in adults with postural hyperlordosis.
Structural lordosis caused by vertebral body shape or congenital factors cannot be corrected by exercise and may require bracing or surgical management.
What is the best sleeping position for lumbar lordosis?
Sleeping on your back with a pillow placed under your knees is the optimal position for lumbar hyperlordosis because slight hip and knee flexion releases iliopsoas tension and allows the pelvis to settle into neutral.
Side sleeping with a pillow between the knees is the second-best option and is preferred during pregnancy after the first trimester.
Stomach sleeping is the least recommended position as it forces the lumbar spine into further extension and requires sustained neck rotation.
Is walking good for lordosis?
Walking is beneficial for lordosis when performed with postural awareness, specifically with light abdominal engagement, slightly shortened strides, and a focus on gluteal push-off rather than hip flexor pull-through.
A 2020 gait analysis study in Gait and Posture found that individuals with hyperlordosis tend to walk with excessive anterior pelvic tilt, which walking with deliberate pelvic control can help retrain.
Start with 15 to 20 minutes on flat surfaces and avoid prolonged downhill walking, which increases anterior pelvic tilt and lumbar loading.
What stretches help reduce lordosis-related back pain?
The half-kneeling hip flexor stretch, performed with a deliberate posterior pelvic tilt before leaning forward, directly targets the shortened iliopsoas that drives anterior pelvic tilt and lumbar hyperlordosis.
The standing quadriceps stretch with pelvis tucked under addresses the rectus femoris component of hip flexor tightness.
The 90-90 positional relief position, lying on your back with legs elevated on a chair, provides the most effective non-stretch pain relief by unloading the lumbar facet joints and releasing iliopsoas tension.
How long does it take to see improvement from lordosis exercises?
Postural awareness improvements are typically noticeable within 2 to 4 weeks of consistent daily practice, while measurable strength gains in the transverse abdominis and gluteus maximus develop over 6 to 8 weeks.
A 2023 trial in the Journal of Orthopaedic and Sports Physical Therapy found clinically meaningful pain reduction and curve angle improvement at 12 weeks with a combined core stabilization and gluteal strengthening program performed 4 to 5 days per week.
Improvement continues beyond 12 weeks with program progression, but the most rapid gains occur in the first 3 months of consistent practice.
Should I use a back brace for lordosis?
Back braces are not recommended for routine adult lordosis self-care because they provide external support that can lead to core muscle deconditioning when used long-term.
Bracing has a specific, evidence-supported role in pediatric structural lordosis management during growth, where it may help prevent curve progression under orthopedic supervision.
A maternity support belt during pregnancy is a distinct category that provides proprioceptive feedback and symptom relief without the deconditioning concerns of rigid bracing.
Your spine adapts to what you ask of it every day. The posture you hold most often, sitting at a desk or looking at a phone, becomes the posture your muscles and connective tissue reinforce. Lordosis self-care is the deliberate interruption of that reinforcement. It is not about perfect posture held rigidly. It is about giving your body a different default, built through small, consistent corrections repeated thousands of times over weeks and months.
The single most practical action from this entire guide is the 20-minute reset timer for sitting posture. Every 20 minutes, perform a five-second pelvic tilt check and abdominal engagement reset. Every hour, stand up and move for two minutes. If you do nothing else, that intervention alone changes the postural input your spine receives for the majority of your waking hours. Stack the core routine, the hip flexor stretches, and the sleeping position adjustments on top of that foundation as your capacity and consistency build.
Start with posture awareness. Add one corrective exercise every few days. Track how your back feels in the morning and after long periods of sitting. Notice what changes and what does not. If you are improving, keep going. If you are stuck, seek a physical therapy evaluation from a board-certified orthopedic specialist who can see what a general guide cannot. You now have the information to self-care effectively and the knowledge to recognize when self-care needs a partner.