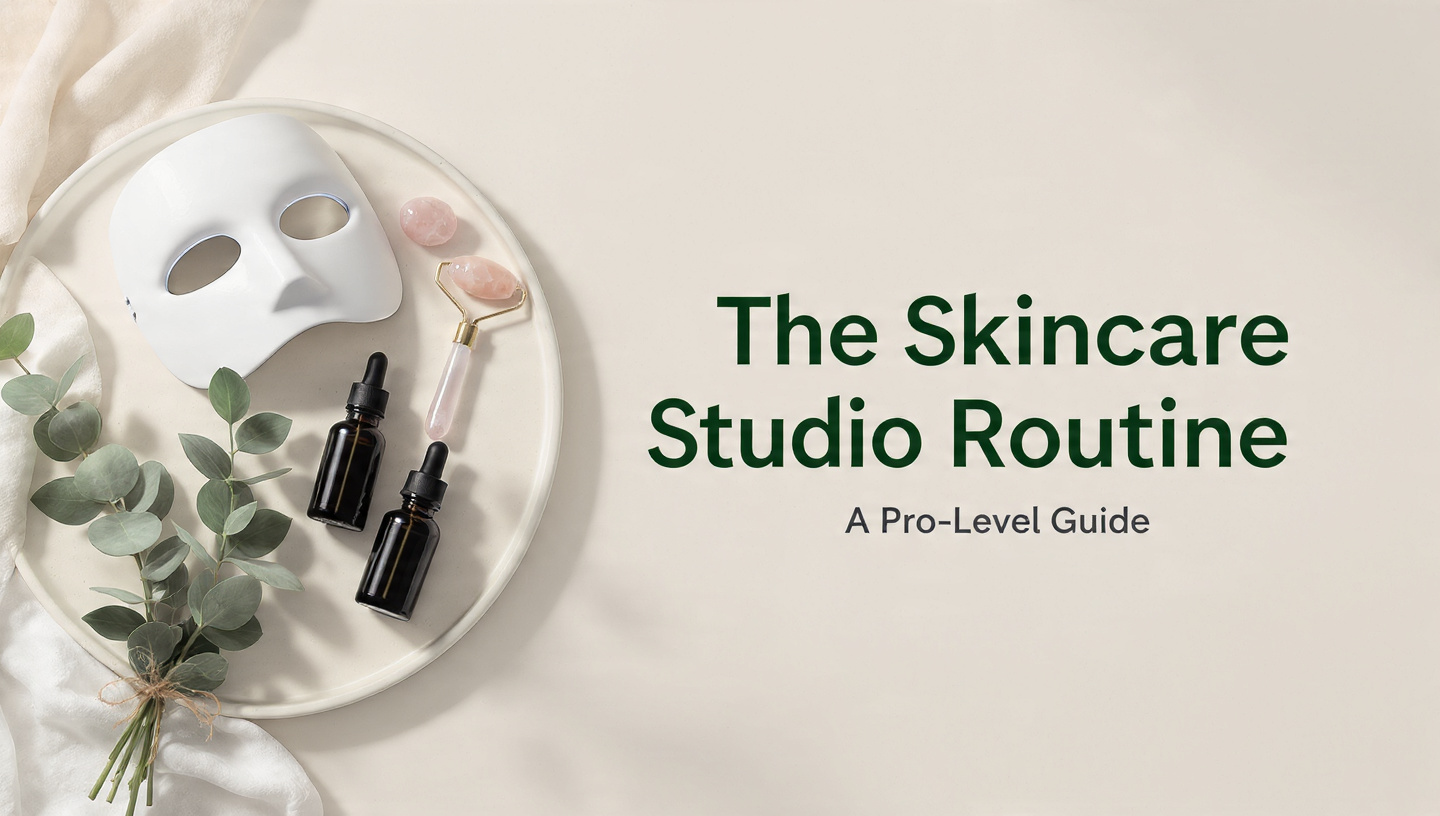
The Skincare Studio Routine: A Pro-Level 2026 Guide
A skincare studio routine translates the precision of a professional facial into a daily and weekly at-home practice. It is not a basic three-step regimen. It is a thoughtful, tool-integrated, results-driven protocol that treats your skin with the same diagnostic and layering logic an esthetician uses during a studio treatment. This approach moves you from passive product application to active skin management.
Adopting a studio mindset at home can measurably improve product performance. According to a 2023 review in the Journal of Cosmetic Dermatology, proper product layering and the integration of modalities like LED therapy or massage can enhance ingredient penetration and stimulate circulation, delivering results closer to in-office treatments. This shift acknowledges that healthy skin is not just about what you buy. It is about how you use it, when you use it, and in what sequence.
You will learn the exact protocol for a full home studio service: the correct product order, the integration of high-tech tools, the art of serums cocktailing, and the essential safety rules for combining devices with potent actives. You will also get specific, adaptable studio calendars for acne, hyperpigmentation, and anti-aging. This is your blueprint for a 2026 skincare practice that treats your bathroom like a treatment room.
What Is a Skincare Studio Routine
A skincare studio routine is a structured protocol that combines professional-grade product layering with at-home treatment modalities like facial massage, LED, and microcurrent. It mimics the logic and flow of an esthetician-led treatment: skin diagnosis, deep but gentle cleansing, preparation of the skin to receive actives, targeted treatment serums selected for the day’s specific skin status, and a protective seal. It moves away from a rigid, one-size-fits-all daily habit.
The term “studio” implies a dedicated approach, not a rushed bathroom counter task. In a professional studio, the practitioner does not just throw products on your face. They read your skin under a magnifying lamp. They ask about your diet, stress, and recent breakouts before choosing a peel or a serum. Replicating this at home means learning to self-diagnose and adapt. A skincare studio routine asks you to check your skin every morning and decide: does it need exfoliation, barrier support, or a brightening treatment cocktail today?
This approach is built around the concept of a daily “service” and a weekly “deep treatment.” The morning service is protective and preventive, the evening service is corrective and regenerative, and the weekly service is the deep exfoliation and masking protocol that resets the skin’s surface. It treats tool usage not as a novelty but as a scheduled step as essential as your moisturizer. The 2026 standard for this practice integrates the clinical efficacy data of these tools into a unified calendar, which is what most basic routines completely miss.
Skincare Studio Philosophy at Home
The skincare studio philosophy is about transforming your skincare practice from a mindless task into an intentional sensory ritual that prioritizes skin health. It borrows the core tenet of professional treatment: you are not just “doing your skincare.” You are practicing it. This shift in mindset from passive consumer to active practitioner is what separates a person with a cabinet full of unused products from someone with consistently healthy skin.
This philosophy has three pillars. The first is diagnostic engagement. Before you touch a product, you touch your skin. You assess its hydration level by how it feels when you smile, its congestion by running clean fingers over your jawline, and its inflammation level by checking for warmth or uniform redness. An esthetician uses a lamp; you use clean hands and natural morning light. The second pillar is intentional layering. No product is applied without understanding its role in the sequence. You think of it as a conveyor belt. Each step has a specific job that prepares the surface for the next step or seals in the ones before it.
The third pillar is ritual over routine. A routine is something you can do on autopilot. A ritual requires presence. It engages your nervous system. A 2022 study in the International Journal of Cosmetic Science explored the stress-skin axis, noting that consistent, mindful facial massage can lower perceived stress and improve skin barrier function over time through tactile stimulation and parasympathetic nervous system activation. By setting up your space with intention, you pair a sensory self-care practice with a clinical protocol. The physical results are better product absorption, improved lymphatic drainage, and reduced muscle tension that contributes to expression lines. The psychological result is a daily reset.
Key Takeaway: A skincare studio routine is not defined by the price of your products but by the diagnostic, intentional, and ritualistic approach you bring to applying them.
Professional Skincare Routine Order
The professional skincare routine order moves from the thinnest, most water-based formulas to the thickest, most oil-based ones, with specific wait times for actives. The golden rule, validated by formulation chemists, is simple: products cannot penetrate a heavier product, and water-based serums cannot pass through an oil barrier. Getting the sequence wrong can neutralize expensive ingredients or trigger irritation. The studio sequence follows a clinical logic designed to keep the skin barrier intact while delivering actives exactly where they need to go.
The morning studio protocol is a tight, protective five-step sequence.
- Cleanser: A gentle, non-stripping gel or cream formula based on your skin type. The goal is to remove night-time residue and sweat without foaming away your barrier lipids.
- Treatment Lotion or Essence: An often-skipped but critical step in professional settings. This dampens the stratum corneum, immediately reducing transepidermal water loss (TEWL) and preparing the skin to pull the next water-based serum deeper.
- Antioxidant Serum: A vitamin C (L-ascorbic acid) serum is the gold standard here. It loads the skin with a reserve of photoprotective antioxidants before UV exposure. This step is scientifically non-negotiable for a studio protocol.
- Moisturizer: A medium-weight formula to hydrate and reinforce the barrier. It should contain a mix of humectants like glycerin or sodium hyaluronate to pull water in and emollients to smooth the surface.
- Sunscreen: A broad-spectrum SPF 30 or higher, applied generously as the final protective seal. Mineral filters with zinc oxide offer immediate, reflective protection and are less likely to sting the eyes.
The evening studio sequence is the corrective, regenerative phase that allows for more active ingredients.
- Double Cleanse: Start with an oil-based cleanser to dissolve sunscreen and makeup. Follow with a water-based cleanser tailored to your skin type. This ensures a completely bare surface for actives.
- Exfoliant (3x per week max) or Treatment Essence: On exfoliation nights, apply your acid toner here. On non-exfoliation nights, a hydrating essence preps the skin. Do not put an exfoliating acid on dry, un-prepped skin if you have a sensitive barrier.
- Treatment Serum: This is where your retinoid, peptide cocktail, or targeted spot treatment is applied. The skin is clean and free of any occlusive barrier from creams.
- Eye Cream: Applied before your face cream to ensure the delicate periorbital skin gets the targeted lipid and peptide complex it needs without being blocked.
- Moisturizer or Night Cream: A richer formula with ceramides (NP, AP, EOP) and fatty acids to support overnight barrier repair when TEWL naturally increases.
This sequence is not an option. It is a functional requirement of cosmetic chemistry. Putting an oil-based retinol over a heavy silicone moisturizer will trap the active, preventing absorption and increasing the risk of surface irritation. The professional order exists to guarantee efficacy and tolerance.
Creating a Skincare Studio at Home Setup
Creating a skincare studio at home means curating a clean, organized space that stores your products at the correct temperature and houses your tools in a way that makes your daily and weekly protocols feel intuitive. You do not need a renovation. You need four functional zones that mirror a professional treatment room’s workflow.
Zone one is the Cleansing and Prep Station at the sink. Keep your cleansers, konjac sponges, and soft microfiber face cloths here. This area is about removal and gentle physical interaction. Hang your gua sha tool and jade roller here as well, so you see them and are prompted to use them. The visual cue is everything. Zone two is your Product Fridge or Cool, Dark Cabinet. Active ingredients like ascorbic acid and retinol degrade rapidly with heat, light, and oxygen exposure. A small skincare fridge, set to 45-50°F, can extend the potency of water-based serums and make the application of eye cream and tools a depuffing, cryo-like experience. Never store oil-based formulas or balms in a fridge, as they can solidify or cloud.
Zone three is the Treatment Tray for your daily and nightly serums, organized in order of application from left to right. A simple divided tray transforms product application from chaotic grabbing into a deliberate sequence. Place your treatment essences first, then water-based serums, then lotions, then oils. Zone four is the Device Charging Station. LED masks, microcurrent devices, and high-frequency wands need a dedicated charging drawer or shelf with cable management. If a device is not charged and accessible, you will not use it. This station keeps the barrier to entry low.
Lighting is an often-overlooked component of a home studio. A simple, lighted 5x or 10x magnification mirror mimics the esthetician’s lamp. It forces you into diagnostic engagement. You can see the clogged pores on your nose, the dehydration lines on your forehead, and the small areas of hyperpigmentation that need targeted treatment. Your skincare studio setup is not just about aesthetics; it is about creating an environment that demands presence and clinical observation.
Skincare Studio Tools and Devices Guide
The 2026 skincare studio tool kit integrates technology that was once exclusive to professional clinics: LED light therapy, microcurrent, and targeted thermal or percussive massage tools. These devices are not magic. They are physical modalities that stimulate biological processes. Using them correctly means understanding their mechanism, the required frequency, and, critically, how they interact with the active ingredients in your product routine. A tool is only as effective as the protocol you build around it.
LED Light Therapy Masks use specific wavelengths of light to trigger cellular responses. Red light (630-660 nm) has the most robust clinical evidence, absorbed by fibroblast mitochondria to increase ATP production and upregulate collagen type I synthesis. A 2023 study in the Journal of the American Academy of Dermatology confirmed that consistent use of red LED can improve skin firmness and reduce periorbital wrinkles. Blue light (415 nm) targets Cutibacterium acnes bacteria, generating reactive oxygen species that destroy the bacteria. The treatment window is 10-20 minutes, 3-4 times per week. The skin must be freshly cleansed and completely free of any occlusive balms or sunscreens that could block light penetration. Apply your water-based treatment essence before, and your serums and moisturizer after the session.
Microcurrent Devices deliver low-level electrical currents that mimic the body’s natural bioelectricity. This current stimulates the facial muscles, providing an immediate temporary lifting and contouring effect and, over time, may improve muscle tone and support ATP synthesis. They are not a substitute for a face lift, but a maintenance tool for muscle engagement. The protocol here is strict: you need a conductive gel. Water-based ultrasound gel or a clean aloe vera gel works perfectly. The current will not conduct through oil. Cleanse your skin completely, apply a thick layer of conductive gel, and perform the targeted lifts for 5-20 minutes, 3-5 times per week. After the session, remove the gel, then immediately apply your serum and moisturizer to the stimulated, primed tissue. Using a microcurrent device on skin with active acne or an inflamed rosacea flare can worsen the condition. Avoid the thyroid gland area and always consult your physician if you have a pacemaker, epilepsy, or are pregnant.
Gua Sha and Cryo Tools address circulation and the lymphatic system. Gua sha is a myofascial release technique that uses a flat, smooth stone to scrape lymphatic fluid toward the nodes, draining puffiness and increasing topical blood flow. Cryo tools, like ice globes or chilled metal wands, constrict capillaries to reduce redness and temporarily de-puff, making them an ideal morning studio step. These two tools bookend your routine: cryo in the morning over a sheet mask, gua sha in the evening over a facial oil to provide the necessary slip.
| Device | Mechanism | Ideal Frequency | Application Step |
|---|---|---|---|
| LED Mask | Photobiomodulation of fibroblasts | 3-4x per week | After cleansing, before serums |
| Microcurrent | Bioelectric muscle stimulation | 3-5x per week | After cleansing, with conductive gel |
| Gua Sha | Manual lymphatic drainage | Daily or 5x per week | Over facial oil, as final step |
| Cryo Tools | Vasoconstriction | Daily (AM) | After serums, before moisturizer |
Key Takeaway: Studio devices are powerful, but they require a blank canvas. Cleanse, use your device, then apply your actives. Never apply your retinoid serum and then strap on an LED mask, the blue light can degrade the retinol and the heat can drive irritation into a compromised barrier.
How to Layer Skincare Like an Esthetician
Learning how to layer skincare like an esthetician means moving beyond the basic “thinnest to thickest” rule and adopting a “delivery and seal” methodology. An esthetician thinks of the skin’s surface as a selectively permeable filter. Their job is to deliver active ingredients to the viable epidermis and dermis while sealing in hydration and preventing the escape of water. This requires a precise wetness and pH gradient.
The esthetician’s first secret is the damp canvas rule. After cleansing, the skin’s surface begins to lose water immediately through transepidermal water loss. An esthetician never lets the skin air-dry completely. They apply the first leave-on product, a treatment lotion or essence, onto slightly damp skin within 30 seconds. The second secret is the sandwich technique for irritant actives. If you are introducing a strong active like tretinoin or a high-percentage glycolic acid, the esthetician does not apply it to bare, freshly cleansed skin. They apply a thin buffer layer of a basic, fragrance-free moisturizer first, let it absorb for a few minutes, then apply the active, and finally seal it with a richer cream. This slows the rate of absorption, reducing the peak concentration of the active in the tissue and dramatically cutting irritation without sacrificing long-term efficacy.
The third secret is targeted lipophilic layering. Estheticians do not slug the whole face with a heavy occlusive unless it is an extreme barrier-repair situation. They understand that the skin on the cheeks is often drier and more sensitive than the T-zone. They will spot-apply a rich balm with occlusives like petrolatum or dimethicone on the lateral cheeks and periorbital area while leaving the T-zone with just a light lotion. This prevents clogging pores on the nose while supporting the barrier where it is genetically thinner and more prone to dehydration.
A practical studio-level layering flow looks like this: mist or essence, water-based serum, treatment lotion, anhydrous oil-based active, emulsion or gel cream, and then, if the skin status demands it, a final occlusive seal on the driest areas. The esthetician reads the skin after each layer, checking for tackiness and absorption before proceeding.
Ingredient Layering Rules and Wait Times
Ingredient layering rules and wait times are governed by pH incompatibility, absorption kinetics, and the risk of deactivating expensive compounds. The most common home skincare error is not mixing “bad” ingredients together. It is piling them on so fast that the first product is physically diluted and wiped away by the second. A studio protocol includes intentional pauses that honor the time it takes for a formula to set and penetrate.
The pH sensitivity rule is critical. Low-pH products like L-ascorbic acid serums or AHA/BHA exfoliants require an acidic environment (pH 3.0-4.0) to remain in their active, free-acid form. If you immediately apply a higher-pH product, like a niacinamide serum or a basic moisturizer, you neutralize the acid and blunt its effect. The studio rule is to apply your low-pH active, then wait. According to formulation chemists, a 3-5 minute wait time is sufficient for a modern cosmetically elegant serum to dry down and its pH buffer system to do its work before the next layer. You do not need to wait 20 minutes.
The retinoid exemption rule is critical for safety. Retinoids are lipophilic and will penetrate even faster if the skin is wet or if you have just done a microcurrent session. Always apply retinoids to completely dry skin. After cleansing, wait 10-15 minutes for the water on the surface to fully evaporate. Apply a buffer moisturizer, wait another 5 minutes, then apply a pea-sized amount of retinoid. The morning after a retinoid night, never immediately apply an acid toner. Your barrier is in a vulnerable state of accelerated cell turnover. A gentle milk or cream cleanser and a ceramide-rich moisturizer are the correct follow-up.
The peptide and acid conflict is a nuanced but important point. Strong exfoliating acids can hydrolyze peptides, breaking their protein bonds and rendering them useless. In a studio schedule, you separate them. Use your exfoliating acid on night one and your peptide-heavy serum on night two. If you must use them in the same routine, apply the acid, wait 10 minutes for the surface pH to rise slightly, and then apply the peptides. A quick studio tip: if a product’s primary benefit is collagen stimulation through cell injury (retinoids, peels), give it its own dedicated night. If it is an antioxidant or hydrating protectant, it can be layered more freely.
| Active Ingredient | Wait Time After Application | Compatible Layers |
|---|---|---|
| L-Ascorbic Acid | 3-5 minutes | Hyaluronic acid, moisturizer, SPF |
| AHA/BHA Exfoliant | 5-10 minutes | Follow with hydrating, non-acid serums |
| Retinoid (Retinol/Tretinoin) | 15-20 minutes (before next layer) | Niacinamide, ceramides, plain moisturizer |
| Peptides | 2-3 minutes | Niacinamide, hyaluronic acid, moisturizer |
| Niacinamide | 2-3 minutes | Compatible with most, including retinoids |
Treatment Serums and How to Cocktail Them
Cocktailing treatment serums means mixing two or more compatible water-based or anhydrous formulas in the palm of your hand immediately before application. This esthetician technique allows you to customize your morning or evening treatment to your real-time skin status without creating the irritation of layering four or five full droppers sequentially. It reduces product waste and can buffer irritation while delivering a synergistic punch.
The golden rule of safe cocktailing is to only mix products with a like chemical base. Water-based serums can mix with water-based serums. A hyaluronic acid serum can mix with a niacinamide serum. An oil-based retinol can mix with a plant-based squalane oil. You never mix a water-based serum into an oil-based formula in your palm, as they will not form a stable mixture and the active may not spread evenly. The texture in your hand tells you instantly: does it become a uniform, milky drop or does it bead up and separate? If it separates, do not apply it.
For the morning studio session, a classic esthetician cocktail is one pump of a vitamin C serum with two drops of a ferulic acid and vitamin E booster. This mimics the stable, synergistic formulation that clinical research has validated for photoprotection, but it allows you to adjust the strength. On a day when your barrier feels fragile, you can add a drop of a simple sodium hyaluronate serum to the mix, diluting the acid’s sting while still getting the antioxidant benefit. For the evening, cocktailing a pea-sized amount of your prescription retinoid with a pump of a calming, peptide-rich moisturizer is the ultimate buffer. It creates a diluted, time-release effect that reduces the peak concentration hitting your skin at once, making nightly toleration more achievable.
You should never cocktail ingredients with extreme pH ranges. Do not mix your glycolic acid toner into your retinol cream thinking you are saving time. The acid will destabilize the retinoid and severely irritate your skin. The studio principle is to use the cocktail for hydration, barrier support, and antioxidant synergy. The heavy-hitting actives like exfoliating acids and retinoids perform best in a dedicated, controlled layer on dry skin, not as part of a mixed drink in your palm.
Key Takeaway: Cocktailing is a tool for customization and buffering. It is perfect for antioxidants, peptides, and hydrators. It is dangerous and ineffective for potent low-pH acids and prescription retinoids.
Facial Massage and Gua Sha Techniques
Facial massage and gua sha techniques are the manual therapy component of the skincare studio protocol, focusing on lymphatic drainage, muscle release, and increased cutaneous circulation. These are not face-lifting miracles, but they are physiologically potent. The key to their efficacy is not the tool itself but the vector and pressure of the stroke, always moving lymph toward the designated drainage nodes. Incorrect technique that drags skin downward is counterproductive.
The lymphatic system in the face is a superficial network of vessels that drains interstitial fluid into nodes at the base of the neck, the pre-auricular area (in front of the ears), and the submandibular area under the jaw. When this system is sluggish, fluid accumulates, creating puffiness under the eyes and along the jawline. A studio-grade gua sha protocol does not just scrape the face. It opens the nodes first. You use the smooth, notched edge of a jade or rose quartz stone. Start at the base of the neck with 3-5 light pumping strokes along the clavicle to open the thoracic duct. Then move behind the ears, sweeping down the neck. Only after the drainage pathways are clear do you begin working on the face, moving from the center line outward toward the ears, always at a 15-degree angle with light, feathering pressure.
The myofascial release component targets the muscles of facial expression. The masseter muscle at the jaw angle and the frontalis muscle on the forehead hold significant tension from clenching and squinting. Using the flat surface of the gua sha tool or your knuckles, you can perform slow, deep press-and-release motions on these muscles to release trigger points. This has a dual benefit. It relieves the tension that contributes to tension headaches and potentially softens the chronic overuse that deepens dynamic wrinkles. The technique must be done over a high-slip facial oil to prevent capillary breakage. A non-comedogenic oil like squalane or jojoba provides the perfect medium.
Perform this protocol 4-5 times per week in the evening. The ritual forces you into a parasympathetic state, lowering cortisol levels. Chronically elevated cortisol, as noted by a 2023 review in the Journal of Investigative Dermatology, weakens the skin barrier and accelerates collagen breakdown. By treating the facial muscles and lymphatic system as part of your skincare, you are targeting skin health on a vascular and hormonal level, not just a topical one.
Microcurrent and LED Light Therapy Routine
A microcurrent and LED light therapy routine in a home studio requires a carefully split schedule. These two devices should not be used at the same time, as the opaque silicone of a microcurrent pad or the conductive gel required for it will block the LED light from hitting the skin. Instead, they should be alternated on different days or, if used on the same day, in a specific, separated sequence. The most effective protocol is to use microcurrent in the morning for a lifting and depuffing effect, and LED therapy at night for a regenerative, collagen-stimulating session.
The morning microcurrent session targets muscle memory and contouring. After cleansing, apply a generous, even layer of conductive gel. Do not let the device drag on bare skin, as this can cause micro-tears and does not transmit the current. Perform the standard protocol for your device: typically three slow gliding passes along the jawline from chin to ear, three holds on the cheekbones, and three sweeps across the forehead. The entire session should take 10-15 minutes. Rinse off the gel, and immediately follow with your water-based antioxidant serum. The post-microcurrent window is ideal for absorption because the galvanic-like process has temporarily increased the permeability of the skin’s tight junctions. This is excellent for hydration but means you should never apply irritating actives like exfoliating acids immediately after.
The evening LED protocol is the recovery powerhouse. After a full double-cleanse, dry your face completely. No product should be on the skin except a water-based, leave-on treatment essence, which can help with light refraction while keeping the skin hydrated. Secure your LED mask and select the red or near-infrared setting. A session is typically 10-20 minutes. The light triggers cytochrome c oxidase in the mitochondria, setting off a cascade that leads to an upregulation of collagen type I and elastin production. When the session is done, you do not wash the skin again. You immediately apply your peptide serum or your retinoid (if it’s a retinoid night), followed by a moisturizer. The cellular energy that has been created, ATP, fuels the repair work that these topicals are signaling for.
Your weekly calendar should avoid overlap fatigue. A sample studio schedule: Monday (AM: microcurrent), Tuesday (PM: LED), Wednesday (rest), Thursday (AM: microcurrent), Friday (PM: LED), Saturday (AM: microcurrent), Sunday (full manual facial massage and LED rest). This spacing prevents overstimulation of the facial muscles and gives the skin’s sensory nerves a rest.
Weekly Exfoliation and Masking Studio Protocol
The weekly exfoliation and masking studio protocol is the deep-clean and reset that replaces the daily surface-level wash. In a professional studio, the facialist spends the bulk of the treatment time on this phase: analyzing the pores, using steam or a warm compress to prep the skin, performing extractions if needed, and then applying a targeted mask to rebalance. You can replicate a safe, modified version of this at home once or twice a week. This is not about scrubbing your face raw. It is a controlled chemical and physical reset.
The protocol begins with a warm compress. After your double-cleanse, soak a clean, soft cloth in comfortably warm (not hot) water, wring it out, and press it gently to your face for 30-60 seconds. This gentle heat softens the keratin plug in your pores and preps the stratum corneum for exfoliation. Next, apply your chemical exfoliant. For a studio treatment, a leave-on AHA/BHA liquid is ideal. A formula containing both glycolic acid for surface smoothing and salicylic acid to decongest pores creates a professional-grade flash peel effect. Sweep this over the face with a cotton pad, avoiding the periorbital and perioral area, and let it absorb for 5 minutes. Do not rinse.
Immediately after the acid has set, apply your treatment mask. The mask should be specific to your skin’s weekly status. If you are broken out, a clay mask with kaolin or bentonite layered over the salicylic acid treatment will pull excess sebum and debris from the now-open pores. If your barrier feels tight and you are peeling from retinoid use, a rich, creamy mask with ceramides, colloidal oatmeal, and centella asiatica is the correct choice. The acid preps the skin to absorb the mask’s ingredients more effectively. This combination is far more effective than using a mask on un-exfoliated skin, where it just sits on top of dead cells.
Leave the mask on for 10-15 minutes. Rinse gently with cool water to constrict capillaries and seal the treatment. Your final step is the post-treatment moisturizer seal. This must be a simple, fragrance-free barrier cream with ceramides NP, AP, EOP, and cholesterol at a physiologically optimal ratio. On a weekly protocol night, you apply nothing else: no retinoids, no active serums, no devices. The goal is a deep clean and a complete barrier replenishment. The morning after, your sunscreen application is the single most important step in protecting the fresh, newly revealed skin cells.
| Weekly Protocol Step | Product Type | Studio Function |
|---|---|---|
| 1. Warm Compress | Soft clean cloth | Soften keratin, open pores |
| 2. Flash Peel | AHA/BHA liquid | Dissolve bonds, clear pores |
| 3. Treatment Mask | Clay or cream mask | Draw impurities or replenish barrier |
| 4. Seal | Ceramide barrier cream | Restore physiological lipid balance |
Key Takeaway: The exfoliation and masking protocol is a complete system. The compress preps the skin, the acid clears the path, the mask delivers the payload, and the moisturizer locks it all in while preventing water loss from the newly exposed surface.
Skin Cycling Method Studio Schedule
The skin cycling method is a four-night rotation that cycles exfoliation, retinoid application, and recovery. The skincare studio schedule adapts this concept by integrating it with device modalities and morning rituals. A four-night cycle, popularized by dermatologists and widely adopted into studio logic, prevents the chronic barrier damage that comes from daily aggressive use while still delivering transformative results. The studio version of this schedule defines not just what you do at night, but how you support the cycle in the morning.
Night 1: Exfoliation Studio. The goal is a clean, smooth, acid-prepped surface. After a double-cleanse, you apply your AHA/BHA treatment and wait. No retinoids. You can follow the acid with a hydrating, simple peptide serum to begin the reparative signaling. For the morning after, your studio protocol is strict. Your skin’s acid mantle and barrier are slightly thinned from the exfoliation. Your AM routine must be entirely anti-inflammatory and shield the skin. Use a gentle milk cleanser, a barrier-supporting ceramide serum, and a high-protection mineral SPF. No vitamin C serums, as the low pH of L-ascorbic acid on the morning after an acid peel can provoke a stinging, reactive response.
Night 2: Retinoid Studio. On completely dry skin, apply your buffer moisturizer, then your retinoid. This is an ideal night to couple with red LED light therapy. Apply your retinoid after the LED session. The ATP generated by the LED fuels the cellular signaling that the retinoid is triggering in the dermal fibroblasts. The morning after a retinoid night requires an even gentler protocol. Your skin is experiencing accelerated cell turnover. Double down on ceramides and use a creamy, non-foaming cleanser. SPF is, as always, essential, and a light facial massage with a gua sha tool over your moisturizer can help soothe any morning tightness.
Night 3: Recovery Studio One. The active ingredients are put away. This is a hydration-focused, barrier-repair night. Cleanse very gently. Apply a copper peptide serum or a growth factor serum, which are excellent for repair signaling during rest phases. Layer a rich, unscented moisturizer. This is the perfect night to use your cryo tools or perform a longer gua sha lymphatic drainage session with a nourishing oil. You are supporting the body’s natural repair mechanisms without adding chemical stress.
Night 4: Recovery Studio Two. This mirrors night three. You can introduce a deeply hydrating sheet mask or a creamy sleep mask as your final layer. The extended recovery phase is what allows the skin to tolerate the exfoliation and retinoid nights on a weekly basis without developing perioral dermatitis, chronic redness, or stinging. In a 7-day week, you run the 4-day cycle and then either start a new cycle with night 1, giving you two full cycles in eight days, or you can add a third recovery night.
Barrier Repair and Skin Fasting Studio Protocol
The barrier repair and skin fasting studio protocol is a complete cessation of all active and exfoliating ingredients for a defined period, anywhere from 3 to 10 days, to allow the stratum corneum to heal itself. This is not laziness. It is a clinical intervention for a compromised barrier, a condition known as irritant contact dermatitis or a disrupted moisture barrier. In the studio, practitioners use this protocol when a client’s skin becomes red, stings with water application, or shows signs of tight, shiny, scaling skin. The approach is zero therapy, or a meticulously curated minimal routine.
The skin barrier, primarily the stratum corneum and its lipid matrix, is your first line of immunological defense. When it is breached by over-exfoliation, the skin experiences unchecked transepidermal water loss and becomes permeable to irritants. The skin fasting protocol acknowledges that the skin has an innate ability to self-repair if you stop interfering. Stop all foaming cleansers. Switch to a cream or balm cleanser that can be tissued off with no water. Stop all acids, all retinoids, all vitamin C, and even peptides for the first 3 days. The skin needs a sterile, quiet environment to reset its inflammatory cascade.
The active steps of barrier repair are a three-step, back-to-basics formula. Step one: a hypochlorous acid mist. This is a naturally occurring compound produced by white blood cells to fight infection and calm inflammation. Mist it onto the face after cleansing to reduce bacterial load and calm redness without any sting. Step two: a simple, fragrance-free moisturizer containing the critical physiological lipids: ceramide NP, ceramide AP, ceramide EOP, cholesterol, and free fatty acids in a ratio of 3:1:1. This mimics the skin’s natural lipid matrix and provides the raw materials for repair. Step three: a final occlusive layer. A thin layer of a balm with dimethicone or petrolatum seals the water and the lipids in, creating a moist wound-healing environment that accelerates barrier recovery.
A skin fasting protocol can last for 5-7 days. You will know the barrier is restored when water no longer stings on application, the skin feels supple rather than tight, and the shiny, cellophane-like texture fades. Reintroduce actives slowly. Start with a single peptide serum on night 4 of the recovery. Wait two nights before adding back a gentle retinoid. The studio philosophy is that the barrier is a living, dynamic organ, not an inert canvas. Without a functioning barrier, every other product and device in your studio is useless.
Key Takeaway: Skin fasting is a diagnostic reset. When every product stings and nothing works, the answer is not a new product. The answer is a three-step protocol of hypochlorous acid, a 3:1:1 ceramide lipid moisturizer, and an occlusive seal for up to a week.
Skincare Studio Routine for Acne-Prone Skin
The skincare studio routine for acne-prone skin focuses on maintaining a clear follicular environment while aggressively protecting the barrier from the drying effects of anti-acne actives. The classic mistake is attacking acne with a barrage of stripping cleansers and undiluted benzoyl peroxide, which ruptures the lipid barrier and triggers a compensatory overproduction of sebum. A studio approach manages acne by balancing exfoliation, bacterial control, and barrier integrity.
The diagnostic read for acne-prone skin in the morning is critical. Check for active inflammatory pustules versus non-inflammatory closed comedones. If you have deep, inflamed cysts, you skip the morning acid toner and use a hypochlorous acid mist and a niacinamide serum. Niacinamide at 4-5% is clinically proven to regulate sebum and has an anti-inflammatory effect on the interleukin pathways that drive acne. Your morning moisturizer must be oil-free but rich in humectants like glycerin. An ultra-light, gel-based SPF is a must. Mineral sunscreens with zinc oxide also offer anti-inflammatory properties, which can help calm active lesions.
The evening protocol rotates on a two-night schedule. Night one is the BHA and retinoid synergy night. After a double-cleanse, you apply a 2% salicylic acid treatment to clean, dry skin. The lipophilic nature of salicylic acid allows it to penetrate the oil-clogged follicle and exfoliate the keratin lining. Wait 10 minutes. Apply a thin buffer of oil-free moisturizer. Then apply your prescription retinoid or over-the-counter adapalene. Adapalene is a third-generation retinoid specifically studied for its comedolytic activity and stability. This combination is potent, and it is the core of an acne studio protocol. Night two is a recovery and hydration night with no actives, focusing on a ceramide-rich gel cream.
Weekly modifications are essential. The weekly exfoliation and masking protocol is modified for acne. Replace the AHA step with a salicylic acid pad, and follow with a sulfur or clay mask to absorb excess oil. Sulfur has a keratolytic and mild antimicrobial effect without the harshness of benzoyl peroxide. After the mask, do not use a balm or an occlusive. Stick to a lightweight, oil-free moisturizer. The goal is to clear the pore without smothering the skin in heavy lipids that could feed the bacterial biofilm. High-frequency wands, which use argon gas to generate a mild electrical current and ozone, can be a useful weekly spot-treatment tool for killing C. acnes bacteria on active lesions.
Skincare Studio Routine for Hyperpigmentation
A skincare studio routine for hyperpigmentation is built around the concept of a multi-pathway attack on melanin overproduction. Hyperpigmentation, whether it is melasma or post-inflammatory hyperpigmentation (PIH), is not a surface stain. It is a complex cascade involving tyrosinase activation, melanosome transfer, and dermal melanin deposition. A studio protocol requires a morning shield and an evening cocktail of specific, synergistic tyrosinase inhibitors, with deep consideration for Fitzpatrick skin type.
The morning protocol has one goal: prevent the UV and visible light that triggers melanogenesis. This starts with a low-pH L-ascorbic acid serum at 10-15%. Ascorbic acid is not just an antioxidant; it directly inhibits the tyrosinase enzyme. Layer this with a broad-spectrum SPF that contains iron oxides. Iron oxides are critical because they block visible light (blue light from the sun and screens), which standard chemical sunscreens do not. Visible light induces a more intense and prolonged pigmentation response in people with Fitzpatrick skin types IV-VI, as confirmed by a 2022 study in the Journal of the American Academy of Dermatology. An SPF with a tint containing iron oxides is the studio standard for hyperpigmentation.
The evening protocol is where the deep corrective work happens. This is a direct application of the “cocktailing” technique, mixing a combination of pigment inhibitors that each work on a different part of the pathway. A studio-grade evening routine for hyperpigmentation includes a spot treatment of a concentrated serum containing tranexamic acid, kojic acid, and niacinamide. Tranexamic acid blocks the plasmin pathway, which is a key upstream trigger for melanin production. Kojic acid is a direct tyrosinase inhibitor. Niacinamide inhibits the transfer of melanosomes from the melanocyte to the surrounding keratinocyte. After applying this cocktail on non-retinoid nights, you seal with a plain moisturizer.
On two or three nights per week, replace the cocktail with a prescription-strength retinoid or a compounded hydroquinone formula (used only under strict dermatological guidance and for limited periods due to the risk of ochronosis). The weekly exfoliation protocol for hyperpigmentation shifts away from aggressive glycolic acid, which can inflame and worsen PIH in deeper skin tones. Lactic acid or mandelic acid at 5-10% is safer and more effective. They gently desquamate the pigment-laden cells on the surface without triggering the micro-inflammation that can cause rebound pigmentation. The weekly mask is a brightening enzyme mask with papain or bromelain, which offers a gentle, non-acidic surface polish.
Skincare Studio Routine for Anti-Aging
The skincare studio routine for anti-aging is a long-game strategy that targets the dermal extracellular matrix. The goal is not just to temporarily firm or hydrate. It is to stimulate the fibroblast cells in the dermis to produce new collagen, elastin, and glycosaminoglycans. The professional studio integrates a retinoid as the non-negotiable backbone, a daily antioxidant shield, and a rigorous investment in device technology. The philosophy is about density and resilience, not just line-smoothing.
The morning anti-aging protocol prioritizes photoprotection and DNA repair. After a creamy, non-foaming cleanser, you apply an essence rich in fermented ingredients. Fermented galactomyces, for instance, has shown promise in enhancing the skin’s endogenous antioxidant capacity. Then, a vitamin C serum is the standard. For aging skin that can feel dry, magnesium ascorbyl phosphate, a water-soluble, non-irritating vitamin C derivative, is an excellent choice. It hydrates while providing antioxidant protection and collagen-boosting signaling. The final layer is a peptide-rich moisturizer followed by a deeply hydrating sunscreen.
The evening is where you build density. The retinoid is the star. Tretinoin is the clinical gold standard, with decades of data confirming its ability to stimulate collagen type I synthesis and reduce the activity of matrix metalloproteinases (MMPs) that break down collagen. The studio protocol alternates the retinoid with a growth factor serum or a copper peptide serum on the “off” nights. These signaling molecules work on a separate receptor pathway to stimulate matrix production without the inflammation of a retinoid. Combining them on the same night can sometimes lead to excessive inflammation or a conflict in pH delivery. Rotating them night-to-night ensures your fibroblasts are getting a consistent, non-overlapping repair signal.
The device integration for anti-aging is the most robust in a studio setting. Red LED light therapy is used 4 times a week to provide consistent, low-level stimulation for collagen and elastin. Microcurrent is used 3-4 mornings a week to maintain muscle tone and facial contour, which acts as a scaffold for the skin. The weekly protocol involves a gentle lactic acid exfoliation, which, unlike glycolic acid, provides surface smoothness and stimulates glycosaminoglycans in the dermis while providing essential hydration. This is followed by a firming, collagen sheet mask. The mask is not a treatment. It is an occlusive hydrator that plumps the skin temporarily while the deeper actives do the long-term work.
Key Takeaway: The anti-aging studio is a marathon, not a sprint. The only thing that builds dermal collagen long-term is a consistent retinoid, diligent sun protection, and patience. The tools and peptides are accelerators, not replacements, for this core duo.
Frequently Asked Questions About Skincare Studio Routines
What is the professional order of skincare products?
The professional order is thinnest water-based formulas to thickest oil-based creams, guided by chemistry and pH. You start with a treatment essence on damp skin, then water-based serums, then anhydrous actives, then an emulsion or moisturizer, and finally an occlusive seal where needed. This sequence ensures actives penetrate and hydration is locked in.
How do I start a skincare studio routine at home?
Start with a four-zone setup: a cleansing station, a product fridge or cool storage, a treatment tray organized left to right in application order, and a device charging station. Then, master the basic layering sequence before adding any advanced tools. Integrate devices one at a time, starting with a simple weekly exfoliation and masking protocol.
Can I use LED light therapy with my serums?
Yes, but you must apply your water-based serums after your LED session to avoid blocking the light. The only product that should be on your skin during an LED session is a hydrating, water-based treatment essence. Never use an LED mask over a retinol serum, as the light can deactivate the active and drive irritation.
What is skin cycling and should I try it?
Skin cycling is a four-night rotation of exfoliation, retinoid, recovery, and recovery. A studio schedule uses this to prevent barrier damage. You should try it if your skin feels constantly irritated or has plateaued. It gives your skin the necessary rest to repair and build collagen without the constant inflammation of daily active use.
How do I layer multiple treatment serums safely?
Layer water-based serums first, waiting 2-3 minutes between each. You can also safely cocktail water-based serums in your palm if they mix to a uniform consistency. Never layer a high-pH niacinamide serum immediately over a low-pH acid serum, as this can neutralize the acid.
What are the best tools for a home skincare studio?
The essential professional-grade tools are an LED light therapy mask for collagen stimulation, a microcurrent device for muscle tone, and a gua sha tool for lymphatic drainage. An LED mask offers the best return on investment for skin quality, while a gua sha tool provides a foundational daily massage and de-puffing practice.
The single most important concept in a 2026 skincare studio is not the most expensive device or the rarest serum. It is the disciplined sequencing of what you already own. A simple, consistent, and correctly layered protocol will outperform a cluttered counter of misused prestige products every single time.
Start tonight by clearing your treatment tray. Line up your products in the studio order: cleanser, essence, serum, moisturizer. Do this for one week. Observe how your skin responds to the deliberate cadence and the wait times. You are no longer just applying skincare. You are reading your skin, responding to its status, and practicing a craft. That is the difference between a bathroom and a studio. You are now the practitioner. Treat your skin with that respect and precision, and it will become evident in your results.