Osgood-Schlatter Self-Care: A Complete 2026 Home Guide
Osgood-Schlatter disease self-care centers on guided activity modification, targeted stretching, proper pain management, and skin protection under supportive devices. The condition resolves in most adolescents within 12 to 24 months when self-care is consistent and activity progression is gradual. You can manage this at home successfully with the right sequence of daily practices.
According to the Journal of Bone and Joint Surgery, Osgood-Schlatter disease affects approximately 10% of adolescent athletes during growth spurts, making it one of the most common causes of knee pain in this age group. The condition is not actually a disease but a traction apophysitis, where the quadriceps muscle pulls repeatedly on the tibial tubercle growth plate through the patellar tendon. Understanding this mechanical origin changes how you approach self-care.
This guide covers the complete self-care picture: recognizing symptoms accurately, knowing realistic recovery timelines, managing daily pain with correct ice and heat sequencing, identifying exercises that help versus harm, progressing safely back to sport, protecting skin under braces and straps, and supporting the emotional side of temporary sports restriction. You will walk away with a specific daily routine you can start tonight.
osgood schlatter disease self-care
Osgood-Schlatter disease self-care is a structured daily routine that combines activity modification, targeted flexibility work, pain management, and skin protection to manage symptoms while the growth plate matures. According to the American Academy of Orthopaedic Surgeons, this self-care approach works because the condition is self-limiting and responds well to conservative management when applied consistently. The goal is not complete rest but controlled loading that respects pain signals.
Think of the tibial tubercle during a growth spurt like wet cement. The area is still setting and cannot handle the same weight as cured concrete. Repeated quadriceps contractions, especially during jumping and sprinting, create traction stress that irritates the still-softening growth plate. Self-care works by reducing that traction load while maintaining enough muscle function to support the knee joint and prevent deconditioning.
The core daily sequence involves five components: morning assessment of pain and swelling, activity modification based on pain levels, afternoon stretching and strengthening, evening pain management with ice, and skin care for any bracing or strapping used during the day. Each component works together to create an environment where the tibial tubercle apophysis can mature without constant inflammatory stress.
| Self-Care Component | Daily Action | Frequency | Primary Purpose |
|---|---|---|---|
| Pain Assessment | Rate knee pain 0-10 on waking | Once daily | Guide activity level for the day |
| Activity Modification | Reduce jumping, sprinting, deep knee bends | Throughout day | Decrease traction stress on growth plate |
| Stretching | Quadriceps and hamstring stretches | 2-3 times daily | Reduce muscle tension pulling on tubercle |
| Ice Application | 15-20 minutes after activity | 2-4 times daily | Control inflammation and pain |
| Skin Protection | Barrier cream under brace or strap | Before device application | Prevent maceration and contact dermatitis |
Key Takeaway: Osgood-Schlatter self-care succeeds when you treat pain as a guide rather than an enemy, reducing activity to a level where discomfort stays below a 4 out of 10 while continuing controlled movement.
osgood schlatter symptoms checklist
The osgood schlatter symptoms checklist includes localized pain and swelling directly over the tibial tubercle, pain that worsens with running or jumping, and tenderness when pressing on the bony prominence below the kneecap. According to the National Institute of Arthritis and Musculoskeletal and Skin Diseases, the condition presents with a visible or palpable bump at the top of the shinbone where the patellar tendon attaches. This bump may feel warm and remain enlarged even after pain resolves.
Additional symptoms include tightness in the quadriceps and hamstrings, pain when kneeling directly on the tubercle, and discomfort going up or down stairs. Some adolescents describe a sharp pain with sudden acceleration or deceleration during sports. The pain is typically activity-dependent, meaning it improves with rest and worsens with specific movements.
One feature that distinguishes Osgood-Schlatter from other knee conditions is the absence of locking, giving way, or significant swelling inside the knee joint itself. The swelling is localized to the front of the knee, directly over the bony prominence. If your adolescent reports knee joint swelling, catching sensations, or instability, these symptoms point toward a different diagnosis requiring medical evaluation.
- Pain localized to the tibial tubercle (the bump below the kneecap)
- Swelling or visible enlargement of the tibial tubercle
- Pain that increases with running, jumping, squatting, or stair climbing
- Pain that decreases with rest or reduced activity
- Quadriceps and hamstring tightness
- Tenderness when pressing directly on the bony prominence
- Pain with kneeling directly on the affected knee
Key Takeaway: Osgood-Schlatter pain is always localized to the tibial tubercle; any knee joint swelling, locking, or instability warrants medical evaluation for other conditions.
osgood schlatter recovery time
Osgood-Schlatter recovery time typically ranges from 12 to 24 months, with most adolescents becoming symptom-free once skeletal maturity is reached and the growth plate fuses. A landmark study published in the Journal of Bone and Joint Surgery by Krause and colleagues found that approximately 90% of patients experience complete symptom resolution by the time the tibial tubercle apophysis closes, which occurs between ages 14 and 18 depending on individual growth patterns. The recovery timeline varies based on activity level, adherence to self-care, and the intensity of the original sport participation.
Recovery is not a linear process. Symptoms often fluctuate with growth spurts, returning briefly when the adolescent experiences another period of rapid bone lengthening. Many parents report that their child improves significantly within 6 to 8 weeks of consistent self-care, then experiences a temporary flare during the next growth phase. This pattern is normal and does not indicate treatment failure.
Several factors influence how quickly symptoms resolve. Athletes who continue high-impact jumping sports without modification tend to have longer symptomatic periods. Adolescents who commit to daily stretching, proper activity modification, and consistent icing typically see meaningful improvement within 4 to 6 weeks. The American Academy of Pediatrics notes that complete resolution depends on physeal closure more than any specific intervention.
| Recovery Phase | Typical Timeline | Expected Milestone | Key Self-Care Focus |
|---|---|---|---|
| Acute Phase | 0-6 weeks | Pain decreases below 4/10 | Ice, activity modification, gentle stretching |
| Subacute Phase | 6-12 weeks | Return to modified activity | Progressive strengthening, sport-specific drills |
| Maintenance Phase | 3-12 months | Full sport participation | Continued stretching, load management |
| Resolution Phase | 12-24 months | Growth plate fusion, no pain | Gradual return to unrestricted activity |
Key Takeaway: Recovery from Osgood-Schlatter takes 12 to 24 months because the growth plate must fuse, but meaningful pain reduction typically occurs within 4 to 6 weeks of consistent self-care.
osgood schlatter treatment at home
Osgood-Schlatter treatment at home focuses on five evidence-based interventions: ice application after activity, quadriceps and hamstring stretching, activity modification to control pain, protective bracing or strapping during sports, and skin care under supportive devices. The British Journal of Sports Medicine published a systematic review confirming that conservative management remains the gold standard, with surgical intervention required in fewer than 2% of cases. Your home treatment plan should prioritize consistency over intensity.
The most effective home treatment sequence begins with morning stretching to reduce muscle tension before the day’s activities. Follow this with activity modification where jumping, deep squatting, and prolonged running are reduced to levels that keep pain below a 4 out of 10. After any activity, apply ice to the tibial tubercle for 15 to 20 minutes. Before sports participation, apply a knee strap or patellar tendon support to distribute traction forces away from the growth plate.
Many families make the mistake of alternating between full activity and complete rest. This pattern creates deconditioning during rest periods and re-injury during activity bursts. Instead, maintain a consistent level of modified activity that does not exceed the pain threshold. Swimming, cycling with low resistance, and upper body strength training can maintain fitness without stressing the tibial tubercle.
To implement a home treatment routine:
- Perform quadriceps and hamstring stretches each morning before activity
- Modify activity to keep pain below 4 out of 10 during and after exercise
- Apply ice for 15 to 20 minutes after any activity that causes discomfort
- Use a knee strap or patellar tendon support during sports participation
- Apply a skin barrier product before wearing any supportive device
- Reassess pain levels weekly to determine if activity can be progressed
Quick Tip: Night pain that wakes your adolescent from sleep is not typical for Osgood-Schlatter. If this occurs, consult a pediatric sports medicine physician to rule out other conditions.
osgood schlatter ice or heat
For osgood schlatter ice or heat, ice is the correct choice for acute pain and post-activity inflammation, while heat can be useful for tight muscles before stretching. The American Academy of Orthopaedic Surgeons recommends applying ice to the tibial tubercle for 15 to 20 minutes after activity to reduce localized inflammation and pain. Heat application has a different role, warming up the quadriceps and hamstrings before stretching to improve tissue extensibility.
The physiological rationale is straightforward. Ice causes vasoconstriction, reducing blood flow to the inflamed apophysis and decreasing the metabolic activity that contributes to pain signaling. Heat increases blood flow and tissue elasticity, which helps muscles lengthen more easily during stretching. Using them in the wrong order can increase pain or reduce the effectiveness of your self-care routine.
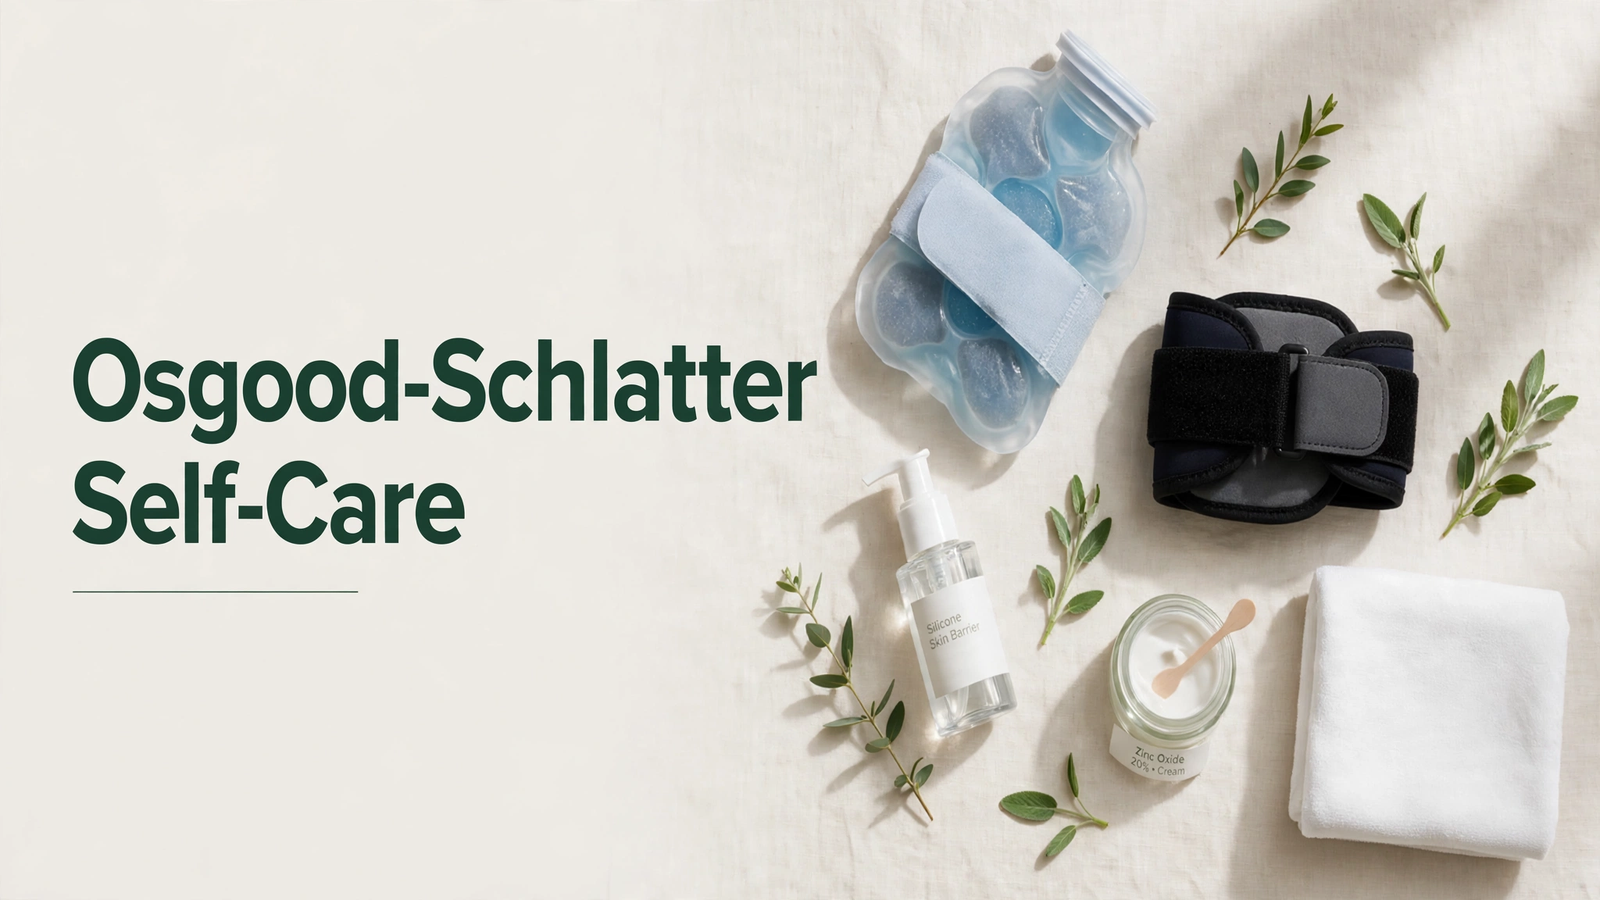
The recommended sequence is heat on the muscles of the thigh before stretching, then ice on the tibial tubercle after activity. Never apply ice directly to the skin. Use a thin cloth barrier or a commercially available gel ice wrap designed for knee application. The Journal of Orthopaedic and Sports Physical Therapy recommends limiting ice application to 20 minutes maximum to avoid skin damage and nerve irritation.
- Ice after activity: 15 to 20 minutes, with cloth barrier, directly over tibial tubercle
- Heat before stretching: 10 to 15 minutes on quadriceps and hamstrings, moist heat preferred
- Never ice before sport participation, as this can mask pain and alter proprioception
- Never apply heat directly to the inflamed tibial tubercle
- For adolescents with sensitive skin, check the skin every 5 minutes during ice application
Key Takeaway: Ice belongs on the bump after activity; heat belongs on the thigh muscles before stretching. Reversing this order reduces effectiveness.
osgood schlatter pain relief
Osgood-Schlatter pain relief combines ice therapy, over-the-counter anti-inflammatory medication when appropriate, activity modification, and proper bracing to reduce mechanical stress on the tibial tubercle. According to the American Academy of Pediatrics, short-term use of ibuprofen or naproxen can effectively reduce pain and inflammation during acute flares, but these medications should not be used continuously for more than 10 to 14 days without medical supervision. The most sustainable pain relief comes from mechanical interventions, not pharmacological ones.
Ice remains the safest and most accessible pain management tool. Applying ice for 15 to 20 minutes after activity reduces pain signaling and local inflammation without systemic side effects. A gel ice wrap secured around the knee provides consistent contact with the tibial tubercle while allowing the adolescent to sit comfortably during treatment. The British Journal of Sports Medicine notes that cryotherapy reduces pain perception through both vascular and neurological mechanisms.
Knee straps and patellar tendon supports provide mechanical pain relief by redistributing the traction force generated during quadriceps contraction. A properly positioned infrapatellar strap applies counterpressure to the patellar tendon, reducing the pull on the tibial tubercle attachment point. Many adolescents report immediate pain reduction when wearing these devices during sport participation.
| Pain Relief Method | Onset of Relief | Duration | Mechanism | Best For |
|---|---|---|---|---|
| Ice Application | 5-10 minutes | 1-2 hours | Vasoconstriction, reduced nerve signaling | Post-activity pain, acute flares |
| Ibuprofen (as directed) | 30-60 minutes | 4-6 hours | COX inhibition, reduced prostaglandins | Acute flares, night pain |
| Knee Strap | Immediate | During wear | Redistributes traction force | Sport participation |
| Activity Modification | 1-3 days | Sustained | Reduces mechanical stress | Persistent symptoms |
| Stretching Program | 1-2 weeks | Sustained | Reduces muscle tension | Prevention, maintenance |
Quick Tip: Ice and a knee strap used together often provide better pain relief than either intervention alone, addressing both the inflammatory and mechanical components of Osgood-Schlatter pain.
osgood schlatter exercises to avoid
Osgood-Schlatter exercises to avoid include deep squats, lunges with knee forward of toes, box jumps, plyometric drills, and any exercise that causes pain directly over the tibial tubercle. The American Physical Therapy Association emphasizes that these movements create excessive traction force through the patellar tendon onto the vulnerable growth plate. Avoiding these exercises during the acute phase protects the apophysis while it continues to mature.
Running on hard surfaces and downhill running place additional eccentric load on the quadriceps, increasing stress on the tibial tubercle. Sprinting with sudden acceleration and deceleration should be avoided or significantly reduced during painful periods. Kneeling directly on the tibial tubercle is universally painful and should be avoided entirely, with knee pads or a soft surface used if kneeling is unavoidable.
High-impact sports that require frequent jumping, such as basketball, volleyball, and gymnastics, create the highest traction forces. The Journal of Bone and Joint Surgery reports that these sports are associated with the highest rates of Osgood-Schlatter symptoms. Temporary modification or substitution with low-impact alternatives allows the condition to settle while maintaining cardiovascular fitness and sport-specific skills.
- Deep squats below 90 degrees of knee flexion
- Jumping exercises (box jumps, depth jumps, plyometrics)
- Sprinting with sudden starts and stops
- Lunges with the front knee traveling beyond the toes
- Leg extension machines with heavy resistance
- Kicking motions with resistance bands
- Hill running, particularly downhill running
- Any exercise that reproduces tibial tubercle pain
Key Takeaway: If an exercise causes pain at the tibial tubercle during or immediately after the movement, it is creating too much traction stress and should be modified or temporarily eliminated.
osgood schlatter stretching exercises
Osgood-Schlatter stretching exercises target the quadriceps and hamstrings to reduce muscle tension that contributes to traction stress on the tibial tubercle. According to the Journal of Orthopaedic and Sports Physical Therapy, a consistent stretching program performed 2 to 3 times daily improves flexibility and reduces symptoms within 2 to 4 weeks. The standing quadriceps stretch and the seated hamstring stretch form the foundation of an effective home program.
The standing quadriceps stretch involves holding the ankle behind the body while maintaining upright posture and keeping the knees together. This position lengthens the rectus femoris and vastus muscles that insert through the patellar tendon onto the tibial tubercle. Hold each stretch for 30 seconds without bouncing, repeating 3 times per leg. The stretch should produce a pulling sensation in the front of the thigh without causing knee pain.
The seated hamstring stretch addresses the posterior chain tension that often accompanies quadriceps tightness in growing athletes. Sit on the floor with one leg extended and the other bent, then hinge forward from the hips until a gentle stretch is felt in the back of the thigh. Hold for 30 seconds, repeat 3 times per leg, and perform this sequence after activity when muscles are warm. Stretching cold muscles increases injury risk and reduces effectiveness.
To perform the core stretching routine:
- Warm muscles with 5 minutes of light activity or moist heat
- Complete standing quadriceps stretch: 30 seconds x 3 repetitions per leg
- Complete seated hamstring stretch: 30 seconds x 3 repetitions per leg
- Complete calf stretch against wall: 30 seconds x 3 repetitions per leg
- Repeat the full sequence 2 to 3 times daily, especially after activity
Quick Tip: Stretching should never cause sharp pain at the tibial tubercle. If a stretch reproduces knee pain, reduce the intensity until only a gentle pulling sensation is felt in the muscle belly.
osgood schlatter physical therapy exercises
Osgood-Schlatter physical therapy exercises focus on progressive strengthening of the quadriceps, hamstrings, gluteal muscles, and core stabilizers to improve lower extremity mechanics and reduce abnormal stress through the patellar tendon. The American Physical Therapy Association recommends beginning with isometric exercises that contract the quadriceps without moving the knee joint, then progressing to closed-chain exercises as pain decreases. This progression allows muscle strengthening without excessive traction on the healing apophysis.
Isometric quadriceps sets form the starting point. Sit with the leg extended and contract the thigh muscle, pressing the back of the knee toward the floor, holding for 10 seconds. This contraction strengthens the quadriceps without creating joint movement or traction stress. Wall sits with the knees at a 45-degree angle provide a safe closed-chain exercise that builds endurance while keeping tension on the tibial tubercle manageable.
As pain decreases, progressive strengthening advances through straight leg raises, mini squats, step-ups, and eventually full squats within a pain-free range. The British Journal of Sports Medicine emphasizes that strengthening should progress based on symptom response rather than a fixed timeline. Adding resistance or complexity while pain remains above 4 out of 10 will delay recovery.
| Exercise | Phase | Sets x Reps | Technique Notes |
|---|---|---|---|
| Isometric Quad Sets | Acute | 3 x 10, 10-sec hold | No knee movement, press knee down |
| Wall Sit 45° | Acute/Subacute | 3 x 30-45 sec | Knees at 45°, pain-free |
| Straight Leg Raise | Subacute | 3 x 10 | Leg straight, lift 12 inches |
| Step-Up | Subacute | 3 x 10 | Low step, controlled descent |
| Mini Squat | Maintenance | 3 x 15 | Knees behind toes, pain-free range |
| Single Leg Balance | Maintenance | 3 x 30 sec | Progress to unstable surface |
Key Takeaway: Physical therapy for Osgood-Schlatter progresses from isometric to closed-chain to sport-specific movements, always guided by the rule that pain should remain below a 4 out of 10 during and after exercise.
osgood schlatter return to sport protocol
An osgood schlatter return to sport protocol uses a graduated, criteria-based progression that allows resumption of full activity only when specific functional milestones are met. According to the British Journal of Sports Medicine, return-to-sport decisions should be based on pain-free completion of sport-specific movements rather than arbitrary time frames. The protocol typically requires 6 to 12 weeks of progressive loading before full competition is resumed.
The progression begins with pain-free activities of daily living and basic strengthening exercises. Once the adolescent can complete a full day without pain, they advance to jogging on flat surfaces, then to sport-specific drills at reduced intensity. Each stage requires successful completion without significant pain, defined as below 4 out of 10 during activity and no increase in resting pain the following day.
Jumping sports require special attention. Before returning to basketball, volleyball, or gymnastics, the adolescent should demonstrate pain-free single-leg hopping, controlled landing mechanics, and the ability to perform repeated jumps without symptom exacerbation. The American Physical Therapy Association recommends a minimum of 2 weeks at each progression stage without pain before advancing.
To progress through return to sport:
- Achieve pain-free walking and daily activities for 1 full week
- Complete strengthening exercises without pain for 2 consecutive weeks
- Progress to jogging on flat ground, advancing to 30 minutes without pain
- Add sport-specific drills at 50% intensity, monitoring next-day pain
- Advance to full-intensity practice, demonstrating pain-free participation
- Return to competition only after 2 full weeks of pain-free practice
- Maintain stretching and strengthening program throughout the season
Quick Tip: The adolescent should be able to hop on the affected leg 20 times without pain before returning to jumping sports, a functional test that predicts readiness better than time alone.
osgood schlatter knee brace for sports
An osgood schlatter knee brace for sports typically takes the form of an infrapatellar strap or patellar tendon support band that applies targeted pressure to the patellar tendon, reducing traction stress on the tibial tubercle during activity. According to a study in the American Journal of Sports Medicine, patellar tendon straps reduce pain during sport participation by altering the angle of tendon pull and distributing forces more evenly across the tendon attachment. These devices are worn during activity only, not during rest.
The infrapatellar strap works by compressing the patellar tendon just below the kneecap, creating a mechanical fulcrum that changes how quadriceps force transmits to the tibial tubercle. Many adolescent athletes report immediate pain reduction when wearing these devices during running and jumping sports. The strap should be snug enough to stay in position but not tight enough to restrict blood flow or cause numbness below the knee.
For sports requiring more substantial knee support, a neoprene sleeve with a patellar tendon pad combines compression with thermal insulation. The sleeve provides proprioceptive feedback that improves knee positioning while the built-in pad delivers targeted pressure to the patellar tendon. The American Academy of Orthopaedic Surgeons notes that these supportive devices do not cure Osgood-Schlatter but allow safer participation during the recovery period.
| Brace Type | Mechanism | Best For | Wear Time | Skin Considerations |
|---|---|---|---|---|
| Infrapatellar Strap | Counterpressure on tendon | Running, jumping sports | During activity only | Minimal skin coverage, low maceration risk |
| Neoprene Sleeve with Pad | Compression + tendon pad | Sports with lateral movement | During activity only | Moderate skin coverage, higher maceration risk |
| Patellar Tendon Support Band | Adjustable pressure | Variable activity intensity | During activity only | Adjustable fit reduces pressure points |
| Knee Sleeve with Hinge | Lateral stability | Multi-directional sports | During activity only | Higher skin coverage, requires moisture management |
Key Takeaway: Knee straps and braces reduce pain during activity but do not replace the need for stretching, strengthening, and activity modification as the primary self-care strategies.
osgood schlatter knee strap placement
Osgood-Schlatter knee strap placement requires positioning the strap directly over the patellar tendon, approximately one finger-width below the kneecap, so that the pressure pad sits between the patella and the tibial tubercle. According to the Journal of Orthopaedic and Sports Physical Therapy, incorrect placement reduces the strap’s effectiveness and can create additional discomfort. The strap should compress the tendon, not the tibial tubercle itself, which is already tender and inflamed.
Finding the correct position starts with identifying the patellar tendon. Locate the bottom edge of the kneecap and the tibial tubercle, the bony bump on the front of the shin. The strap belongs midway between these two points, wrapping around the back of the knee. The pressure pad, if present, should face the tendon directly. The strap should feel snug but allow one finger to slide underneath without force.
Common placement errors include positioning the strap too high, so it rides over the kneecap and provides no benefit, or too low, so it presses directly on the painful tibial tubercle and increases discomfort. Some adolescents position the strap too loosely, allowing it to slide during activity, or too tightly, creating circulatory restriction and numbness. Checking placement before each use and adjusting as needed ensures consistent benefit.
To position a knee strap correctly:
- Locate the bottom edge of the kneecap and the top of the tibial tubercle
- Mark the midpoint between these two bony landmarks
- Wrap the strap around the leg so the pressure pad sits at this midpoint
- Fasten the strap snugly, allowing one finger to slide underneath
- Bend and straighten the knee several times to confirm the strap stays in position
- Adjust tightness if you experience numbness, tingling, or color changes below the strap
Quick Tip: Recheck strap placement after 15 minutes of activity, as straps can shift during vigorous movement. A strap that has moved is a strap that is no longer helping.
osgood schlatter skin care under brace
Osgood-Schlatter skin care under a brace or strap prevents contact dermatitis, skin maceration, and pressure-related irritation that commonly develop when supportive devices are worn during athletic activity. According to the American Academy of Dermatology, skin under occlusive materials like neoprene becomes vulnerable to moisture accumulation, friction, and bacterial overgrowth within hours of continuous wear. A proper skin care routine before and after brace use prevents these complications.
The pre-application routine starts with clean, dry skin. Apply a thin layer of a dimethicone-based skin protectant or zinc oxide barrier cream to the skin areas that will contact the brace or strap. These products form a protective film that reduces friction and shields the stratum corneum from moisture damage. For adolescents with sensitive skin, a silicone-based barrier film designed for medical devices provides superior protection without leaving a heavy residue.
After removing the brace or strap, clean the skin with a gentle, fragrance-free cleanser and pat dry thoroughly. Allow the skin to air dry completely before applying clean clothing or reapplying the device. The device itself requires regular cleaning according to manufacturer instructions, as accumulated sweat, dead skin cells, and bacteria will re-contaminate protected skin on subsequent use.
| Product Type | INCI Name | Application | Frequency | Skin Benefit |
|---|---|---|---|---|
| Silicone Barrier Film | Dimethicone | Thin layer under device | Before each use | Friction reduction, moisture barrier |
| Zinc Oxide Cream | Zinc Oxide | Visible layer on contact areas | Before each use | Occlusive barrier, anti-inflammatory |
| Gentle Cleanser | Various, fragrance-free | Wash skin after device removal | After each use | Remove sweat, bacteria, residue |
| Barrier Repair Cream | Ceramide NP | Apply to clean skin | Daily, after cleansing | Restore stratum corneum function |
| Moisture Powder | Talc-free, cornstarch-based | Light dusting under device | Before each use | Absorb moisture, reduce friction |
Quick Tip: Any skin breakdown, persistent redness, blistering, or signs of infection under a brace warrant removal of the device and consultation with a board-certified dermatologist, who can assess whether the skin reaction is irritant, allergic, or infectious.
osgood schlatter in adults
Osgood-Schlatter in adults presents as persistent anterior knee pain over the tibial tubercle, typically caused by a residual ossicle or unfused bone fragment that remains after the growth plate closes. According to the Journal of Bone and Joint Surgery, approximately 10% of adolescents with Osgood-Schlatter continue to experience symptoms into adulthood, with the pain localized to the same tibial tubercle region and worsened by kneeling or direct pressure. Adult onset without a history of adolescent symptoms is rare and warrants investigation for alternative diagnoses.
Adults with persistent Osgood-Schlatter symptoms often report that the visible bump below their kneecap has been present since adolescence but only intermittently painful. Activities that require kneeling, squatting, or direct pressure on the tibial tubercle reliably reproduce symptoms. Unlike adolescent Osgood-Schlatter, the adult version will not resolve with skeletal maturity because the growth plate has already closed, making the residual ossicle a permanent mechanical irritant.
Self-care for adults follows similar principles to adolescent management, emphasizing activity modification, stretching, and ice. However, the recovery expectation differs significantly. Adult symptoms may persist indefinitely without intervention, and surgical removal of the ossicle becomes a more relevant consideration when conservative measures fail. The American Academy of Orthopaedic Surgeons notes that surgical outcomes for adult Osgood-Schlatter are generally excellent, with high rates of return to full activity.
| Adult vs. Adolescent | Adolescent OSD | Adult OSD |
|---|---|---|
| Growth Plate Status | Open, actively growing | Closed, skeletally mature |
| Resolution Potential | Resolves with physeal closure | May persist without intervention |
| Primary Mechanism | Traction apophysitis | Residual ossicle, tendinopathy |
| Conservative Treatment | Highly effective | Moderately effective |
| Surgical Consideration | Rarely indicated | Considered after 6 months failed conservative care |
| Self-Care Timeframe | 12-24 months to resolution | Ongoing management |
Key Takeaway: Adult Osgood-Schlatter symptoms will not resolve on their own because the growth plate has already fused, making persistent symptoms a different clinical scenario that may require orthopedic evaluation.
osgood schlatter growth spurt connection
The osgood schlatter growth spurt connection exists because rapid bone lengthening during puberty creates a temporary mismatch between bone growth and muscle flexibility, increasing traction force on the tibial tubercle apophysis. According to the American Academy of Pediatrics, Osgood-Schlatter occurs most commonly during periods of peak height velocity, typically ages 12 to 14 in males and 10 to 12 in females. The timing of symptom onset correlates directly with growth velocity curves.
During a growth spurt, long bones lengthen faster than muscles can adapt. The femur grows rapidly while the quadriceps and hamstrings remain relatively short, creating significant tension in the muscle-tendon unit. This tension concentrates at the weakest point, which during skeletal immaturity is the apophysis, the growth plate attachment site for the patellar tendon on the tibial tubercle. Each quadriceps contraction pulls on this vulnerable area.
The growth spurt connection explains why Osgood-Schlatter symptoms often fluctuate. Pain may increase during periods of rapid growth and decrease when growth velocity slows. An adolescent who experiences a significant flare during a 3-inch growth spurt may see improvement over subsequent months as muscle flexibility catches up to the longer bones. The Journal of Bone and Joint Surgery identifies this growth velocity pattern as the primary reason for the condition’s self-limiting nature.
- Peak height velocity: males 12-14 years, females 10-12 years
- Symptoms often begin 6-12 months after rapid growth acceleration
- Muscle lengthening lags behind bone growth by 3-6 months
- Growth spurts of 3+ inches in a year carry highest symptom risk
- Multiple sport participation during peak growth increases symptom likelihood
Quick Tip: Tracking your adolescent’s height monthly can help anticipate symptom flares. A rapid height increase often precedes an Osgood-Schlatter pain flare by 4 to 8 weeks.
osgood schlatter stress and mental health
Osgood-Schlatter stress and mental health are connected through the forced reduction in sports participation, which research in the Journal of Applied Sport Psychology identifies as a significant stressor for adolescent athletes whose identity and social connections center on athletics. The American Psychological Association recognizes that temporary activity restriction, combined with chronic pain, activates stress responses that can worsen pain perception and reduce coping capacity. Addressing the psychological dimension is as important as managing the physical symptoms.
Adolescent athletes often experience frustration, anxiety about losing their starting position, fear of falling behind peers, and grief over missing competitions. These emotional responses are normal and should be acknowledged rather than dismissed. A 2023 study in the Journal of Applied Sport Psychology found that athletes who maintained modified participation and received social support showed significantly better psychological outcomes than those forced into complete withdrawal from team environments.
Practical self-care strategies include maintaining team involvement in non-playing roles, setting realistic short-term goals focused on rehabilitation milestones rather than missed games, and developing non-sport interests that provide alternative sources of competence and enjoyment. Sports psychology literature supports reframing the injury period as an opportunity to strengthen other skills, including mental preparation, tactical understanding, and upper body conditioning.
| Psychological Strategy | Implementation | Expected Benefit |
|---|---|---|
| Team Involvement | Attend practices, track statistics, support teammates | Maintains identity, social connection |
| Goal Reframing | Set rehabilitation milestones as achievements | Creates sense of progress, competence |
| Skill Development | Focus on tactical study, upper body training | Maintains athletic identity, preparation |
| Mindfulness Practice | 5-10 minutes daily of breath-focused attention | Reduces pain catastrophizing, anxiety |
| Social Support | Regular contact with teammates and friends | Buffers stress, prevents isolation |
Key Takeaway: Supporting the emotional needs of an adolescent with Osgood-Schlatter is not optional. Maintaining social connection and providing meaningful alternative activities directly improves both psychological wellbeing and pain outcomes.
Frequently Asked Questions About Osgood-Schlatter Self-Care
What is the fastest way to relieve Osgood-Schlatter pain?
The fastest way to relieve Osgood-Schlatter pain is ice application for 15 to 20 minutes directly over the tibial tubercle combined with immediate activity modification to remove jumping and sprinting movements.
A properly positioned infrapatellar strap worn during activity provides additional mechanical pain relief by redistributing traction force away from the growth plate.
Can my child still play sports with Osgood-Schlatter disease?
Your child can typically continue modified sports participation with Osgood-Schlatter disease as long as pain remains below a 4 out of 10 during and after activity.
High-impact jumping sports may require temporary substitution with lower-impact alternatives during acute flares, with a graduated return to full participation as symptoms improve.
How long does Osgood-Schlatter disease last?
Osgood-Schlatter disease typically lasts 12 to 24 months in adolescents, resolving when the tibial tubercle growth plate fuses and skeletal maturity is reached.
Most adolescents experience meaningful pain reduction within 4 to 6 weeks of consistent self-care, though periodic flares during subsequent growth spurts are common.
Is heat or ice better for Osgood-Schlatter pain?
Ice is better for Osgood-Schlatter pain affecting the tibial tubercle, as it reduces inflammation and pain signaling at the affected growth plate.
Heat has a different role, warming the quadriceps and hamstrings before stretching to improve muscle flexibility and reduce traction stress on the tendon attachment.
What exercises make Osgood-Schlatter worse?
Deep squats, jumping exercises, plyometrics, hill running, and any movement that causes pain at the tibial tubercle during or after activity make Osgood-Schlatter worse.
These exercises create excessive traction force through the patellar tendon onto the vulnerable growth plate and should be modified during symptomatic periods.
Can adults get Osgood-Schlatter disease?
Adults can experience persistent Osgood-Schlatter symptoms from a residual ossicle that remains after adolescent growth plate closure, though new-onset adult cases without prior adolescent symptoms are rare.
Adult symptoms are managed differently from adolescent cases because they will not resolve with skeletal maturity and may require surgical intervention if conservative measures fail.
================================================================
Closing
Osgood-Schlatter self-care works when you commit to the daily sequence: assess pain, modify activity to stay below a 4 out of 10, stretch the quadriceps and hamstrings, apply ice after activity, and protect the skin under any supportive devices. Consistency beats intensity. Your adolescent will see meaningful improvement within 4 to 6 weeks.
Start tonight with ice application and a gentle quadriceps stretch. Tomorrow morning, apply a dimethicone barrier film under the knee strap if one is worn during sports. Talk with your adolescent about what staying involved with the team looks like during this recovery period.
This condition resolves. The growth plate will fuse, the pain will fade, and the athlete will return to full activity. Your job is to make the next 12 to 24 months as comfortable, active, and psychologically healthy as possible while that natural healing process runs its course.